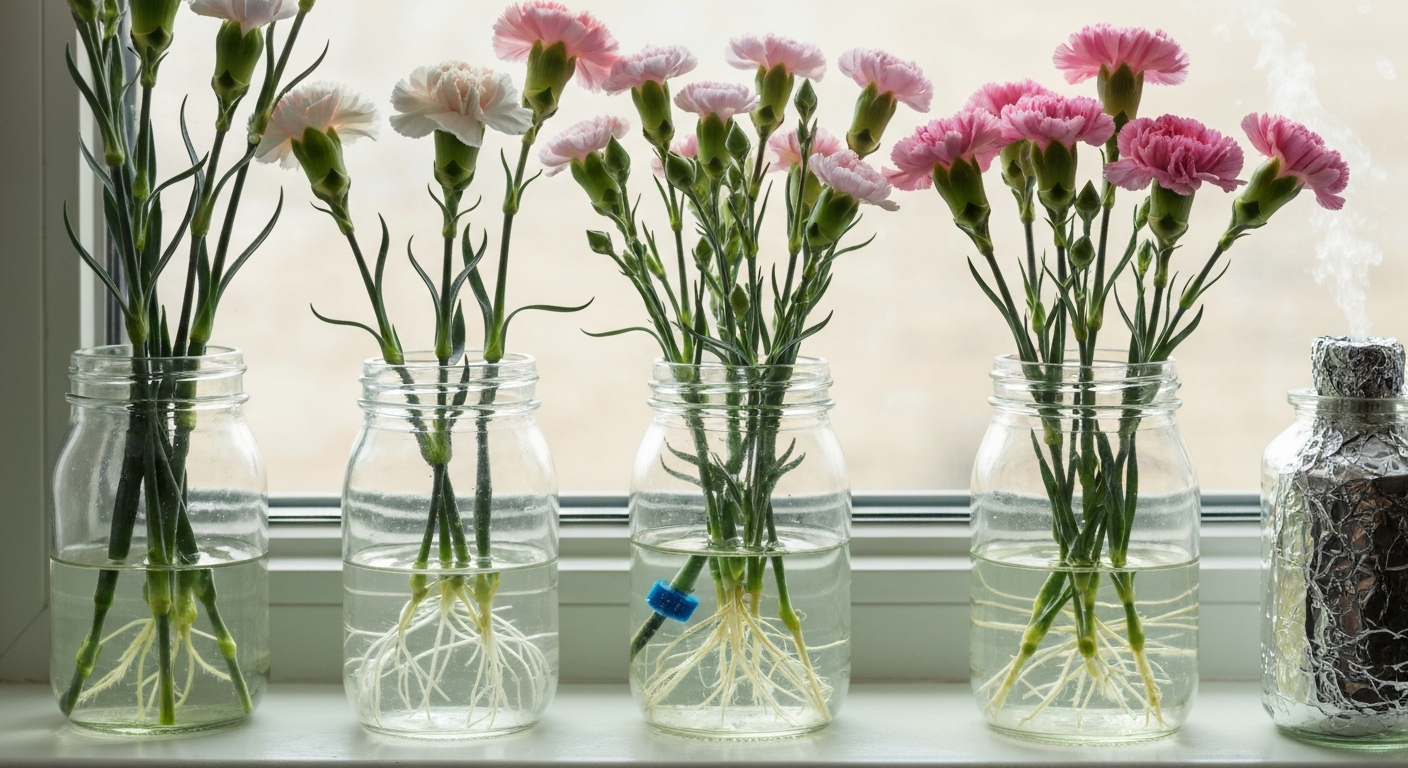
Growing long-stem carnations (Dianthus caryophyllus) at home is absolutely doable, and when you get it right, you end up with 40 to 80 cm stems topped by full, fragrant blooms that look like they came straight from a florist's bucket. The key is choosing genuine florist-type (standard) cultivars, starting seeds indoors 8 to 12 weeks before your last frost, giving plants cool nights and plenty of light, pinching young plants early, and harvesting at exactly the right stage. This guide walks you through every step of that process from seed packet to vase.
How to Grow Long Stem Carnations: Complete Beginner Guide
Marcus Holloway
21 Jul 2026
What this guide covers and who it's for
This is a practical, start-to-finish guide for home gardeners and beginners who want to grow long-stem carnations for a cutting garden or for home arrangements. You do not need a greenhouse or a commercial setup. You do need the right variety, decent timing, and a few techniques that make the difference between a short bedding plant and a true long-stemmed cut flower. By the end of this guide you will know how to choose the right type of carnation, prepare your beds or containers, sow seed or root cuttings, feed and train plants for maximum stem length, and harvest blooms that hold up in the vase. If you are also curious about growing other Dianthus types or companion cut flowers, the related guides on mini carnations and growing carnations outdoors sit alongside this one as natural next reads.
Quick planning checklist and season timeline
Before you buy a single seed packet, run through this checklist so your season does not stall mid-way. Long-stem carnations need a longer runway than most annuals, so planning early matters more here than with, say, marigolds or cosmos.
- Confirm you have a florist/standard cultivar, not a dwarf or mini type
- Order seeds or rooted cuttings at least 10 to 12 weeks before your intended transplant date
- Prepare a sowing space with bottom heat capability (a heat mat under a tray works fine)
- Identify your last frost date and first fall frost date for your area
- Check that your outdoor bed or containers get at least 6 hours of direct sun per day
- Source a free-draining, pH 6.5–7.5 growing medium before transplant time
- Have stakes or support netting ready before plants reach 30 cm
The table below shows when to start seeds, transplant, and expect first blooms by climate zone. These windows assume standard long-stem cultivars grown for summer or fall cutting.
| Climate | Start seeds indoors | Transplant outdoors | First blooms expected |
|---|---|---|---|
| Cool (zones 3–5, last frost May–June) | Late February to mid-March | After last frost: late May to mid-June | Late July to September |
| Temperate (zones 6–7, last frost April–early May) | Late January to mid-February | After last frost: late April to mid-May | Late June to August |
| Warm (zones 8–10, mild winters) | October to December (for winter/spring bloom) | November to January | March to May; second flush possible |
Warm-climate gardeners have a real advantage here. In zones 8 to 10, carnations can be treated almost like cool-season crops: fall-transplanted plants overwinter in an unheated tunnel or a frost-cloth-covered bed and come into bloom by spring. Utah State University Extension trials showed that fall-transplanted miniature carnations in unheated high tunnels reached around 90 cm in height with strong stem yields, outperforming spring plantings on both length and productivity. The same principle applies to standard long-stem types.
Choosing the right type: long-stem vs mini and spray carnations
Not all carnations grow tall. This is probably the single most common reason home gardeners end up disappointed: they buy seeds labeled simply 'carnation' and get compact bedding or patio plants with stems under 30 cm. For cutting, you want standard or florist carnations, which are genetically distinct from dwarf, mini, and spray types. Standard carnations produce one large bloom per stem (5 to 7 cm head), and the stem itself is the whole point because it commonly reaches 40 to 80 cm or longer under good conditions. Spray carnations produce multiple smaller blooms per stem on branching side shoots, which gives a different vase effect. Mini carnations are bred for container or bedding use and will almost never give you the stem length you want for cutting.
| Type | Stem length | Bloom per stem | Best use | Grows long stems? |
|---|---|---|---|---|
| Standard / florist carnation | 40–80+ cm | Single large bloom (5–7 cm) | Cut flower, arrangements | Yes |
| Spray carnation | 30–60 cm | Multiple smaller blooms per stem | Cut flower, mixed bouquets | Moderate |
| Mini / dwarf carnation | 15–30 cm | Small single or double blooms | Pots, bedding, borders | No |
If your goal is vase-worthy long stems, standard carnations are your target. For a comparison of mini types and how to grow them differently, the mini carnations guide covers that ground. The approach in this article is focused entirely on standard long-stem production.
How to read variety labels and what to look for when buying
When you pick up a seed packet or browse a breeder catalog, a few numbers tell you almost everything about whether a variety will give you long, strong stems. Here is what to look for and what the figures actually mean.
- Stem length range: Look for 40 cm minimum, ideally 60–80 cm. Breeder catalogs (such as Danziger's SENTI series) list this explicitly. If a packet only says 'tall' with no measurement, ask or skip it.
- Head size: Standard florist types list 5–7 cm head diameters. Smaller heads often indicate a spray or mini type.
- Days to flower / crop cycle: Commercial catalogs list cycle days from transplant to first cut. Longer cycles (often 120–180 days) usually correlate with better stem length and quality.
- Use designation: Labels or catalog listings that say 'cut flower,' 'standard,' or 'florist type' confirm you have the right genetic type. 'Bedding,' 'patio,' or 'border' on the label is a red flag for short stems.
- Photoperiod note: Some premium catalogs note that the variety responds to long days for stem extension. This is a sign of a true florist-grade standard carnation.
- Variety name: Named cultivars from cut-flower breeders like Danziger, Hilverda Kooij, or Whetman are bred specifically for stem length. Open-pollinated seed varieties like Marie Chabaud (a classic heirloom) are also documented for long-stem performance in home gardens.
Peer-reviewed variety trials have recorded mean stem lengths ranging from about 50 cm up to over 90 cm depending purely on cultivar and growing conditions. Choosing the right variety from the start is worth more than any fertilizer trick applied later to the wrong plant.
Preparing your outdoor bed
Long-stem carnations are not forgiving of waterlogged roots. The single biggest outdoor failure I see is planting into heavy clay that holds moisture through wet spells. Before you do anything else, dig your bed and watch what happens to a bucket of water poured into the planting hole: if it drains within 30 to 60 minutes, you are fine. If it is still sitting there two hours later, you need to either raise the bed or work serious drainage material into the soil.
Drainage and raised beds
A raised bed of 20 to 30 cm provides instant drainage improvement and warms faster in spring, which is a real advantage for cool-climate gardeners. If you are planting directly into ground soil, work a 10 to 15 cm layer of grit, coarse sand, or perlite into the top 30 cm of your bed. This is not optional for heavy soils: root rot from standing water will kill carnations faster than almost any pest.
pH and soil amendments
Carnations prefer a pH of 6.5 to 7.5 (slightly acidic to slightly alkaline). Below pH 5.0, nutrient uptake collapses and plants stall. Above pH 8.0, iron and manganese lock up. Get a basic soil test before planting. If your pH is low, work in ground limestone at the rate your test recommends. If it is already above 7.5, you generally do not need to do anything unless you are over 8.0, in which case adding sulfur and increasing organic matter helps. Alongside pH correction, work in 5 to 8 cm of well-rotted compost or aged manure to boost organic matter and improve both drainage in clay and moisture retention in sandy soils. Avoid high-nitrogen fresh manure: it promotes leafy, soft growth at the expense of strong stems.
Spacing in the bed
For standard long-stem carnations, space plants 20 to 25 cm apart in rows 30 to 40 cm apart. Commercial greenhouse production targets around 25 plants per square metre (roughly 20 x 20 cm), but in a home garden a slightly more generous 20 x 25 cm spacing improves airflow and reduces fungal disease risk. Production Technologies in Horticulture notes common protected/greenhouse carnation densities of about 25 plants per square metre (≈20×20 cm spacing) blank" rel="noopener noreferrer">Production Technologies in Horticulture (greenhouse/carnation density ~25 plants/m² recommendation). Good airflow between plants is not a luxury: it is your primary defense against Botrytis, which loves the dense humid microclimate of overcrowded carnation beds.
Growing long-stem carnations in containers
Containers work well for carnations as long as you do not compromise on pot size or drainage. Small pots dry out too fast in summer and do not give roots room to anchor the tall stems you are aiming for. Here is what works in practice.
- Pot size: Use a minimum 30 cm diameter pot for one to two standard carnation plants. A 40 cm pot is better. Anything smaller will restrict root development and limit stem length.
- Drainage holes: Non-negotiable. If a decorative pot has no holes, use it as an outer sleeve over a plain plastic pot with holes, or drill your own.
- Growing medium: Use a free-draining mix, not straight garden soil. A good blend is 60% quality peat-free compost, 30% perlite, and 10% coarse horticultural grit. This gives drainage, aeration, and enough organic matter to hold modest nutrients.
- Avoid saucers: If you use saucers under pots, empty them within an hour of watering. Sitting water in a saucer is a fast track to root rot.
- Top dressing: A 2 cm layer of fine grit on the soil surface reduces splash-back of soil onto lower leaves, which lowers Botrytis risk.
- Feeding containers: Potted carnations exhaust nutrients faster than in-ground plants. A balanced slow-release fertilizer at planting, supplemented with a liquid feed every two weeks at half strength during active growth, keeps them going without pushing soft, floppy stems.
When to sow or transplant
The standard approach for cool and temperate gardeners is to start seed indoors 8 to 12 weeks before your last expected frost date. For detailed regional timing and month-by-month schedules, see when to grow carnations. This means late January or early February for zone 6 gardeners, and late February to early March for zone 4 to 5 gardeners. Transplant outdoors once frost danger has passed and soil temperature is consistently above 10°C (50°F). Carnation seedlings are surprisingly frost-tolerant once hardened off (they handle light frosts down to around -3°C briefly), but a hard freeze after transplant will set them back by weeks.
For warm-climate growers in zones 8 to 10, reverse the calendar: sow in October to December and transplant in November to January. Plants establish through the mild winter and come into flower in spring when temperatures are still cool, which is exactly when standard carnations do their best work. High summer heat above 35°C slows flower development and reduces stem length in warm climates, so timing to catch the cool shoulder season is the key move.
If you are buying plug plants or rooted cuttings rather than growing from seed, your transplant window is the same, but you skip the 8 to 12 week indoor phase. Plugs planted directly into prepared beds or large containers can establish quickly if temperatures are suitable, and this is genuinely the faster route for a beginner wanting flowers in the same season.
How to grow long-stem carnations from seed
Starting from seed is rewarding and inexpensive, and it is the route most home gardeners take for standard varieties like Marie Chabaud. The process is straightforward but has a few details that make a real difference to germination rates and seedling quality.
Step-by-step seed starting
- Fill a seed tray or small modules with a fine, sterile seed-starting mix. Peat-lite mixes or a peat-and-vermiculite blend work well. Avoid heavy garden compost at this stage because it holds too much moisture and increases damping-off risk.
- Moisten the mix before sowing so the surface is damp but not soggy. Press the surface lightly to firm it.
- Sow seeds on the surface or cover with only 1 to 2 mm of fine vermiculite. Carnation seeds need light to germinate reliably, so deep burial is the most common seed-starting mistake. One to two seeds per module cell is ideal.
- Cover the tray with a clear propagator lid or stretch film and place on a heat mat set to 18 to 22°C (64 to 72°F). This temperature range gives the fastest, most even germination. Expect seedlings to emerge in 7 to 14 days; 21 days is normal if conditions are slightly cooler.
- Once seedlings emerge, remove the cover and move the tray to the brightest windowsill you have, or place under grow lights 5 to 8 cm above the seedlings for 14 to 16 hours per day. This is important: inadequate light at this stage causes leggy, weak seedlings that never produce good stems.
- Lower the temperature slightly once seedlings are up, aiming for daytime temperatures around 15 to 18°C (60 to 65°F) and cooler nights (10 to 15°C / 50 to 59°F). Cool nights toughen seedlings and produce compact, strong growth rather than soft, stretched stems.
- Water from below when possible by sitting the tray in a shallow dish of water for 20 minutes then draining. This avoids wetting the foliage, which reduces damping-off.
- Thin to one seedling per cell once the first true leaves appear. Use scissors to snip the weaker seedling at soil level rather than pulling, which disturbs roots.
- Feed seedlings with a half-strength balanced liquid fertilizer once per week starting from the second pair of true leaves.
- When seedlings reach 8 to 10 cm and have at least 4 to 5 pairs of leaves, begin hardening off: move trays outdoors to a sheltered spot for 1 to 2 hours per day, gradually increasing over 10 to 14 days before full outdoor exposure.
- Transplant into prepared beds or containers at the correct spacing (20 to 25 cm) after hardening off and once frost risk has passed.
Germination troubleshooting
If seeds fail to germinate after 21 days, the most likely culprits are seeds buried too deep, temperatures below 15°C, or seed that has been stored too long (carnation seed viability drops significantly after two years). Leggy seedlings stretching toward the light are a sign of insufficient light intensity or photoperiod, not a watering problem. Adding a cheap grow light on a timer fixed 14 hours per day solves this almost every time.
Rooting carnations from stem cuttings
You can absolutely grow new carnation plants from stem cuttings, and for premium named cultivars that do not come true from seed, cuttings are actually the preferred propagation method. Commercial perpetual-flowering and standard cultivars are almost always propagated this way. For step-by-step rooting methods and troubleshooting, see can you grow carnation from stem which covers timing, media, and care for successful cuttings.
- Select healthy, non-flowering shoot tips 5 to 10 cm long with 3 to 5 pairs of leaves. Take cuttings in the morning when stems are turgid.
- Remove the lower two pairs of leaves cleanly with a sharp knife. Nip off any flower buds if present.
- Dip the cut end lightly in rooting hormone powder or gel. Research on carnation cuttings shows IBA (indole-3-butyric acid) or NAA (naphthaleneacetic acid) in the 500 to 2,000 ppm range improves rooting speed and root number. Ready-made rooting gels sold at garden centers are suitable for home use.
- Insert cuttings into a rooting medium of 1: 1 perlite and vermiculite, or a peat-perlite mix. These low-fertility, highly aerated mixes produce better root systems than standard compost.
- Water in, then cover with a clear plastic bag or propagator lid to maintain humidity. Do not seal airtight: leave a small gap for air exchange.
- Place in bright indirect light with gentle bottom heat (around 20 to 22°C). Avoid direct sun, which wilts unrooted cuttings rapidly.
- Roots typically form in 2 to 4 weeks. Test gently by tugging: resistance means roots have formed.
- Once rooted, gradually acclimatize to open air over one week before potting on into a standard growing mix or transplanting to beds.
A note on rooting in water: it is technically possible to root carnation cuttings in a jar of water, and many gardeners try it. It works occasionally, but the roots that form in water are structurally different from those formed in aerated media, and plants rooted in water often struggle when transplanted to soil. For cuttings you actually want to keep and grow on, rooting in perlite or peat-perlite is worth the small extra effort. Controlled‑trial data on auxins report species‑sensitive responses, one published trial (blank" rel="noopener noreferrer">Influence of Auxins on Rooting Efficacy in Carnation (Dianthus caryophyllus L.) Cuttings | Journal of Horticultural Sciences (trial reporting NAA 500 ppm effective)) found NAA at 500 ppm produced the earliest rooting (≈18.7 days) and the highest rooting percentage in that experiment. For a deeper look at the water-rooting question, the guide on growing carnations in water covers that method specifically.
Planting, pinching, and staking for long stems
Getting the plant in the ground is not the end of the work: how you manage plants in the first four to six weeks after transplant determines whether you end up with a single long cutting stem or a short, bushy plant covered in small flowers. The critical technique is pinching.
Pinching
When your transplanted seedling reaches 15 to 20 cm and has developed 6 to 8 pairs of leaves, pinch out the growing tip just above a leaf node using your fingers or clean scissors. This redirects energy into lateral shoots, each of which can become a long cutting stem. For maximum stem length on standard carnations, many growers do a second pinch: once lateral shoots from the first pinch reach 10 to 15 cm, pinch the strongest ones again. This takes patience because it delays your first bloom by several weeks, but the stems you eventually cut will be substantially longer and stronger.
Staking
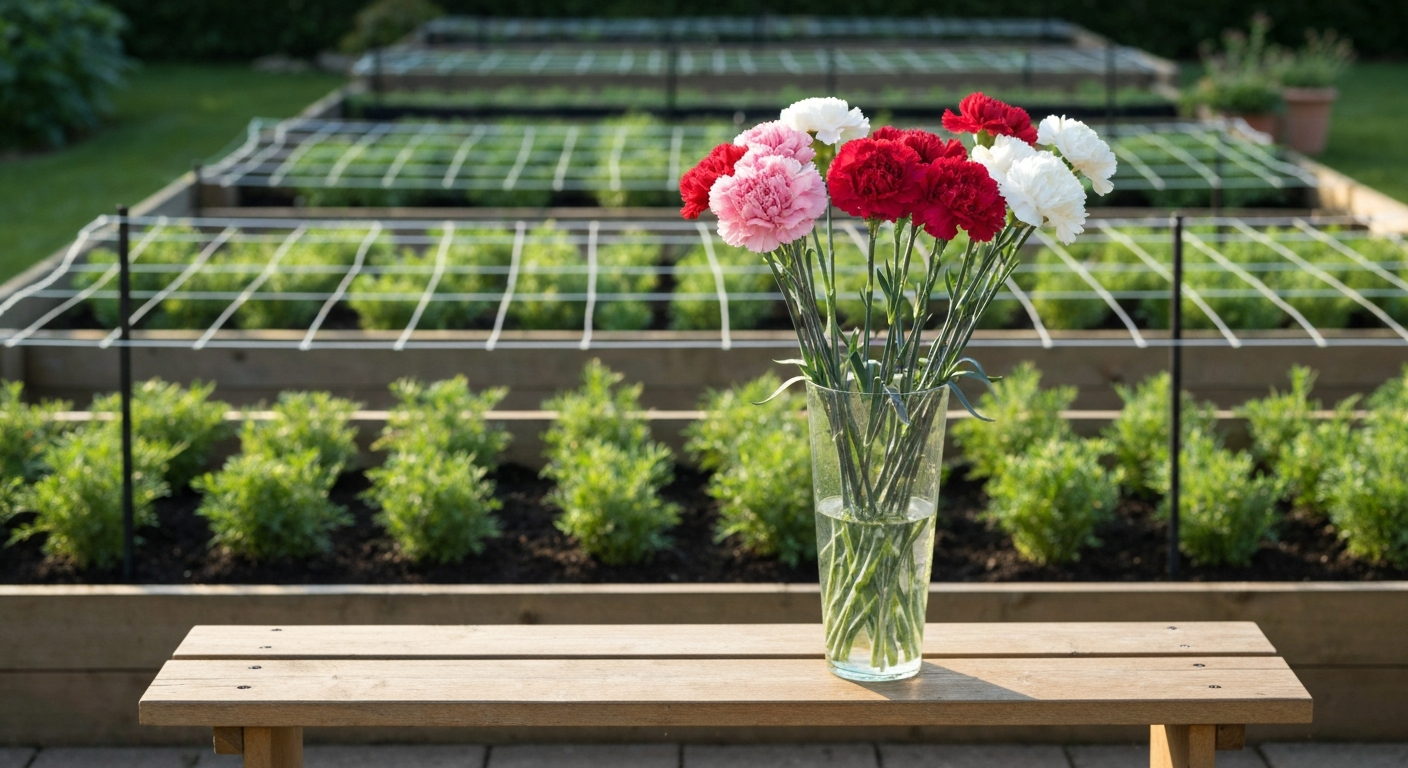
Long-stem carnations are top-heavy by design, and outdoor plants in particular will fall over without support. The most effective method is horizontal support netting (similar to what tomato or sweet pea growers use): stretch a layer of wide-mesh netting or wire grid horizontally 20 to 25 cm above the soil and let stems grow through it. As plants grow, add a second layer at 40 to 50 cm. Alternatively, install bamboo canes at each plant and loosely tie stems every 15 cm as they grow. The goal is to keep stems vertical, which also helps maximize the stem-length genetics of your variety.
Light, temperature, and watering
Standard carnations are long-day plants, meaning they initiate flowering and extend stem length when days are longer than about 13 hours. This is why late spring and early summer sowings tend to produce the longest stems: plants experience lengthening days as they develop. If you are growing under artificial lights or in a greenhouse, providing 14 to 16 hours of light per day will replicate this effect and push stem elongation. Outdoors in a good northern-hemisphere summer, natural day length handles this automatically from May through July.
Temperature is equally important. Carnations genuinely prefer cool conditions: daytime temperatures of 15 to 21°C (60 to 70°F) and night temperatures of 10 to 15°C (50 to 60°F) are the sweet spot for stem elongation and flower quality. Sustained heat above 30°C causes flower quality to drop and stems to shorten. This is why carnations are such a natural cool-climate or shoulder-season crop.
Water consistently but avoid waterlogging. In ground beds, water deeply once or twice a week rather than lightly every day, allowing the top 2 to 3 cm of soil to dry slightly between waterings. In containers, check moisture more frequently, especially in warm weather. Drip irrigation at the base of plants is ideal because it keeps foliage dry. Overhead watering late in the day is a direct invitation to Botrytis.
Feeding your carnations
Carnations are moderate feeders. The goal is steady, balanced nutrition that supports strong stems without pushing soft, lush leafy growth that is prone to disease and flopping. A balanced NPK fertilizer (such as 10-10-10 or a flower-specific blend) applied at planting and then every four weeks through the growing season works well for ground beds. For containers, a liquid feed every 10 to 14 days at half the recommended dose is more reliable than slow-release granules alone, because containers flush nutrients faster.
For growers interested in hydroponics or soilless production (which is commercially common for carnations), peer-reviewed trials recommend a nutrient solution EC of 1.5 to 2.5 dS/m and pH around 5.5 to 6.5, with a target closer to EC 1.8 to 2.0 and pH 6.0 during active production. These figures are reference points for anyone setting up a simple recirculating or drip system, though for most home gardeners a good quality liquid fertilizer diluted to label rate in well-draining compost will do the job without the complexity of EC meters.
Common pests and diseases to watch for
Carnations are not especially pest-prone outdoors, but a handful of issues come up regularly and are worth knowing before they become a problem.
| Problem | Symptoms | Prevention / Treatment |
|---|---|---|
| Botrytis (grey mould) | Grey fuzzy patches on stems, petals, and leaves; most common in humid, cool, overcrowded conditions | Improve airflow (correct spacing), avoid overhead watering, remove dead foliage promptly, apply copper-based fungicide if severe |
| Fusarium wilt | Yellowing and wilting of stems from the base up; brown vascular tissue inside stem | Use sterile growing media, rotate beds, avoid overwatering; no chemical cure once established, remove and destroy affected plants |
| Aphids | Clusters of small soft insects on shoot tips and buds; distorted new growth | Blast off with water, encourage beneficial insects, use insecticidal soap spray for heavy infestations |
| Thrips | Silver streaking on petals and leaves; tiny elongated insects visible on blooms | Blue sticky traps, remove heavily infested material, spinosad spray if needed |
| Damping-off (seedlings) | Seedlings collapse at soil level; common in cold, wet, poorly ventilated indoor conditions | Use sterile seed mix, avoid overwatering, improve air circulation around trays, use bottom watering |
| Rust | Orange or brown pustules on leaves and stems | Remove affected leaves promptly, avoid wetting foliage, apply fungicide labelled for rust if widespread |
Most disease problems in carnations trace back to moisture on foliage combined with poor airflow. Getting the spacing right and watering at the base of plants rather than overhead prevents the majority of disease issues before they start. I would rather spend five minutes adjusting a drip line than an afternoon dealing with Botrytis that has taken hold of half a bed.
When and how to harvest for the best vase life
Harvesting at the right stage is the difference between a carnation that lasts two weeks in the vase and one that opens and drops petals within days. This is where all your earlier work either pays off or gets wasted by cutting too early or too late.
The right stage to cut
Cut standard carnations when the bud is just beginning to open, with petals starting to unfurl but the bloom not yet fully open. At this stage the flower is showing colour but the head has not expanded to its full diameter. If you cut earlier (tight bud) the flower often fails to open properly in the vase. If you cut later (fully open) vase life is significantly shortened. Early morning is the best time to cut: stems are fully hydrated after the cool night.
Cutting technique
- Use clean, sharp scissors or a floral knife. Dirty or blunt tools crush the vascular tissue and reduce water uptake.
- Cut the stem at a 45-degree angle, as long as possible, just above a leaf node. The 45-degree cut increases the surface area for water absorption.
- Immediately plunge the cut stem into a bucket of clean, cool water. Do not leave stems out of water for more than a minute or two.
- Remove any leaves that would sit below the water line in your final vase arrangement.
- Let stems condition in cool water in a shaded spot for several hours before arranging. This rehydration step substantially extends vase life.
- Change vase water every two days and re-cut the stem base by 1 to 2 cm each time.
Well-grown long-stem carnations cut at the right stage and conditioned properly will last 10 to 21 days in the vase, which is one of the best vase-life figures of any cut flower. That performance is the reward for getting the variety choice, growing conditions, and harvest timing right from the start.
What to grow alongside your carnations
Long-stem carnations are outstanding in mixed cutting-garden arrangements. Their strong, straight stems pair well with alstroemerias, which have a similarly long vase life and complement the bold, round carnation head with clusters of smaller, lily-like blooms. For a bulbous contrast in your cutting garden, see the guide on how to grow Amaryllis 'Ferrari' for timing and culture that complement carnation seasons. If you want to extend your cutting garden beyond carnations, the guides on how to grow alstroemerias and how to grow amaryllis Ferrari cover two more long-lasting cut flowers worth adding to the same bed or tunnel. For anyone who wants the full picture on carnation growing beyond long-stem types, the general guide on how to grow carnations and the guide on growing carnations outdoors both build naturally on what you have learned here.
FAQ
Which carnation types and specific varieties should I choose when my goal is long, strong cutting stems?
Choose florist/standard (also called 'standard' or 'cut') Dianthus caryophyllus cultivars rather than dwarf/potted or mini types. Standard cultivars are bred for single large blooms and long stems (commonly 40–80+ cm). Use breeder catalogs and trial data to pick reliable long-stem lines (examples: many commercial Danziger/SENTI™ lines list stem lengths 40–80 cm; peer cultivar trials show mean stem-length differences among varieties). Sources: RHS plant page on Dianthus caryophyllus; Danziger/SENTI™ cultivar catalog; published varietal trials.
When should I sow seed or transplant carnations in my region (general calendars and climate notes)?
General home‑gardener rules: start seed indoors 8–12 weeks before your last expected frost for spring production; in mild/warm-winter regions you can sow for fall or winter greenhouse production. In cooler climates consider fall or high‑tunnel transplanting for overwintering (some extension trials show fall transplants produce longer stems). Maintain cool seedling night temps (~50–64°F / 10–18°C) to avoid leggy growth. Sources: flower‑farmer production calendars; Utah State Univ. Extension mini‑carnation trials; propagation guides.
How do I grow long-stem carnations from seed (step-by-step, timing, media, temperatures)?
Sow on the surface or cover very lightly (1–3 mm) because seeds are light‑sensitive. Use a fine, sterile seed mix (peat/vermiculite or peat:perlite). Maintain seed‑zone temperature ~64–72°F (18–22°C) for fastest emergence; expect 7–21 days. After cotyledons open, provide bright light, moderate temps (~55–65°F / 13–18°C nights), and a dilute feed when true leaves form. Harden seedlings 7–10 days before transplanting. Sources: species cultivation notes and seed supplier guidance; propagation literature.
Can you grow carnations from stem cuttings? How do I root them successfully?
Yes—terminal/softwood cuttings are the common commercial propagation method for standard cultivars. Take 5–10 cm tip cuttings with 3–5 leaf pairs, remove lower leaves and any flowers/buds. Use a well‑aerated sterile rooting medium (vermiculite, perlite, sand or peat:perlite 1:1), keep high humidity (mist/propagation dome), and use bottom heat (~20–25°C) for faster rooting. Consider a quick auxin treatment: short dip or talc of IBA or NAA in the roughly 500–2,000 ppm range (trial responses vary by cultivar; NAA 500 ppm was effective in at least one trial). Rooting generally in 2–4 weeks. Sources: propagation manuals, peer trials on auxin responses, horticultural handbooks.
Can I root carnation cuttings in water or grow them hydroponically?
Water‑only rooting is possible but not recommended for production because roots formed in water often adapt poorly to soil. For best survival, root in a porous medium then harden off. Carnations can be grown hydroponically/soilless with good results: maintain nutrient solution pH ~5.5–6.5 (≈6.0 ideal) and EC roughly 1.5–2.5 dS·m⁻¹ (1.8–2.0 commonly used by trials). Monitor and adjust EC/pH in recirculating systems. Sources: Hartmann & Kester on propagation; hydroponic greenhouse studies and BMC trial reporting EC/pH ranges.
How should I prepare the site and soil for outdoor beds or containers to maximize stem length?
Choose full sun (or bright greenhouse/long-day light) and very well‑drained soil or soilless mix. Ideal substrate pH is near neutral to slightly alkaline (~6.5–7.5). For outdoor beds, improve drainage with organic matter and sharp sand/ grit in heavy soils; bed should be friable and not waterlogged. For containers use a high‑porosity potting mix (peat or coir with perlite/vermiculite) and a 1:1:1 base for aeration. Prepare beds so plants are well‑drained and roots have space; adjust fertility modestly—carnations prefer moderate fertility and aeration. Sources: ScienceDirect species notes; floriculture production guides.
Next Article
How to Grow Carnations in Water: Guide for Beginners & Gardeners
Learn step-by-step how to grow carnations in water: supplies, rooting, care, timing, troubleshooting, and transfers.