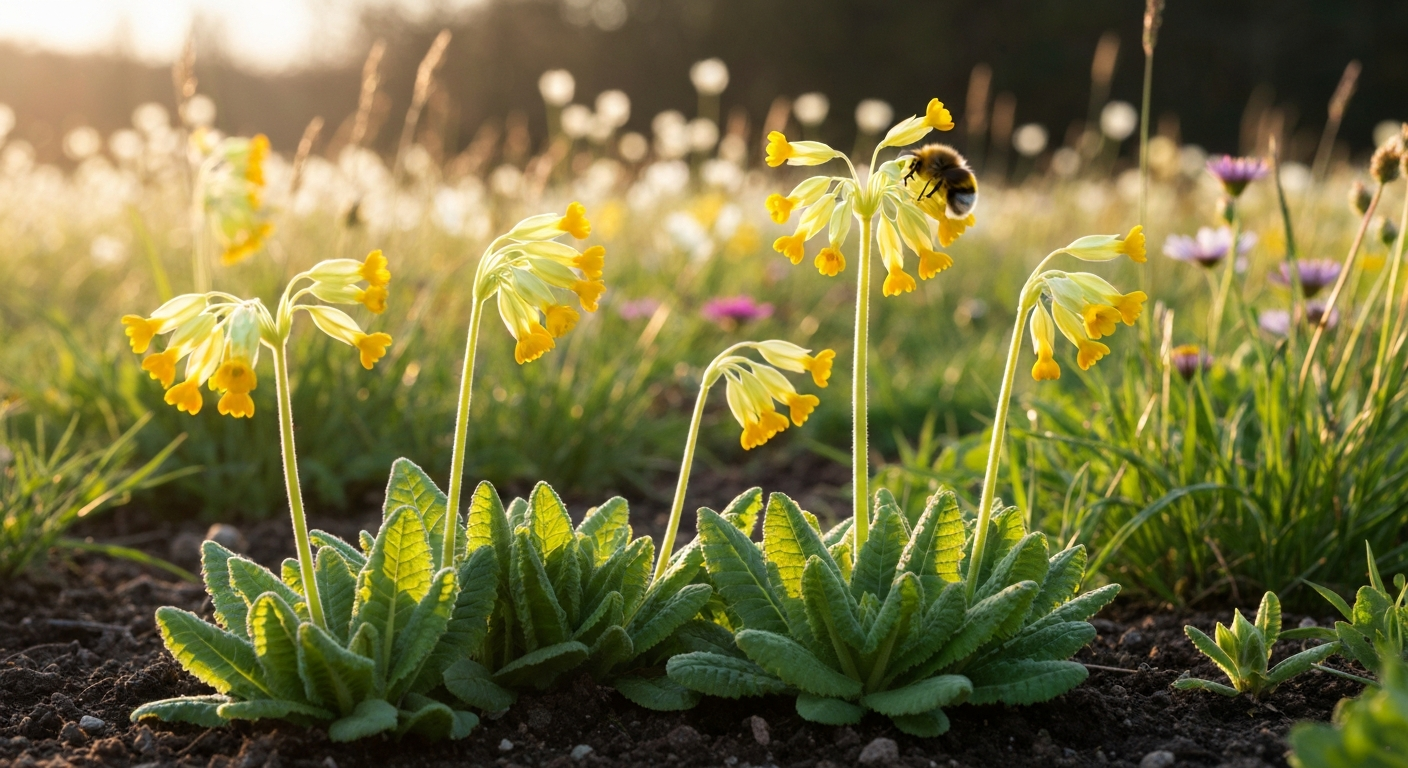
Cowslips (Primula veris) are one of the most rewarding wildflowers you can grow from seed. Sow in autumn, let winter do the hard work of cold stratification naturally, and you will have cheerful yellow flower spikes nodding in the garden by May. They are clump-forming, semi-evergreen perennials that come back year after year, spread gently by seed, and ask for very little once they are established. This guide walks you through every step: choosing varieties, collecting and storing seeds, sowing outdoors in autumn or indoors in spring, nursing seedlings to planting size, and keeping plants healthy season to season.
How to Grow Cowslips from Seed: Step-by-Step Guide for Beginners
Marcus Holloway
9 Aug 2026
What cowslips are and why they are worth growing
Primula veris is a native European perennial that grows wild across meadows, hedgerows, and chalk grassland. In a garden it reaches about 20 to 25 cm tall, producing rosettes of crinkled, slightly downy leaves from which tall, slender flower stems rise each spring. The drooping, tubular flowers are carried in clusters, typically in shades of yellow with an orange eye, and they appear from April through to June depending on your local conditions. Because it is fully hardy across the UK and most of temperate Europe and North America, it needs no protection in winter and, once past the seedling stage, is genuinely trouble-free. Pollinators love it: bees in particular visit repeatedly in early spring when not much else is in bloom. This guide covers everything from seed to established clump, including variety selection, both autumn outdoor sowing and spring indoor sowing, propagation alternatives such as division and basal cuttings, and a plain-language troubleshooting section so you know what to do if things do not go to plan.
Seasonal calendar: when to sow, plant, and expect flowers
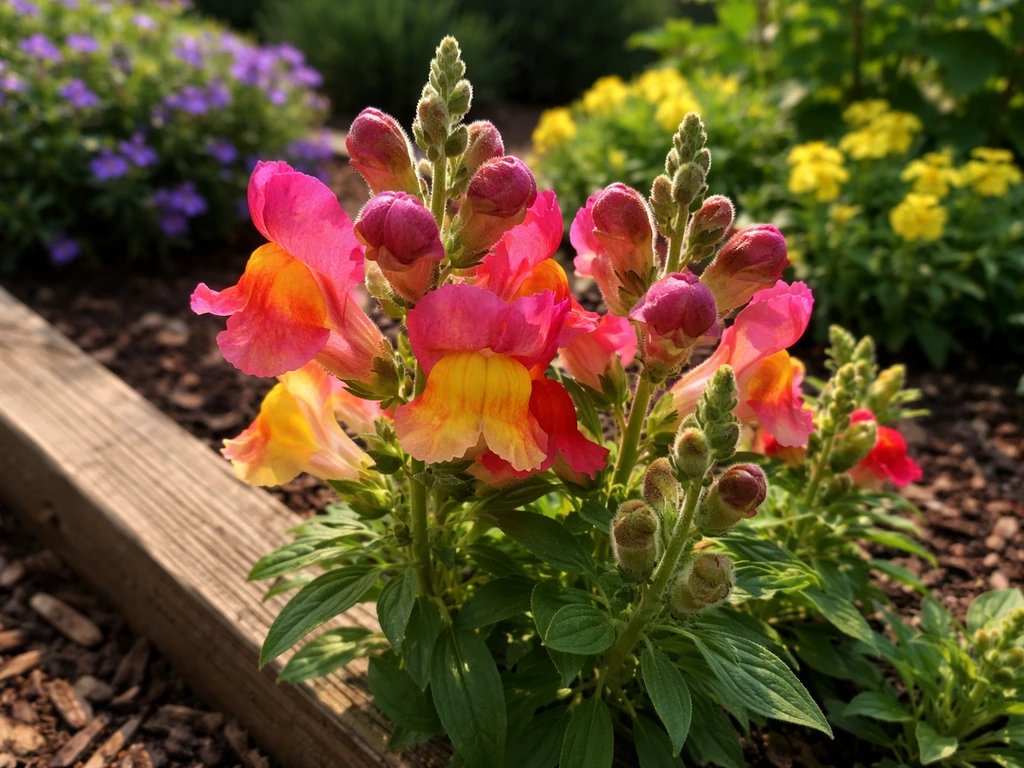
Timing is everything with cowslips. The plant's whole germination biology is built around a cold winter followed by warming spring temperatures, so your sowing calendar should mirror that natural cycle as closely as possible. For a quick comparison of sowing schedules for other spring-flowering plants, see when to grow snapdragons (internal reference).
| Month | Task | Notes |
|---|---|---|
| July – August | Collect seed from ripe capsules | Harvest when capsules are dry and papery; shed naturally mid to late summer |
| August – September | Clean and store harvested seed | Dry fully before sealing; refrigerate with desiccant if keeping beyond one season |
| September – October | Outdoor autumn sowing (preferred method) | Sow into prepared beds or seed trays left outside; cold winter provides natural stratification |
| October – February | Cold stratification period outdoors | No action needed; seeds chill naturally through winter frosts |
| November – January | Indoor cold stratification (spring-sow route) | Seal pre-moistened seeds in compost in a bag in the fridge for 4–6 weeks |
| February – April | Germination begins (spring) | Seedlings emerge once temperatures rise above ~10 °C; optimum around 16 °C |
| April – June | Prick out and pot on seedlings | Move to individual 7–9 cm pots once two true leaves appear |
| September – October | Plant out into final positions | Autumn planting lets roots establish before winter |
| April – June (year 2+) | First flowers | Most plants flower in their second spring; some vigorous seedlings may flower in year one |
The most important timing rule: fresh seed sown in autumn almost always outperforms spring-sown seed because the seeds experience real winter cold rather than an artificial substitute. If you collect or buy seed in summer, resist the urge to sow it immediately indoors in warmth. It will not germinate without that cold period, and you will waste months waiting for nothing to happen.
Choosing the right cowslip variety
The straight species, Primula veris, is the one you see in wildflower meadows: clear yellow flowers with a small orange eye, 20 to 25 cm tall, wonderfully robust and freely self-seeding once established. For most beginners this is the best starting point. It is the most freely available, the cheapest to buy as seed, and the most ecologically useful if you are growing for pollinators or naturalising into grass.
If you want more colour in a mixed border, named cultivars offer interesting variation. 'Sunset Shades' is probably the most widely stocked garden form: it produces nodding, red-edged flowers in orange-yellow tones, grows to the same 0.1 to 0.5 m range as the species, and performs well in full sun or partial shade across loam, clay, and chalk soils. The Barnhaven 'Coronation' group extends the palette further into deep oranges and reds. Both are clump-forming perennials treated in exactly the same way as the wild species for sowing and care.
| Variety | Flower colour | Height | Best use | Notes |
|---|---|---|---|---|
| Primula veris (species) | Clear yellow, orange eye | 20–25 cm | Meadow, naturalising, wildlife garden | Most vigorous, cheapest seed, best for beginners |
| 'Sunset Shades' | Orange-yellow, red-edged | 20–40 cm | Border, container, mixed planting | RHS recommended; suits loam, clay, chalk |
| Barnhaven 'Coronation' | Yellow, orange, red range | 20–25 cm | Border, cottage garden | Specialist nursery seed; beautiful colour mix |
A quick note on buying plants versus seed: plug plants and pot-grown cowslips are available from nurseries in spring and are a perfectly valid shortcut if you want flowers sooner. For guidance on growing another common spring bedding plant from seed or nursery stock, see our guide on how do you grow snapdragons. Division (splitting existing clumps) is another option covered later in this guide. But seed is the most economical route, especially if you want large numbers for a meadow or wildflower area, and the process is genuinely satisfying once you understand what the seed needs.
Everything you need to know about cowslip seeds
Buying seed
Buy from reputable wildflower seed suppliers or specialist primula nurseries rather than generic general-purpose packets. Look for a clear harvest or packed-for date on the packet. Freshness matters enormously with Primula veris: seeds start to lose viability over time, and while properly stored seed can remain viable for several years, fresh seed from the current or previous season gives the best germination rates. Many UK wildflower suppliers stock seed harvested in the same year and list it specifically for autumn sowing.
Collecting your own seed
If you already have cowslips growing, collecting your own seed is straightforward and free. A single flowering plant can produce around 19 seed capsules on average, each holding up to 28 seeds, so one good plant can yield several hundred seeds in a season. Watch the capsules from late June onward: they are ripe and ready to harvest when they have turned papery and pale brown, and the top of the capsule begins to open. Do not wait until you can see the seeds spilling out, or birds and wind will have beaten you to it. Cut the seed-bearing stems into a paper bag (never plastic, which traps moisture and causes mould) and finish drying them for a week or two in a warm, airy spot indoors.
Cleaning seeds
Once dry, thresh the capsules by rubbing them gently between your palms over a sheet of white paper. Cowslip seeds are small (roughly 1.7 x 1.4 mm) and dark brown to black, so they stand out clearly against white paper. Separate the seeds from the chaff by gently tipping the mixture through a fine kitchen sieve: the seeds pass through while most of the larger fragments of capsule stay behind. A gentle puff of breath or a fan set to low can blow away lighter chaff. Do not wash the seeds; wet cleaning risks triggering premature germination or mould.
Storing seeds short-term and long-term
For short-term storage (sowing the following autumn), keep cleaned, fully dry seeds in a small paper envelope inside an airtight container such as a glass jar with a tight lid. Add a sachet of silica gel desiccant and store in a cool, dark cupboard. For longer-term storage, the fridge is better: temperature around 4 to 5 °C, inside an airtight sealed container with desiccant, keeps orthodox seeds like cowslips viable for several years. For very long-term conservation, professional genebanks dry seeds to very low moisture levels and freeze them at -18 °C, but for home gardeners the fridge option is perfectly practical. The key rules are: always dry completely before sealing, use desiccant, exclude light, and keep temperature consistent. If you are working with seeds more than two or three years old, do a quick germination test on a small sample (10 seeds between damp kitchen paper in a sealed bag in the fridge, then moved to room temperature) before committing to a full sowing.
What cowslip seeds actually need to germinate
Understanding why cowslip seeds behave the way they do will save you a lot of frustration. Freshly dispersed Primula veris seeds are dormant when they leave the plant in summer: put them in warm compost and nothing will happen. They need two things to wake up: cold and light.
Cold stratification is the process of exposing seeds to sustained low temperatures (roughly 1 to 5 °C) while they are moist, which mimics the conditions of a natural winter. Research confirms this is the primary mechanism for breaking dormancy in P. veris. Outdoors, winter frost and cold rain do this for free. Indoors, you replicate it by pre-chilling seeds in moist compost or between damp paper in a sealed bag in the fridge for four to six weeks before moving them somewhere warmer to germinate.
Light is equally non-negotiable. Cowslip seeds are what botanists call light-requiring for germination: they need exposure to light to trigger the germination signal. This means you must never bury them. Surface sowing (pressing seeds onto the surface of moist compost with no covering, or the thinnest possible dusting of fine grit or vermiculite) is the correct technique. Covering with even a few millimetres of opaque compost blocks the light and dramatically reduces germination rates.
Once stratification is complete and light is available, the optimum germination temperature is around 16 °C. A cool windowsill or unheated greenhouse in late winter to early spring is ideal. Do not use a heated propagator at this stage: temperatures above 20 °C will actually suppress germination. Germination typically begins three to six weeks after the cold period ends, and the process is spread out rather than sudden, so do not give up on a tray if only a few seedlings have appeared by week three.
What you will need before you start sowing
- Cowslip seeds (fresh, dated packet or home-collected)
- Seed trays or modular plug trays (shallow trays are fine for surface sowing)
- Fine, free-draining seed compost (John Innes Seed Compost or a quality peat-free equivalent)
- Perlite or fine vermiculite to mix into compost for extra drainage (roughly 20–30% by volume)
- A fine sieve or riddle to remove lumps from compost before sowing
- A watering can with a very fine rose or a hand-held plant mister
- Clear plastic propagator lids or cut-down clear plastic bottles to cover trays
- Plant labels and a waterproof marker
- A dibber or pencil for gentle firming
- Fine horticultural grit or vermiculite for the thinnest possible top-dressing (optional but useful)
- For indoor spring sowing: small zip-lock bags, damp kitchen paper or damp seed compost, and fridge space for the stratification period
How to sow cowslip seeds indoors: surface sowing explained
Whether you are sowing indoors in late winter (after artificial cold stratification) or in a cold greenhouse in autumn, the surface-sowing technique is the same. The only difference is timing and where the tray sits during the stratification phase.
- Fill your seed tray or modules to within 1 cm of the rim with seed compost. Tap the tray gently on a hard surface to settle the compost, then firm it lightly with the bottom of another tray or a flat board. The surface should be level and firm, not loose.
- Sieve a thin layer of the same compost over the surface to remove any coarse lumps. You want a smooth, even seedbed.
- Water the compost thoroughly from above using a fine rose, then allow it to drain completely. The compost should be evenly moist but not waterlogged before you sow. This is important: if you try to water after sowing you will scatter the tiny seeds.
- Tip your cowslip seeds into a folded piece of paper to make a makeshift funnel. Tap them out slowly across the surface of the tray, aiming for an even distribution. For a standard seed tray, aim for roughly one seed per square centimetre: too dense and seedlings compete and become prone to damping off.
- Press the seeds gently into the surface of the compost using the flat of your finger or the bottom of a clean glass. They should be in firm contact with the compost but not pushed in. Do not cover with compost.
- If you want a very light top-dressing, use the finest possible dusting of dry horticultural grit or vermiculite just enough to anchor the seeds without blocking light. A pinch across the tray surface is plenty.
- Label the tray immediately with the variety name and the sowing date. You will forget otherwise, especially if you have several trays.
- Cover with a clear propagator lid to maintain moisture. Leave the ventilation slots slightly open to prevent fungal problems.
- For the spring indoor route, move the covered tray to the fridge for four to six weeks (cold stratification phase). For the autumn outdoor route, follow the step-by-step in the next section.
After stratification, move the tray to a cool, bright spot indoors, an unheated greenhouse, or a cold frame. A north-facing windowsill in a cool room works well. Temperatures around 16 °C are ideal. Keep the compost consistently moist by misting or bottom-watering (standing the tray in a shallow dish of water for 20 minutes, then letting it drain). For detailed step‑by‑step guidance on surface sowing, pre‑watering trays, using a clear lid or propagator, and maintaining even moisture (misting or bottom‑watering) while avoiding saturation and ventilating lids to reduce fungal risk, see Propagation techniques - Seed sowing (RHS Advice). Avoid letting the surface dry out, and equally avoid saturation. Germination should begin within three to six weeks of coming out of the cold.
Autumn outdoor sowing: the step-by-step method
Sowing directly outdoors in autumn is the simplest and most reliable method for cowslips, because the seeds get exactly the cold, moist conditions they need through winter with no intervention from you. The window for this is September to October in the UK, before the ground freezes hard.
Preparing the site
Cowslips prefer moist but well-drained soil and will grow in full sun or light shade. They do particularly well on alkaline or neutral soils, including clay and chalk, which is why they are so common on chalk grassland and old meadows. Clear the sowing area of weeds, especially perennial weeds with deep roots, because you will not be able to weed aggressively around tiny seedlings without disturbing them. Rake the soil to a fine tilth, removing stones and large clods. You do not need to add compost or fertiliser at this stage: cowslips are not hungry plants and rich soil tends to produce lush, floppy growth with fewer flowers.
Step-by-step: sowing directly into prepared ground
- Water the prepared seed bed the evening before you sow so the soil is evenly moist but not soggy.
- Scatter seeds thinly across the prepared surface. Do not rake them in. Press them in gently by walking carefully over the surface or by using a flat board. They need light to germinate: burial, even shallow burial, reduces germination significantly.
- Mark the area clearly with sticks or labels so you know where the seeds are and do not accidentally dig or plant over them during winter.
- If slugs and snails are a known problem in your garden, apply a ring of coarse grit or a wildlife-friendly slug deterrent around the marked area now. Seedlings are the most vulnerable stage.
- Leave the site alone through winter. Do not cover with mulch, which would block light from germinating seeds.
- Check from late February onward for the first signs of germination: tiny pairs of narrow seed leaves (cotyledons) appearing at the soil surface.
Autumn sowing in trays left outdoors
If you prefer not to sow directly into the ground, you can use seed trays filled with seed compost, surface-sow as described in the indoor method, cover with a fine mesh or fine grit to protect from heavy rain, and leave the trays in a sheltered spot outdoors (against a wall or in a cold frame with the lid off or propped open) all winter. The trays need to experience the same cold temperatures as the open ground, so do not bring them into a heated greenhouse. A cold frame with the lid left off, or simply a sheltered corner out of direct sun and heavy rain, is ideal. Check periodically that the compost has not dried out completely during dry spells, but otherwise leave them be. Germination will begin in the trays in the same late-winter to spring window.
Protection and winter care
Cowslip seeds and emerging seedlings are hardy and do not need frost protection. What they do not like is prolonged waterlogging, so if your garden or cold frame is prone to sitting water in winter, raise trays slightly on pot feet or bricks to ensure drainage. For outdoor direct sowings, avoid very exposed, wind-swept spots where the thin surface layer of soil can dry out rapidly during cold, dry spells in late winter: a light top-misting during dry periods in February or March will help. Protect trays from birds using a sheet of fine mesh or chicken wire laid flat over the tray surface, as some birds will scratch at freshly sown compost.
What happens after germination: seedling care and potting on
Cowslip seedlings are small and a little slow to get moving, so do not be in a rush to pot them on. Wait until each seedling has developed two proper true leaves (after the initial pair of seed leaves) before you touch them. At that stage they are sturdy enough to handle without damage.
Prick out seedlings individually into 7 to 9 cm pots filled with a standard multipurpose compost mixed with 20 to 25% perlite or horticultural grit for drainage. Hold each seedling by a leaf, never the stem, and use a dibber or pencil to lever the root system gently free of the compost. Firm the seedling in at the same depth it was growing before. Water in from below by standing pots in a shallow tray of water for 20 minutes, then remove and allow to drain.
Keep the potted seedlings in a cool, bright position out of direct afternoon sun for the first few weeks. They will grow on steadily through spring and into early summer. By late summer they should be robust enough to plant out. Aim for late August to October for planting into final positions, which gives roots time to settle before winter.
Planting out: soil, spacing, and site
Cowslips are adaptable but they do have preferences. Moist but well-drained soil is the ideal: they do not enjoy prolonged waterlogging or bone-dry conditions. They tolerate a wide pH range including alkaline chalk and clay soils but tend to struggle in very acidic, peaty conditions. In terms of light, full sun to light dappled shade works well. For similar guidance on light, soil and watering needs for another popular bedding plant, see what do snapdragons need to grow (internal resource: faa0785a-dfc3-4df0-8667-0687e88ac9d5). Avoid deep shade under dense tree canopy.
For border planting, space plants 20 to 25 cm apart. For naturalising into short grass or a wildflower meadow, a more scattered, random distribution looks best: plant at varying spacings from 15 to 30 cm and aim to avoid perfectly straight lines. For containers, one plant per 15 cm pot is about right, or group three plants in a 30 cm pot for a fuller display. Use a loam-based compost (John Innes No. 2) rather than a light multi-purpose mix for containers, as cowslips benefit from the weight and moisture-retention of a loam base.
Plant at the same depth the cowslip was growing in its pot. Firm in well, water thoroughly, and mulch around (not over) the crown with a thin layer of garden compost or composted bark to help retain moisture. In a meadow setting, remove a plug of turf for each plant, loosen the base of the hole, plant, and firm back in. Avoid mulching in a meadow as it will smother the surrounding grass.
Seasonal care: watering, feeding, and looking after established plants
Spring
As flower spikes emerge in April, water consistently if spring is dry. Cowslips in their first spring after planting are the most vulnerable to drying out; established clumps are much more resilient. A single light feed of a balanced granular fertiliser in early spring (something like a 5:5:5 general mix) scratched into the surface around the plant encourages strong flowering. Do not over-feed: too much nitrogen produces large leafy plants with poor flowering.
After flowering
Once flowering finishes in May or June, you have a choice. If you want the plant to set seed and self-sow, leave the seed heads on until the capsules ripen and begin to split in July and August. If you want to prevent excessive self-seeding or tidy the planting, deadhead promptly after flowering. Either way, the foliage rosette remains semi-evergreen and should be left in place through summer and autumn: it is gathering energy for next year's flowers.
Summer and autumn
Water during prolonged dry periods in summer, particularly for container-grown plants. A light mulch of leaf mould or well-rotted garden compost applied in early autumn helps retain moisture through dry autumns and adds organic matter as it breaks down. Do not mulch heavily over the crown of the plant itself.
Overwintering
Established cowslips need no special overwintering care in the UK and most of temperate Europe. They are fully hardy. Container-grown plants may need moving to a more sheltered spot if prolonged hard frost is forecast (below -10 °C), mainly to protect the pot from cracking rather than the plant itself. Avoid cutting back the foliage in autumn as the leaves protect the crown.
Other ways to propagate cowslips: division and basal cuttings
Seed is the main route for building up numbers, but if you already have an established clump, division is the quickest way to get more plants. Lift the whole clump in early autumn (September to October) or just after flowering in May to June using a garden fork. Tease the clump apart by hand or use two forks back-to-back to lever it apart if it is very congested. Each division should have a good rosette of leaves and a healthy root system. Replant immediately at the same depth, water in well, and keep moist until re-established. Dividing every three to four years also rejuvenates plants that have become tired or crowded.
Basal cuttings are less commonly used but effective for named cultivars you want to preserve true to type (which will not come true from seed). In early spring, as new growth emerges at the base of the plant, carefully detach small shoots with a sliver of root attached using a sharp knife. Insert them into free-draining cutting compost (equal parts perlite and coir is ideal), cover with a clear plastic bag or propagator lid, and keep in a cool bright spot out of direct sun. They should root within four to six weeks. This technique requires a little more care than division but works reliably on healthy plants.
Pests, diseases, and common problems
Slugs and snails
These are the number one threat to cowslip seedlings. Young plants in their first season are particularly vulnerable. Use coarse grit around plants as a deterrent, check under pots and nearby debris at night, and apply wildlife-friendly pellets if damage is severe. Once plants are established in their second year and beyond, slug damage is rarely fatal.
Vine weevil
Vine weevil grubs eat the roots of container-grown primulas, causing plants to wilt and collapse suddenly. If you find a plant has died unexpectedly in a pot, knock it out of its container and check for creamy C-shaped grubs in the compost. Treat with a nematode-based biological control (available from garden centres) applied to pots in late summer when soil temperatures are above 5 °C.
Damping off
Damping off is a fungal problem that causes seedlings to collapse at soil level, usually in trays that are too warm, too wet, or too densely sown. Prevent it by sowing thinly, using fresh compost rather than reused compost from previous seasons, ensuring good airflow (open propagator vents), and watering from below rather than overhead. If it strikes, remove affected seedlings immediately and improve ventilation.
Powdery mildew
A white powdery coating on leaves can appear on cowslips in dry summers, especially in sheltered spots with poor air circulation. It rarely kills established plants but looks unsightly. Improve air movement around the planting, avoid wetting the foliage when watering, and water at the base rather than overhead. In severe cases, remove badly affected leaves.
Troubleshooting germination: what went wrong and how to fix it
| Problem | Most likely cause | Fix |
|---|---|---|
| No germination after 6+ weeks indoors | Seeds not cold stratified; too warm | Move tray to fridge for 4–6 weeks then back to cool bright spot at ~16 °C |
| No germination after outdoor autumn sowing | Sown too late (after ground freezes) or seeds washed in and buried | Wait until spring; mark area; if no germination by May, re-sow fresh seed |
| Seedlings emerge then collapse | Damping off (fungal) | Remove affected plants; improve ventilation; reduce watering; use fresh compost |
| Very patchy or slow germination | Old or poorly stored seed with low viability | Test germination on a small sample; buy fresh seed next season |
| Seeds germinated indoors but seedlings are very leggy | Too warm or insufficient light | Move to a cooler, brighter spot; max ~16–18 °C; avoid direct heat sources |
| Seedlings wilting despite watering | Root rot from waterlogging or vine weevil grubs | Check drainage; knock plant out of pot to inspect roots; treat with nematodes if grubs found |
Realistic expectations: when will you see your first flowers?
Patience is the main ingredient in growing cowslips from seed. Most plants sown in autumn will not flower until the following spring, which is roughly 18 months after sowing. A very few vigorous seedlings may throw up a flower stem in their first spring, but this is the exception rather than the rule. The wait is worth it: a well-established cowslip clump in its second and third year is a genuinely beautiful thing, producing multiple flower stems per plant and gradually self-seeding to build up a colony. Think of year one as the investment and year two onward as the dividend. If you want flowers faster, buy plug plants or pot-grown plants from a nursery in spring and plant straight out: this is a completely valid shortcut and nothing to feel guilty about.
Cowslips in the garden: ideas for where and how to use them
Cowslips are versatile in a way that is easy to underestimate. In a formal border they work beautifully alongside other spring-flowering perennials: their airy flower spikes complement the bolder shapes of tulips and camellias in late spring plantings. In a wildflower meadow or lawn area with reduced mowing, they naturalise freely once established and can form a spectacular display alongside other native wildflowers. For a different seasonal option, see our guide on how to grow snapdragon flowers for specific tips on sowing, care, and flowering time. In containers on a patio they make an excellent seasonal display in late April and May, particularly in terracotta or stone pots where the yellow flowers look especially warm. For companion-planting ideas and suitable partners that extend the season after cowslips finish, see what to grow with snapdragons. For taller annuals that provide vertical structure in borders, see our guide on how to grow tall snapdragons. They pair well with snowdrops for a continuous spring display from February onward, with cowslips taking over as snowdrops fade, making them natural companions in a semi-shaded border or a naturalised bulb planting under deciduous trees.
FAQ
What kinds of authoritative sources should I include to write a practical step-by-step guide for growing cowslips (Primula veris) from seed?
Use a mix of horticultural authority (RHS, Kew, botanic gardens), peer‑reviewed ecology/propagation studies (for dormancy, stratification, germination temperatures), reputable seed suppliers and restoration guides (practical sowing windows and timing), genebank/seed‑storage standards (drying/storage protocols), and propagation manuals/extension services (seed composts, tray techniques, troubleshooting). Combine scientific detail with applied guidance so readers get both the ‘why’ and the ‘how’.
Which tier‑1 horticultural references are essential and what facts to extract from them?
Include RHS plant and propagation pages and Kew plant/seed notes. Extract species profile (habit, height, light/soil preferences, flowering time), cultivar recommendations, recommended sowing seasons (autumn outdoor vs spring indoor), seed collection timing, and practical sowing/propagation steps.
Which peer‑reviewed studies should I cite and what specific technical details will they provide?
Cite lifecycle and germination research such as Brys et al. (Journal of Ecology) and Milberg (Ecography) and ex‑situ propagation studies (PMC article). Use these for dormancy status at dispersal, requirement for cold stratification, light requirement for germination, optimum germination temperatures (~16 °C), realistic germination windows and seed viability/seed bank data, and experimental treatments (GA3, pre‑chill) that improve germination.
What commercial or practical sources are useful and why?
Use reputable seed suppliers, botanic garden plant finder pages, and nursery cultivar descriptions. They provide actionable sowing windows used by gardeners, expected germination times on packets (3–6+ weeks post‑stratification), cultivar sizes/colours, and real‑world propagation tips for trays, propagators, and mulches.
What genebank or seed‑storage guidance is recommended for seed‑saving and home storage?
Use FAO/Genebank Standards for long‑term principles (dry to low equilibrium moisture, cold storage) and practical seed‑supplier guides (Johnny's, seed houses) for home practice: thoroughly dry seeds, store airtight with desiccant in a cool dark place or refrigerator, and test germination for seeds older than 1–3 years.
What specific practical propagation protocols should I document and which sources support them?
Document: seed collection (ripeness, July–August harvest, drying and threshing), seed cleaning (sieving/winnowing), stratification options (natural autumn outdoor sowing or artificial cold for indoor sowing), light‑requiring surface sowing or very shallow cover, seed tray medium (fine free‑draining seed mix + humus), moisture control (mist/bottom‑water, propagator lids), and potting on/planting out. Support with RHS propagation pages, Kew notes, and seed supplier instructions plus experimental studies confirming light and stratification needs.
Next Article
What to Grow With Snapdragons: Companion Plants Guide
Best companion plants for snapdragons, with easy pairings, spacing, sowing times, and what to avoid for healthy blooms.