THCA flower is cannabis grown and harvested specifically to preserve high levels of tetrahydrocannabinolic acid (THCA), the raw, non-psychoactive precursor to THC that converts to THC only when heated. Growing it at home follows the same fundamental path as growing any high-resin cannabis: choose the right strain, nail your environment from seedling through flower, harvest at peak trichome maturity, then dry and cure slowly at cool temperatures so the THCA stays intact rather than converting away.
How Do They Grow THCA Flower From Seed to Harvest
Marcus Holloway
29 May 2026

What THCA flower actually is and what you're trying to grow
THCA is the acidic form of THC that the cannabis plant naturally produces in its glandular trichomes. Fresh, properly dried flower is loaded with THCA. It only becomes delta-9 THC when you apply heat (smoking, vaping, cooking). So when people talk about growing THCA flower, they mean cultivating cannabis varieties selected for high THCA content and then handling the harvest carefully enough that the THCA doesn't convert prematurely during drying and curing.
From a cultivation standpoint, you are growing Cannabis sativa L., the same species used to produce hemp and marijuana. The difference between a hemp plant and a high-THCA plant is almost entirely genetic and legal rather than horticultural. Under the 2018 Farm Bill, hemp is defined as cannabis with no more than 0.3% total delta-9 THC on a dry weight basis. Compliance testing uses the formula: delta-9 THC + (THCA × 0.877). A plant with 20% THCA easily blows past that threshold in most legal frameworks. That distinction matters a great deal before you plant a single seed, so check the legal section at the end of this article before you do anything else.
Picking your strain and planning your grow setup
Strain selection is honestly where THCA content is mostly decided before you ever touch soil. Genotype is one of the biggest factors in trichome development and THCA accumulation, so start with genetics that were bred specifically for high resin production. Look for feminized photoperiod or autoflowering seeds from a reputable breeder, with documented lab testing showing total THC or THCA percentages in the high teens to mid-twenties. Strains described as 'high-THC' indicas, sativas, or hybrids are what you want. Autoflowering varieties are genuinely beginner-friendly because they flower based on age rather than light schedule, removing one variable for new growers.
For your grow space, you have two main paths: indoor under artificial light or outdoor in a garden bed or large container. Indoor gives you control over everything that matters for THCA (photoperiod, temperature, humidity, air circulation) but costs more to run. Outdoor is cheaper and often produces large plants but exposes you to weather, pests, and visibility concerns depending on your local laws. A 4x4-foot grow tent with a quality LED grow light (at least 400 true watts for that footprint) is the most practical beginner indoor setup. Outdoors, you want a site with at least 6 to 8 hours of direct sun and good air movement.
| Factor | Indoor Grow | Outdoor Grow |
|---|---|---|
| Cost to start | Higher (lights, tent, fans) | Lower (soil, containers) |
| Environmental control | Full control | Weather-dependent |
| THCA consistency | More consistent | Variable by season |
| Pest/mold risk | Manageable with airflow | Higher in humid climates |
| Visibility/privacy | Easily concealed | Requires screening or enclosure |
| Best for beginners? | Yes, especially autoflowers | Yes in dry, sunny climates |
For growing medium, a well-draining mix with a neutral pH between 6.0 and 7.0 is ideal. Cannabis roots hate sitting in water, and most extension guidance for hemp recommends well-drained soils in that same pH range. A quality cannabis-specific potting mix or a blend of peat, perlite (about 30%), and compost works well in containers. If soil pH climbs above 7.0, phosphorus becomes unavailable to roots, which stunts the plant during its heaviest nutrient demand. Pick up an inexpensive pH meter and use it.
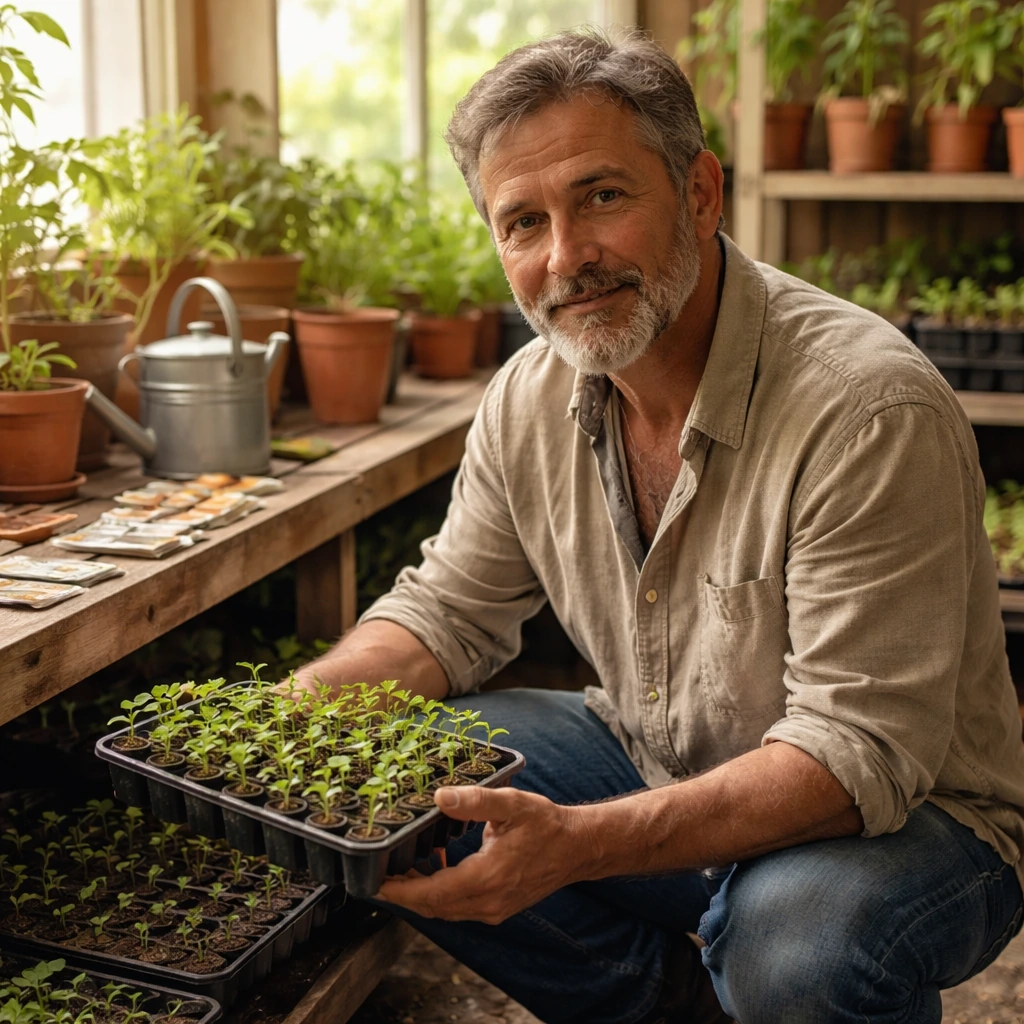
Germinating seeds and getting through early veg

- Pre-soak seeds in a small glass of plain water at room temperature for 12 to 24 hours. Most seeds will sink by the end, which is a good sign they've absorbed moisture.
- Transfer soaked seeds to a folded damp paper towel inside a zip-lock bag. Keep the bag in a warm spot around 70 to 78°F. Check daily. Taproots usually appear within 24 to 72 hours.
- Once the taproot is 0.25 to 0.5 inches long, plant the seed taproot-down about 0.5 inches deep in a small pot (a 2-inch or 4-inch pot works fine) filled with moist seedling mix.
- Cover loosely with plastic wrap or a humidity dome to retain moisture. Remove it as soon as the seedling pushes above the soil, usually within 1 to 3 days.
- Place seedlings under gentle light immediately. A T5 fluorescent or LED panel at 18 to 24 inches works well. Seedlings that stretch toward weak light (leggy growth) will be weak for the rest of their life.
- Water lightly around the base with a spray bottle at first. The goal is evenly moist but never soggy soil. Overwatering is the single most common beginner mistake at this stage.
- After 2 to 3 weeks, when the plant has 3 to 4 sets of true leaves and roots are visible at the drainage holes, transplant into a 1-gallon pot, then later into a 3 to 5-gallon final container.
During the vegetative phase, cannabis is forgiving and grows fast. Keep daytime temperatures between 70 and 85°F and nights around 60 to 70°F. Relative humidity at this stage can sit comfortably between 50 and 70%. Give photoperiod plants 18 hours of light and 6 hours of dark to keep them in veg. Feed lightly with a nitrogen-forward nutrient solution, starting at half the recommended dose and watching how the plant responds before increasing. Yellow lower leaves usually mean nitrogen deficiency; dark clawing leaves usually mean nitrogen overdose.
The flowering phase: light, feeding, and training
For photoperiod strains, you trigger flowering by switching the light schedule to 12 hours of light and 12 hours of uninterrupted darkness. Research comparing 12-hour versus 13-hour indoor photoperiods found that the longer photoperiod measurably increased yield and in some cultivars affected total THC, though effects weren't consistent across all strains. PubMed-indexed research on photoperiodism in Cannabis sativa L reports that different light exposure durations can lead to measurable differences in cannabinoid content, showing that photoperiod can influence cannabinoid accumulation 12-hour versus 13-hour indoor photoperiods. A 12-hour schedule is the safe standard. Autoflowering strains flower on their own without a schedule change, typically starting 3 to 4 weeks from germination.
As flowering begins, shift your nutrients away from nitrogen and toward phosphorus and potassium, which support bud development and resin production. Overfeeding nitrogen in flower produces loose, leafy buds with less density. Follow a cannabis-specific nutrient schedule and flush plain pH-balanced water for the final 1 to 2 weeks before harvest to clear residual salts from the root zone.
Training your plant during late veg and early flower pays off in THCA yield per square foot. Low-stress training (LST) means gently bending and tying branches outward so more bud sites receive direct light. It costs nothing and meaningfully increases production. If you want to try topping (cutting the main stem to create two main colas), do it in veg, not in flower. During flower, drop your room humidity to 40 to 50% to reduce mold risk as buds swell and air pockets between dense colas become harder to ventilate.
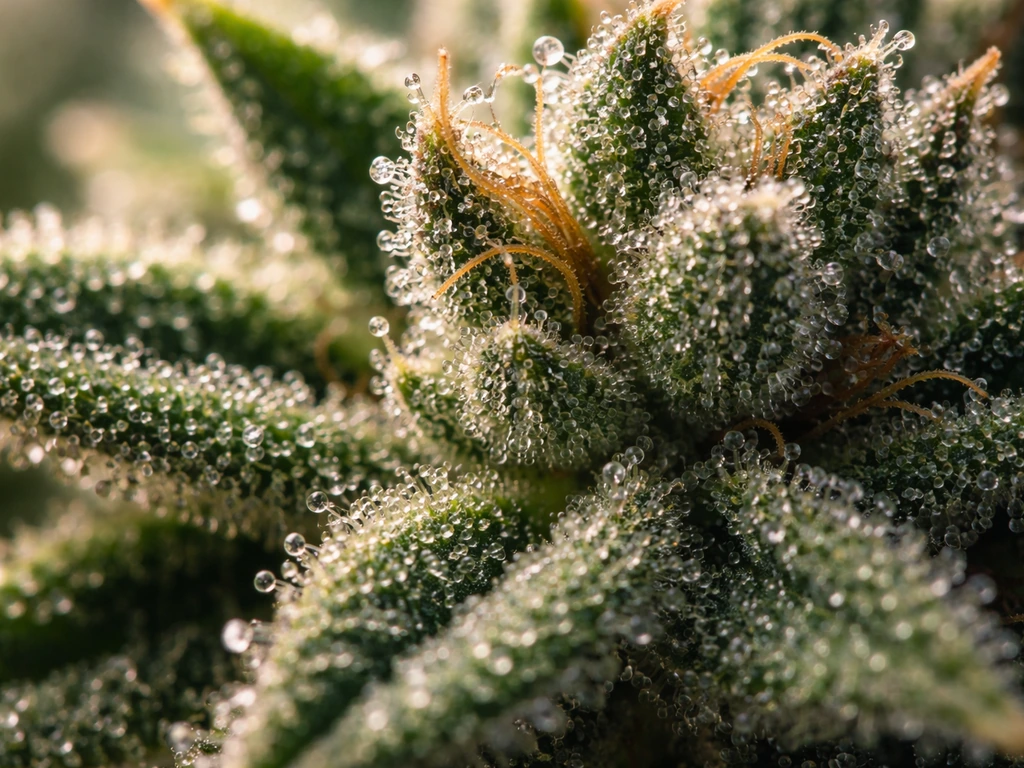
When to harvest for maximum THCA
Harvest timing is one of the most direct ways a grower influences THCA content. Trichome maturation is the most reliable indicator of peak cannabinoid accumulation, and genotype plays a large role in how quickly trichomes mature and what peak looks like. You need a jeweler's loupe (30x to 60x) or a digital microscope to read trichomes properly. At harvest, you're looking at the trichome head color on the flower itself, not the sugar leaves.
- Clear trichomes: too early, THCA is still accumulating, do not harvest yet
- Cloudy/milky white trichomes: THCA is at or near peak, THC effect will be energetic and cerebral
- Amber trichomes starting to appear (10 to 20% amber): THCA beginning to degrade into CBN, harvest window closing
- Mostly amber: overripe, significant THCA has already degraded
For maximum preserved THCA in the final dried flower, most experienced growers harvest when trichomes are predominantly cloudy with just the very beginning of amber appearing. Pistil color is a secondary signal: when 70 to 90% of the white hairs have darkened and curled in, you're in the right window. Check both indicators together. Harvesting too late means you've already lost THCA to degradation in the living plant before the bud ever comes off the stem.
Drying and curing to keep THCA intact
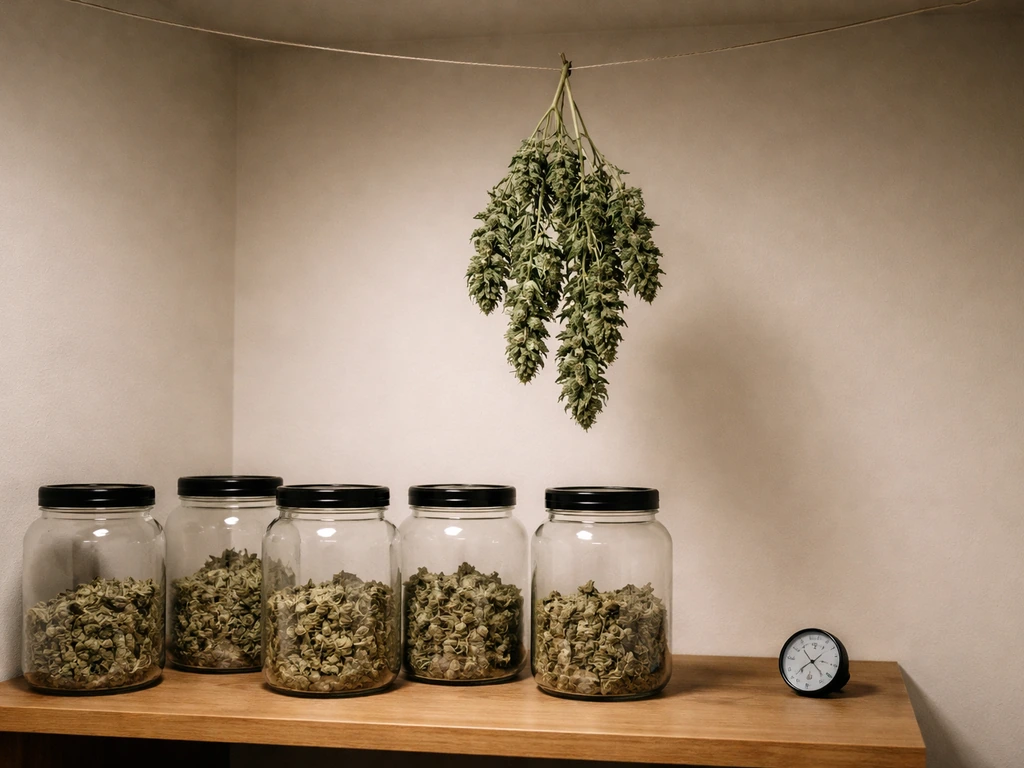
This is where a lot of THCA is lost or preserved, and the chemistry is straightforward. THCA converts to THC (and eventually to CBN) through heat, light, and time. Slow, cool drying at controlled humidity keeps that conversion minimal. Research on THCA decarboxylation confirms it is relatively fast compared to other cannabinoid acids, meaning sloppy drying (too warm, too fast) will convert a measurable portion of your THCA before anyone even uses the flower.
- After harvest, trim large fan leaves and hang whole branches or individual buds upside down in a dark, ventilated space.
- Target a drying environment of 60 to 70°F with relative humidity around 45 to 55%. This range is widely reported by experienced growers as the sweet spot for slow, even drying without mold.
- Keep the space dark. UV light degrades cannabinoids. Good air circulation (a small fan moving air around the room, not blowing directly on buds) prevents mold.
- Drying typically takes 7 to 14 days. Buds are ready to move to cure when small stems snap cleanly rather than bending, and the outside of buds feels dry to the touch.
- Transfer dried buds into airtight glass jars (mason jars work perfectly) filled about 75% full. Store in a cool, dark place.
- For the first 1 to 2 weeks of cure, 'burp' the jars once or twice daily by opening them for 5 to 10 minutes. This releases built-up moisture and gases.
- After 2 to 3 weeks of active burping, check jars every few days. A minimum 4-week cure significantly improves smoothness and flavor. Most experienced growers consider 6 to 8 weeks an ideal cure for quality flower.
Temperature during drying and curing is the key lever for THCA preservation. Avoid drying rooms above 75°F. Never use a food dehydrator or oven to speed up drying if THCA content matters to you: even brief exposure to moderate heat starts the decarboxylation process you are trying to avoid. Store finished, cured flower in a cool dark location, ideally below 70°F. Boveda or Integra humidity packets at 62% relative humidity inside storage jars help stabilize moisture long-term.
Troubleshooting the most common problems
Bud rot (Botrytis cinerea)
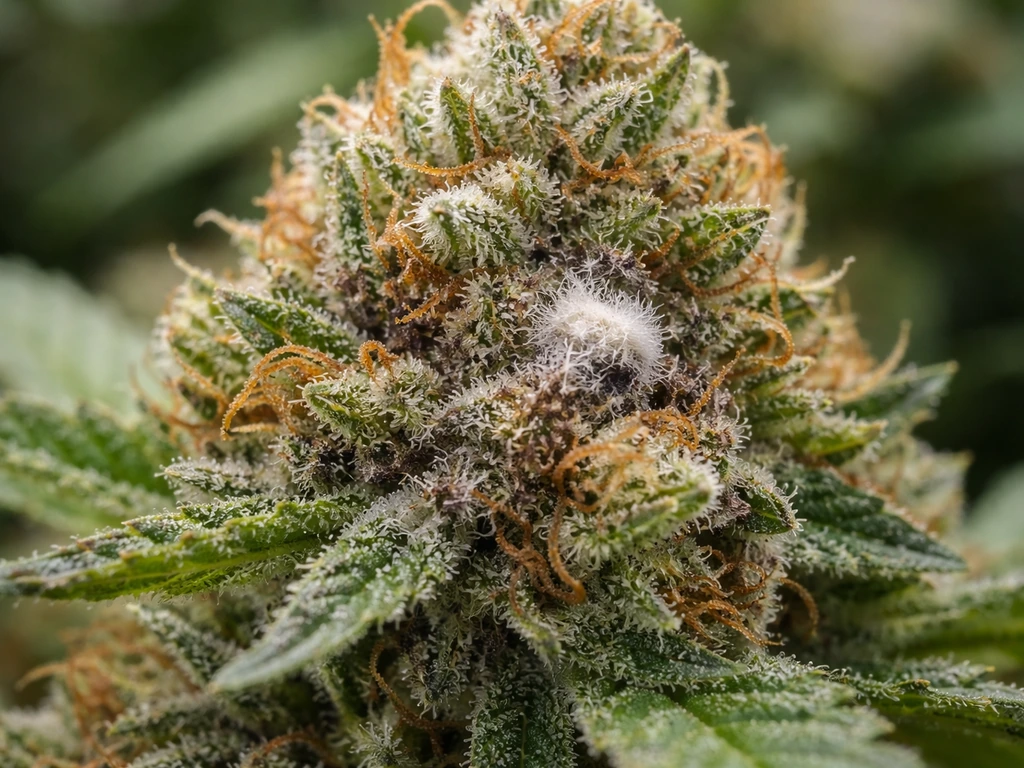
Bud rot is the most devastating problem in the flowering stage. Botrytis cinerea is present in most growing environments and becomes a serious threat when dense buds stay moist and airflow is poor. It starts deep inside a cola as gray-brown fuzzy rot and often isn't visible until significant damage is done. Prevent it by keeping flowering-stage humidity at or below 50%, running oscillating fans so no part of the canopy sits in stagnant air, and removing any dead leaf material from inside the canopy. If you find rot, cut the affected bud well below the visible damage, bag it, and remove it from the grow space immediately.
Aphids and other sap-feeding insects
Cannabis aphids cluster on new growth and the undersides of leaves, excreting sticky honeydew that coats surfaces and attracts mold. Heavy infestations cause yellowing and stunted growth. Inspect plants weekly, especially new shoot tips. A strong spray of water knocks aphids off plants effectively early in an infestation. Insecticidal soap or neem oil (applied in veg, not in late flower) handles moderate pressure. Introduce beneficial insects like ladybugs if growing outdoors.
Nutrient deficiencies
The most common deficiencies are nitrogen (yellowing leaves starting from the bottom up in veg), phosphorus (dark purpling of leaves and stems, especially in cold conditions or high soil pH), and calcium/magnesium (brown spots or interveinal yellowing). Before adding more nutrients, check your soil pH. A pH above 7.0 locks out phosphorus regardless of how much you feed. Adjust pH first, then reassess the plant in 3 to 5 days before supplementing.
Leggy seedlings and damping-off
Leggy seedlings that stretch toward the light and then tip over are almost always a light problem: either the light is too far away or too weak. Move the light closer or upgrade it. Damping-off (seedlings collapsing at the soil line) is a fungal issue caused by wet, poorly drained seedling mix or contaminated containers. Use sterile seedling mix, clean containers, and avoid overwatering. Let the top of the soil dry slightly between waterings even at the seedling stage.
Legal and safety considerations you cannot skip
This is genuinely important, so read it carefully. Cannabis with high THCA content is not hemp under federal law. The USDA compliance formula (THCA × 0.877 + delta-9 THC) means a flower testing at even 1% THCA can push a plant well past the 0.3% total THC threshold that defines hemp. Growing high-THCA cannabis without explicit legal authorization in your state is growing marijuana, not hemp, regardless of whether you call it 'THCA flower.' State laws vary enormously: some states allow adults to grow a limited number of cannabis plants at home for personal use, others prohibit it entirely, and the specifics (plant count, visibility, security) differ widely. Ohio, for example, requires home grows to be in a secured, enclosed space not visible from public areas. Many states with medical or recreational programs have similar enclosure and visibility rules.
Before you germinate a single seed, look up your specific state's current cannabis cultivation laws. Check whether your local municipality has additional restrictions beyond state law, because many do. If you are in a legal home-grow state, follow the plant count and security rules precisely. Do not attempt to extract or concentrate cannabinoids at home using flammable solvents: this is genuinely dangerous and creates additional serious legal exposure beyond simple cultivation rules. This guide covers growing flower for personal use by adults in jurisdictions where that is permitted, nothing more.
If you're interested in growing other unusual or specialty flowering plants, the same core principles of light, soil drainage, timing, and pest prevention apply across the board. If you want to grow a specific specialty variety like bat flower, use these same light, humidity, and timing principles as your baseline in a controlled grow setup how to grow bat flower. Cat's eye flowers (Coreopsis tinctoria) are a different plant, but you can use similar gardening fundamentals like sun requirements and well-drained soil to get strong blooms. If you are specifically looking for how to grow chamanthi flowers, focus on these same fundamentals while matching the light and watering needs of the plant light, soil drainage, timing, and pest prevention. If you want to grow bellflowers too, use the same kind of planning for light, soil drainage, and consistent early care. Plants like bat flower, velvet flower, and chocolate lace flower each have their own quirks, but the fundamentals of healthy seedling establishment and consistent environmental care carry over from one growing project to the next. If you want the specifics on growing velvet flower, plan around its preferred light, soil moisture, and spacing. Cannabis is simply on the more demanding and legally complex end of that spectrum, which makes getting the basics right from the start even more worthwhile.
FAQ
Can I grow THCA flower outdoors without losing much THCA to weather changes?
Autoflowers generally have less flexibility than photoperiods because they switch into flowering on their own. If you want to minimize THCA loss, keep temperature and humidity steady during the first 3 to 4 weeks (before buds form), then avoid big swings in late flower, especially warm, fast drying.
What is the biggest drying mistake that reduces THCA even if I harvested at peak trichomes?
Yes, but your drying conditions matter more outdoors. If daytime highs push your drying area above about 75°F or you cannot control humidity, you will likely decarboxylate more THCA before the cure is finished. Many growers use a shaded, ventilated drying tent to buffer swings.
Why do my sugar leaves show amber before the flower does, and which should I trust?
Use a loupe or microscope to read the flower trichomes, and confirm amber percentage on the flowers themselves, not the sugar leaves. Sugar leaves often show color changes earlier, so relying on them can cause you to harvest late.
How late can I harvest before THCA preservation becomes noticeably worse?
If you harvest cloudy with only the earliest amber, THCA is usually preserved best for most users. However, if you wait until amber is dominant, you tend to see more THC conversion in the plant and potentially more CBN-like degradation later, which can shift effects and reduce the THCA-forward profile.
Will stress during late flower ruin my THCA even if I harvest on time?
Stressed plants often produce weaker resin maturity or uneven trichome development, which makes timing harder. Fix the stress early (light height, pH, pests) and avoid heavy pruning or topping right before harvest windows, because it can alter flowering pace and bud uniformity.
Does flushing in the last 1 to 2 weeks increase THCA or just reduce harshness?
Not exactly. Flush timing can help with residual salts, but it does not “rebuild” lost THCA. If your humidity is too high during drying, the THCA conversion problem still happens regardless of flushing, so prioritize slow, cool drying first.
How should I physically dry buds to avoid uneven curing and mold?
If you cut and bag wet buds, you risk uneven drying and higher mold potential, even if your humidity seems acceptable on the outside. A safer approach is to trim appropriately, hang or rack for airflow, then control drying temp and humidity consistently until stems feel dry.
What storage RH target should I use to keep THCA flower stable without drying it out too much?
In storage, too-dry flower can lose terpenes quickly, and too-moist flower increases mold risk. Aim for stable jar conditions around 62% RH and keep containers sealed, then only open briefly for checks and mixing.
What happens if my drying humidity is too low or too high for THCA flower?
If you undershoot humidity (dry too fast), you can accelerate THCA decarboxylation and harm aroma. If you overshoot (dry too slow), you increase botrytis risk and can also degrade cannabinoid quality over time. Track temp and humidity together, not separately.
How can I tell whether pH problems are hurting THCA production, not just plant health?
If your pH meter reads above 7.0 in the root zone, phosphorus uptake can stall and buds may not develop dense resin. Calibrate the meter, verify runoff pH when possible, and adjust with pH-corrected water before increasing nutrient strength.
What seed or strain selection mistakes lead to disappointing THCA results?
A common one is starting with genetics that claim “high THC” but lack documented THCA or total THC testing. Another is confusing total THC with THCA. For selection, look for lab testing that reports total THC or THCA, and confirm it matches your local definition and compliance rules.
Can I use plant training (LST or topping) and still keep the same humidity targets for mold prevention?
Yes, but do it carefully because canopy density affects airflow. For denser buds, you may need slightly lower humidity than 40 to 50% during peak swell, plus extra fan placement so airflow reaches inside colas without directly blasting buds.
What’s the best way to handle pests without risking contamination during late flower?
Pests can indirectly reduce THCA by stressing the plant, but aphids and mold also create quality defects. If you treat late, residues and timing can become an issue, so plan pest management early in veg and avoid late treatments that could contaminate flowers.
Next Article
How to Grow Chorus Flower From Seed to Blooms
Step-by-step guide to grow chorus flower from seed to blooms, including sowing, soil, care, pests, and end-of-season pla