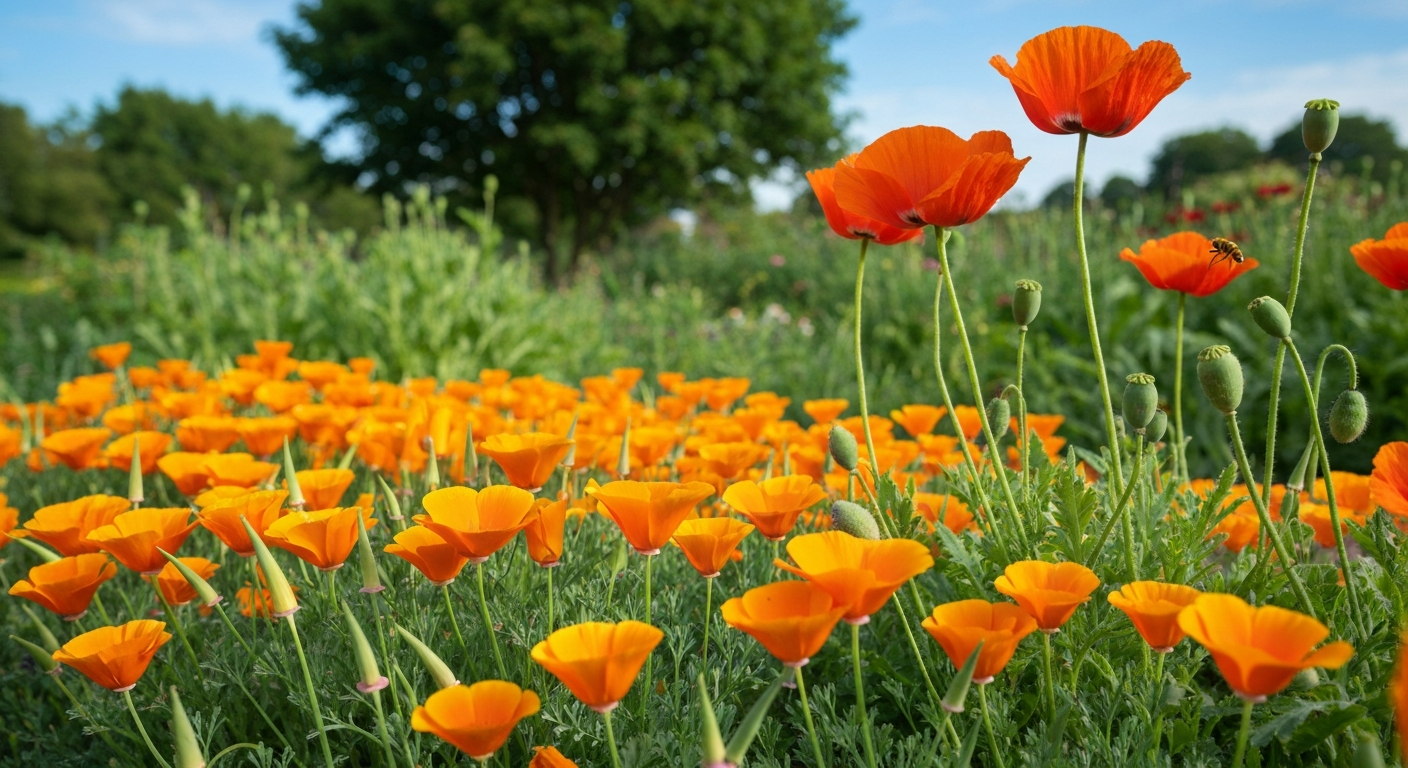
Red Flanders poppies (Papaver rhoeas) are one of the easiest flowers you can grow from seed. You scatter tiny seeds onto the soil surface in early spring or autumn, press them in gently, keep them moist, and within 7 to 21 days you have seedlings. From there it is roughly 60 to 90 days to your first blooms. No indoor propagation is needed, no special equipment, and the plants genuinely prefer lean, average soil over anything rich and pampered. If you have a patch of ground and a seed packet, you are most of the way there. For step-by-step instructions on how to grow red poppies, see our detailed guide.
How to Grow Red Flanders Poppies: Complete Seed Guide
Marcus Holloway
6 Aug 2026
Why Flanders poppies deserve a spot in your garden
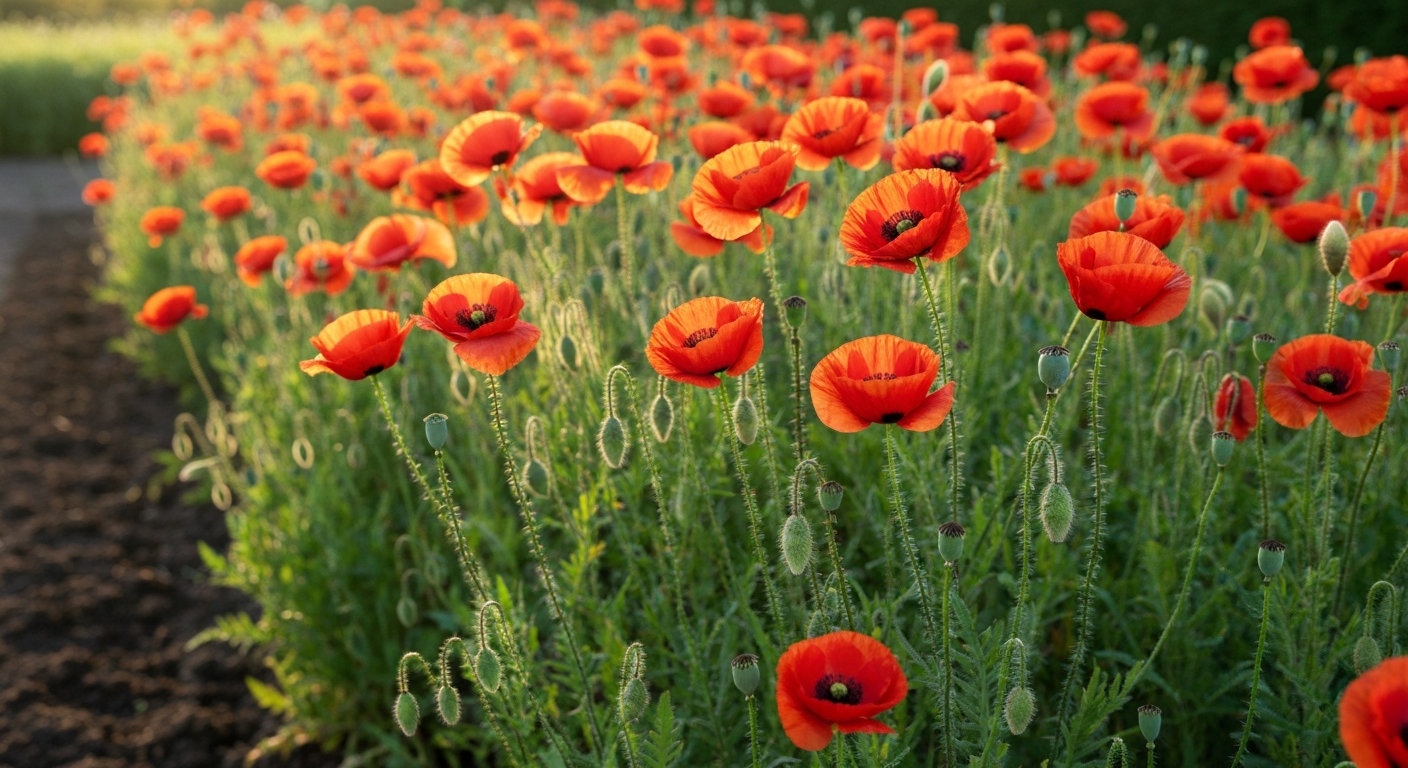
Papaver rhoeas is the scarlet field poppy of European meadows and war memorials, and it is an annual that completes its whole life cycle in one season. The papery, four-petaled blooms on wiry stems have a presence in the garden that feels completely disproportionate to the effort involved. Each plant can carry dozens of flowers over several weeks, and the nodding buds before they open are as beautiful as the blooms themselves. This guide is written for complete beginners and first-time poppy growers. If you have never direct-sown a flower from seed before, this is an excellent place to start. If you have tried poppies and they did not come up, this guide will show you exactly where things went wrong and how to fix them.
One important note before we get into it: Papaver rhoeas is not the same plant as Papaver somniferum, the opium poppy. They are entirely different species with different chemistry, different seed heads, and different cultivation histories. Everything in this guide applies only to P. rhoeas, the Flanders or corn poppy. You will sometimes see it called the Shirley poppy, which refers to a cultivar group bred from P. rhoeas in the 1880s. If you are interested in other poppy types, the orange poppy flower and purple poppies are worth exploring separately, as each has its own timing and character.
Quick facts and what to expect in your first season
| Feature | What to Expect |
|---|---|
| Plant type | Hardy annual (completes in one season) |
| Mature height | 30–90 cm (12–36 in) depending on variety |
| Sowing depth | Surface sow only — press into soil, do not bury |
| Days to germination | 7–21 days at 10–15°C (50–59°F) |
| Days to first bloom | 60–90 days from sowing |
| Bloom window | 4–6 weeks per plant; succession sowing extends this |
| Soil preference | Well-drained, lean to moderately fertile, pH 6.0–7.5 |
| Sun requirement | Full sun (minimum 6 hours) |
| Transplant tolerance | Poor — direct sow in final position |
| Self-seeding | Enthusiastic self-seeder if seedheads are left |
In your first season, expect a relatively modest plant that flowers for around four to six weeks. If you sow in autumn in a mild climate, plants establish over winter and bloom earlier and more vigorously in spring. Spring-sown plants in cooler climates will reach their first flowers by early to midsummer. In hot climates, plants can go to seed quickly once temperatures rise above about 25°C (77°F). The key to a long display is succession sowing, not any single magical variety.
Timing your sowing by region and season
Getting the timing right is the single most important factor with Flanders poppies. The seeds germinate best in cool soil, roughly 10–18°C (50–65°F), and the plants flower before the heat of summer shuts them down. Sow too late into warm soil and you will struggle to get germination. Sow at the right time and the whole process is nearly effortless.
| Climate / Region | Primary Sow Window | Notes |
|---|---|---|
| Temperate (UK, Pacific NW, NE USA) | Late autumn OR very early spring (as soon as soil is workable) | Autumn sowing gives strongest plants; spring sow 4–6 weeks before last frost |
| Mediterranean / mild winters (CA, SW UK, coastal AU) | Autumn (October–November) for spring blooms | Best results from autumn; avoid summer sowing entirely |
| Hot-summer continental (Midwest, SE USA, Central EU) | Very early spring — aim for 6 weeks before last frost | Choose fast-maturing varieties; mulch to keep soil cool |
| Short-season / northern climates | Early spring as soon as ground thaws | Surface sow directly; cold soil actually helps germination |
| High-humidity subtropical | Autumn/winter only | Summer humidity promotes fungal disease; skip spring sowing |
In practice, I aim to be sowing in early March in a temperate UK-style climate, or scattering seed in October if I want the best possible spring show. For gardeners growing poppies in Colorado or other high-altitude, short-season areas, the very early spring window is your best bet, the cool nights actually help rather than hinder germination.
Picking the right seeds and varieties
For true Flanders poppies, you want seeds labeled Papaver rhoeas. The classic form is a single scarlet red with a dark basal blotch, and this is what most people picture when they think of the Flanders poppy. If you want strictly red flowers, look for packets labeled 'Flanders Poppy,' 'Papaver rhoeas single red,' or simply 'corn poppy red.' Avoid packets that only say 'poppy mix' without specifying P. rhoeas, as these often include other species.
The Shirley poppy group (bred from P. rhoeas by Reverend Wilks in the 1880s) gives you a wider color range including white, pink, bicolor, and salmon shades, all on the same airy plants. These are not the same as a traditional red Flanders poppy, but they are the same species and grown identically. For a cutting garden, Shirley mixes are brilliant because the succession of colors keeps things interesting. For the classic red memorial poppy, buy single-species red seeds from a reputable supplier such as Botanical Interests, Sow True Seed, Floret, or John Scheepers. Fresh seed from a reliable source gives you the best germination rates, typically 70–90% for fresh stock.
Choosing the right site
Flanders poppies need full sun, at least six hours of direct sunlight per day. RHS cultivation notes recommend full sun (at least six hours of direct sunlight), shelter from strong winds for long‑stem varieties intended for cutting, and good air circulation to reduce disease RHS cultivation notes recommend full sun (at least six hours of direct sunlight), shelter from strong winds for long‑stem varieties, and good air circulation to reduce disease.. In partial shade, plants become leggy, produce fewer flowers, and are more susceptible to disease. In very hot climates where afternoon temperatures regularly exceed 30°C (86°F), a spot with morning sun and light afternoon shade will help plants last longer before they bolt to seed.
Wind is worth thinking about if you are growing tall cutting varieties. Plants above 60 cm (24 in) can topple in exposed spots, and once the stems are on the ground they are difficult to recover. A position sheltered by a fence, hedge, or taller companion planting will protect your investment. Good air circulation around plants is still important though, a completely enclosed, stuffy spot encourages fungal problems. Aim for shelter from strong prevailing winds without creating a stagnant pocket.
Preparing your soil
One of the things I genuinely love about Flanders poppies is that they do not want rich soil. In fact, overly fertile ground produces lush, leafy plants with disappointing flower counts. These are wildflowers at heart, they evolved in disturbed arable fields, not composted raised beds. Aim for well-drained, lean to moderately fertile soil with a pH of roughly 6.0–7.5.
If your soil is heavy clay, drainage is the main thing to fix. Fork in coarse horticultural grit or perlite and a modest amount of well-rotted compost, maybe 10–20% by volume, just enough to open up the structure without pushing fertility too high. Sandy or loamy soils need very little preparation at all, just rake the surface to a fine tilth before sowing. Avoid adding high-nitrogen fertilizers to the bed before sowing. If your soil is already rich from previous vegetable growing, consider sowing poppies in a less-amended border instead.
- Clear the area of weeds and debris at least two weeks before sowing.
- If drainage is poor, fork in coarse grit (about 10–20% by volume) and a small amount of well-rotted compost.
- Rake the surface to a fine, crumbly tilth — you want a smooth seedbed so tiny seeds make good contact with the soil.
- Do not add nitrogen-heavy fertilizers. A light scatter of balanced granular fertilizer is fine if soil is extremely poor, but skip it if fertility is average.
- Water the bed lightly the day before sowing to settle any dust and give seeds a moist surface to land on.
Seed treatment, storage, and what to expect from germination
Flanders poppy seeds are tiny, roughly the size of a grain of ground pepper, and they require light to germinate. This is the single most important fact about sowing them. Do not bury these seeds. If you cover them with more than about 1–2 mm of soil, germination rates drop sharply. The standard instruction is to press seeds onto the surface of a moist seedbed and leave them there, or at most give them the faintest possible dusting of fine compost.
P. rhoeas seeds can show variable dormancy, which partly explains why autumn or cool early-spring sowing works so well. Experimental work indicates Papaver rhoeas shows variable dormancy that is generally weaker than some related Papaver taxa, and that natural seasonal cycles or roughly 12 weeks of warm conditions can reduce dormancy, which helps explain why fall sowing (natural stratification) or cool early‑spring soil favors reliable germination (A Comparative Study of Germination Ecology of Four Papaver Taxa) A Comparative Study of Germination Ecology of Four Papaver Taxa (discussion of dormancy and stratification). The seeds experience natural temperature cycles (a process similar to cold stratification) that help break any residual dormancy and trigger more even germination. If you are sowing in spring and want to nudge germination along, mixing seeds with a small amount of barely damp sand and keeping them in the fridge for two to four weeks before sowing can help, though in my experience it is rarely necessary when soil temperatures are genuinely cool.
Expect germination in 7 to 21 days when soil temperatures are between 10 and 15°C (50–59°F). At warmer soil temperatures, germination becomes erratic and rates drop. Stored seed should be kept in a cool, dry, dark place, a sealed envelope in the bottom of the fridge is ideal. Seeds remain viable for two to three years with good storage, but germination percentage declines year on year. Test older seed by placing 10 seeds on a damp paper towel, folding it over, and checking for sprouts after 14 days. If fewer than five out of ten sprout, sow more thickly than usual.
How to sow: direct sowing vs starting indoors
Direct sowing (strongly recommended)
Direct sowing is the right method for Flanders poppies in almost every situation. These plants develop a fragile taproot early on, and any disturbance to that root, even careful transplanting, causes significant setback. Seedlings that are moved often sulk, stall, or fail entirely. Direct sowing in the final position avoids all of that.
- Prepare your seedbed as described above and water it the day before.
- Mix your seeds with a small amount of dry sand if you find them hard to handle — it makes distribution easier and shows you where you have already sown.
- Scatter seeds thinly over the prepared area, or sow in clusters of 3–5 seeds every 15–20 cm (6–8 in) if you want a more controlled spacing.
- Press seeds firmly onto the surface using a flat board, the palm of your hand, or a gentle roller. Do not rake them in or cover with soil.
- Water gently with a fine rose or mist setting to avoid washing seeds away.
- Keep the seedbed consistently moist until germination — this is critical, as seeds on the surface dry out quickly.
- Once seedlings are 5–8 cm (2–3 in) tall, thin to one plant every 15–30 cm (6–12 in).
Starting indoors (only when necessary)
I rarely recommend starting Flanders poppies indoors, because the transplant shock risk is real. However, if you have a very short growing season and need a head start of three to four weeks, it is possible. Use deep individual cells or biodegradable pots that can be planted out without disturbing roots. Sow two to three seeds per cell on the surface of a fine seed compost, pressing them in without covering. Keep at 10–15°C (50–59°F) under bright light. Transplant out while seedlings are still small, ideally under 5 cm (2 in), and handle the root ball without breaking it. Harden off for at least a week before planting out.
Spacing, thinning, and handling young seedlings
Thinning is one of those jobs that beginner gardeners resist, because pulling up perfectly good seedlings feels wasteful. But crowded Flanders poppies produce weak, disease-prone plants with short stems and fewer flowers. Give them space and you will get strong, well-branched plants with long cutting stems.
When seedlings reach about 5 cm (2 in) tall, thin to one plant every 15 cm (6 in) for standard varieties, or every 25–30 cm (10–12 in) for tall cutting types. Do not pull seedlings out, snip them at soil level with scissors to avoid disturbing the roots of the plants you are keeping. A second thinning two weeks later, removing any remaining overcrowded plants, will give the final stand the best start.
Growing in containers and small spaces
Flanders poppies can be grown in containers, but the taproot situation means you need to get the setup right from the start. Choose a pot at least 30 cm (12 in) deep and 30 cm wide. Shallower containers restrict root development and result in stunted, short-lived plants. Fill with a mix of two parts loam-based compost and one part perlite or coarse grit for drainage. Avoid peat-heavy multipurpose composts, which tend to stay wet and are too fine-textured for good taproot development.
Sow seeds directly into the final container in the same way as for outdoor beds, surface press, no covering, keep moist. Thin to three to five plants per 30 cm pot once seedlings are established. Containers dry out much faster than garden beds, so watering frequency needs to increase significantly during warm weather. Do not let the compost dry out completely between waterings, but equally avoid waterlogging, these plants hate sitting in wet compost. Place containers in a sheltered, sunny spot and be prepared for them to finish flowering a few weeks earlier than garden plants, as pots heat up faster.
Watering, feeding, and mulching
Young seedlings need consistent moisture until they are well established, the first three to four weeks after germination are the critical window. After that, established Flanders poppies are quite drought-tolerant and in fact prefer drier conditions to constantly wet soil. Water at soil level rather than overhead to reduce the risk of fungal disease on foliage. In dry spells during the growing season, a deep watering once or twice a week is better than shallow daily watering.
Feeding is rarely necessary if your soil is of average fertility. If plants look very pale and growth is slow, a single light application of a balanced liquid fertilizer at half strength is fine. Avoid high-nitrogen feeds, which push leafy growth at the expense of flowers. Once plants are actively blooming, leave them alone nutritionally, they are doing exactly what they should.
A light mulch of 2–3 cm (1 in) of fine bark or straw around established plants helps retain moisture and suppress weeds without affecting the plants negatively. Keep mulch pulled back a centimeter or two from stems to allow air circulation at the base. Do not mulch over freshly sown seeds or tiny seedlings, as it can block light and prevent germination.
Staking, cutting stems, and using poppies in vases
Tall Flanders poppy varieties grown for cutting benefit from some support. Pea sticks, twiggy branches pushed into the ground around young plants, work well and are invisible once plants grow through them. For a cutting garden row, a horizontal grid of string or netting raised on canes as plants grow is more practical at scale.
For the best vase life, cut stems when the bud is just about to open, when the sepals have split and the tip of the petals is just visible but the flower has not fully unfurled. Immediately plunge the freshly cut stem into boiling water for 10–20 seconds, then transfer to a vase of cool water. This sears the latex that the plant produces when cut and dramatically extends vase life, taking it from one day to four or five days. Stems cut in full bloom rarely last more than a day in a vase. Change the water daily and keep arrangements out of direct sunlight and away from fruit (ethylene from ripening fruit accelerates petal drop).
Deadheading vs letting plants self-seed
This is genuinely a choice rather than a right-or-wrong situation, and it depends entirely on what you want from your poppies.
If you deadhead consistently, removing spent flowers before seed heads ripen, you encourage each plant to keep producing new buds and extend your bloom window by several weeks. To deadhead correctly, snap or snip the stem just below the spent flower head as soon as petals drop. Do not leave the swelling seed pod, as this signals the plant to reduce flower production.
If you allow some seed heads to ripen and shatter naturally, you will get self-sown volunteers the following season. This is one of the great pleasures of growing Flanders poppies, a well-established bed can perpetuate itself with minimal effort. The downside is that you lose control over exactly where the plants come up, and self-sown seedlings will need thinning just like deliberately sown ones. In practice, I deadhead the majority of my plants and leave a few seed heads on the strongest plants to do their own thing in autumn.
Harvesting stems for bouquets and saving seed
Cutting for bouquets
Cut stems in the morning when they are most hydrated, using sharp, clean snips or scissors. Choose buds showing color but not yet open. Immediately treat the cut end with boiling water as described above. Strip any foliage that would sit below the waterline in the vase. Recut stems at an angle under water before placing in the vase. Stems are typically 30–60 cm (12–24 in) long depending on variety and growing conditions.
Saving seed for next year
Saving seed from Flanders poppies is easy and rewarding. Leave some seed heads on your strongest, healthiest plants after flowering. Watch for the small holes that appear at the top of the pepper-pot seed capsule, this means the seeds inside are ripe and the capsule has begun to open. Cut the capsule stem and hold it over a paper bag or envelope, then shake gently. Hundreds of tiny black seeds will fall out. Spread them on a sheet of paper for a few days to dry completely, then seal in a paper envelope labeled with the date and variety. Store in a cool, dry, dark place, an airtight container in the fridge is ideal. Properly stored seed remains viable for two to three years, though germination rates improve when seed is fresh.
Pests and diseases to watch out for
| Problem | Symptoms | Prevention / Treatment |
|---|---|---|
| Aphids | Clusters of small insects on stems and buds; distorted growth | Check plants weekly; blast off with water; use insecticidal soap if heavy infestation |
| Slugs and snails | Ragged holes in seedlings; seedlings disappear overnight | Use copper tape around containers; scatter iron phosphate pellets; check under mulch |
| Downy mildew | Grey-white powder on leaf undersides; yellowing foliage | Improve air circulation by thinning; avoid overhead watering; remove affected leaves |
| Powdery mildew | White powdery coating on upper leaf surfaces, usually late season | Increase spacing; water at base; rarely fatal — plants may just be near end of life |
| Damping off (seedlings) | Seedlings collapse at soil level; stem appears pinched and rotted | Use well-drained compost; avoid overwatering; sow thinly; improve air circulation |
| Root rot | Yellowing, wilting despite moist soil; slimy roots | Improve drainage; reduce watering; do not amend soil with excess organic matter |
Slugs are by far the most common problem I encounter with young poppy seedlings. The tiny plants are vulnerable in their first few weeks, and a single slug can wipe out an entire patch overnight. Physical barriers and iron phosphate slug pellets around the sowing area during the seedling stage are well worth the small effort. Once plants are past about 10 cm (4 in) tall, slug damage becomes much less of a threat.
Troubleshooting poor germination and weak plants
Poor germination is the complaint I hear most often about Flanders poppies, and it almost always comes down to one of four causes: seeds were buried too deeply, soil was too warm, the seedbed dried out after sowing, or the seed itself was old. Work through this checklist before assuming your seed is bad.
- Check sowing depth: were seeds pressed onto the surface? Even 5 mm of soil cover significantly reduces light reaching seeds and cuts germination rates. Re-sow on the surface if in doubt.
- Check soil temperature: if daytime temperatures are above 20°C (68°F), germination will be erratic. Wait for cooler conditions or sow in the fridge-cold soil of early spring.
- Check moisture: a seedbed that dries out between waterings will abort germination mid-process. Surface-sown seeds have no moisture reserve — they need the top centimeter of soil to stay consistently damp until emergence.
- Test seed viability: place 10 seeds on a damp paper towel, fold, and check after 14 days. Fewer than 5 germinating means your seed is old or has been stored in poor conditions. Sow more thickly or buy fresh seed.
- Check for slug damage: if seedlings appeared briefly and then vanished, slugs are the likely culprit. Look for slime trails and put down deterrents before re-sowing.
- For weak, leggy seedlings: insufficient light is the usual cause. Move containers to a brighter spot, or if in the ground, check that nothing is shading the patch during the critical morning hours.
A month-by-month care calendar
| Month (Northern Hemisphere) | Key Tasks |
|---|---|
| August–September | Save and dry seed from current-year plants. Plan next year's sowing areas. Order fresh seed if needed. |
| October–November | Autumn sowing in mild climates: prepare beds, surface sow, press in, protect from heavy rain wash-off. Slug watch begins. |
| December–February | Winter rest for autumn-sown seedlings. Ensure drainage is good and seedlings are not waterlogged. No feeding needed. |
| March (early) | Spring sowing in temperate climates: prepare seedbed, surface sow as soon as soil is workable. Begin slug protection. |
| March–April | Germination window. Keep seedbed moist. Watch for slugs. First thinning when seedlings reach 5 cm. |
| April–May | Second thinning to final spacing. Plants establish quickly. Minimal watering needed unless dry spell. |
| May–June | First flowers on spring-sown plants. Begin cutting for bouquets. Deadhead to extend season. Put supports in place. |
| June–July | Peak bloom. Continue deadheading or begin leaving some heads for seed. Succession sow if not done already. |
| July–August | Plants begin to decline as heat builds. Allow chosen plants to set seed. Collect seed once capsule holes appear. Clear spent plants. |
Regional quick-fix adjustments
- Hot summers (SE USA, Mediterranean, parts of Australia): Sow in autumn only. Spring sowing in these climates almost always results in plants that bloom briefly and then bolt as temperatures rise. Choose the earliest-maturing varieties you can find.
- Late frosts and short seasons (Upper Midwest, Canada, mountain regions): Sow as early as you can work the soil — even if frost is still possible. P. rhoeas seedlings tolerate light frost once past the tiny seedling stage. Getting seeds into cool soil early is more important than waiting for frost-free conditions.
- High humidity (Gulf Coast, SE Asia, tropical zones): Prioritize spacing and air circulation above all else. Fungal issues are the primary threat. Sow thinly, thin aggressively, and avoid overhead irrigation. An autumn-to-winter window is your only realistic sowing time.
- Dry, arid climates (SW USA, Mediterranean summers): Mulch lightly after seedlings establish to conserve soil moisture. Water deeply and infrequently rather than little and often. Afternoon shade from a taller plant or structure extends the bloom period significantly.
- Mild, wet winters (Pacific NW USA, western UK, Ireland): Drainage is the priority. Autumn sowing works well here but waterlogged soil is a real risk. Raise beds or incorporate grit to keep roots out of standing water.
Quick troubleshooting checklist
| Symptom | Most Likely Cause | Quick Fix |
|---|---|---|
| No germination after 3 weeks | Seeds buried too deep OR soil too warm OR seed dried out | Re-sow on surface; water twice daily until emergence; check soil temp |
| Seedlings disappeared overnight | Slug damage | Scatter iron phosphate pellets; check at night with a torch |
| Leggy, pale seedlings | Not enough light | Move to full sun; thin surrounding plants |
| Plants flower then stop quickly | Heat stress or insufficient deadheading | Deadhead promptly; shade in afternoon if temperatures exceed 28°C |
| White powder on leaves | Powdery mildew (usually late season) | Increase spacing; water at base; rarely needs treatment |
| Yellowing leaves, wilting despite watering | Root rot from poor drainage | Improve drainage; reduce watering frequency |
| Low flower count despite healthy foliage | Soil too rich in nitrogen | Avoid fertilizing; do not add compost before next sowing |
What to grow next: companions, succession sowing, and long-term displays
Flanders poppies work beautifully alongside other hardy annuals that share the same cool-season sowing window. Cornflowers (Centaurea cyanus), corn chamomile (Anthemis arvensis), and nigella are natural companions, they share the field-flower aesthetic, enjoy the same lean soil and full sun, and can be direct-sown at exactly the same time. For a cutting garden, mixing them in a wildflower-style patch gives you waves of color from late spring through midsummer. If you want a taller, late-summer filler that complements poppies, see our guide on how to grow goldenrod for planting and timing tips.
Succession sowing is the simplest way to stretch your poppy season. Sow a first batch in early spring and a second batch three to four weeks later. In cooler climates you can sometimes squeeze in a third sowing, though this risks running into summer heat before plants have time to bloom. The key is getting each sowing into genuinely cool soil, even a few degrees makes a significant difference to germination speed and reliability.
If you enjoy Flanders poppies and want to explore the broader genus, growing red poppies as a wider category opens up a range of species and hybrids with similar flower forms but different habits. For something really different in terms of color, purple poppies offer a striking contrast in the same-style meadow or cutting garden setting. Each type has its own timing and character, but the core skills you develop with P. rhoeas, surface sowing, cool-season timing, minimal soil interference, transfer directly across the poppy family.
Once you have grown Flanders poppies once and seen how little they ask of you, they tend to become a permanent fixture in the garden. Let a few go to seed each year, scatter them around deliberately in autumn, and you will find they start to naturalize in ways that feel almost effortless. That, in the end, is exactly what a good annual flower should do.
FAQ
What species am I growing and does this guide cover illegal poppy types?
This guide is for red/Flanders poppies (Papaver rhoeas L.), the common field or Shirley-type poppy. It does NOT cover Papaver somniferum (opium/breadseed poppy) or any illegal cultivation. Advice here is safe, legal, and specific to P. rhoeas.
When is the exact best time to sow Papaver rhoeas in my region?
General timing: - Mild/maritime climates: sow thinly in autumn (Sep–Nov) for spring/early-summer blooms (natural cold period helps). - Cool/temperate climates: direct sow very early spring as soon as soil is workable (4–6 weeks before last frost). - Hot-summer/short-season areas: autumn sowing where winters are mild; otherwise sow very early spring into cool soil or use autumn-sown transplants if available. Aim to surface-sow when soil temps are about 10–18 °C (50–65 °F).
Should I start seeds indoors or direct-sow outdoors?
Prefer direct sowing in the final position because P. rhoeas has a delicate taproot and dislikes transplanting. Start indoors only if you must (very short seasons); use deep tall pots (≥30 cm / 12 in), sow on the surface in a light free-draining mix, and transplant carefully when seedlings are very small, understanding transplant shock risk.
How deep should I sow the seeds and how many per spot?
Sow seeds on the soil surface or press very lightly in; do NOT bury deeper than 1/8 inch (≈3 mm). Space sowing groups every 15–20 cm (6–8 in) if sowing several seeds then thin, or broadcast thinly and later thin to final spacing (see below).
What spacing and thinning should I use for best blooms and stems for cutting?
Thin seedlings to 15–30 cm (6–12 in) between plants. For cutting-quality long stems, aim for 20–30 cm (8–12 in) spacing to reduce floppiness and improve airflow. If sown in clumps, leave groups ~20–30 cm apart and thin to the strongest 1–3 plants per clump.
What temperature, light and days-to-germinate can I expect?
Germination favours cool/light conditions: soil 10–18 °C (50–65 °F) and light on the seed surface. Expect emergence in roughly 7–21 days under good conditions; slower germination (several weeks) can occur with colder soils or seed dormancy. Germination requires light exposure, so do not cover seeds.
Next Article
How to Grow Orange Poppy Flower: A Practical Step-by-Step Guide
How to grow orange poppy flower: step-by-step sowing, varieties by zone, care, troubleshooting & seed-saving tips.