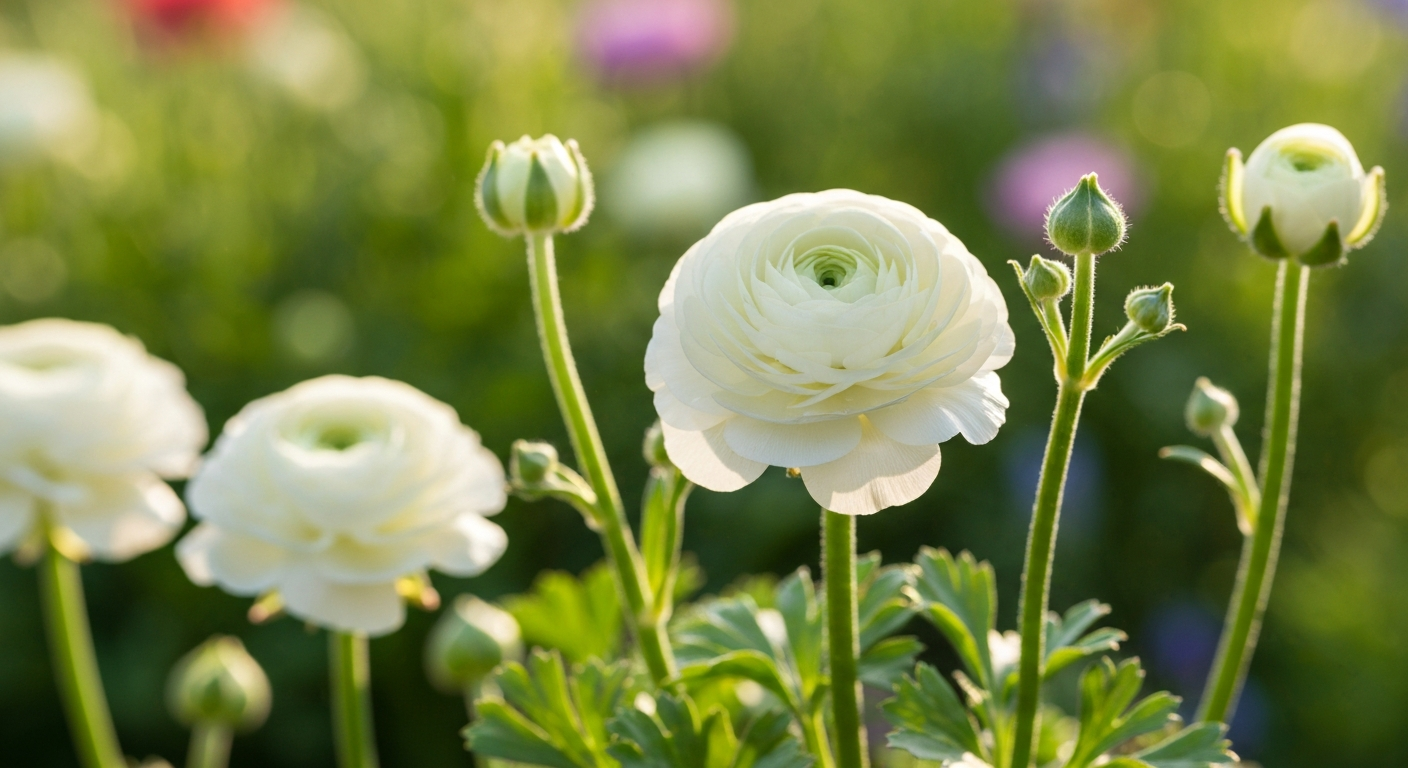
White buttercup in Grow a Garden refers primarily to Ranunculus asiaticus (Persian or florist's buttercup), a tuberous plant that produces layered, rose-like flowers in white and dozens of other shades. You can grow it from the small, claw-shaped corms sold at most garden centers and online seed suppliers, or from seed if you have patience. Extension Gardener Handbook, NC State (bulb/corm/tuber/rhizome definitions) defines a corm as a solid, swollen stem base used for storage and distinguishes corms from bulbs, tubers, and rhizomes Extension Gardener Handbook — NC State (bulb/corm/tuber/rhizome definitions). Plant corms claws-down in well-drained, slightly acidic soil (pH 5.8–6.3), keep them cool (40–65°F / 5–18°C), and you will have blooms in roughly 90 days. The white-flowered forms are among the most sought-after for cutting, wedding arrangements, and cottage-style borders, and they are genuinely achievable for a first-time grower.
How to Get White Buttercup in Grow a Garden: Step-by-Step Guide

What white buttercup actually is (and how to spot the real thing)
The name 'buttercup' covers a large genus, Ranunculus L., which Kew's Plants of the World Online lists as containing hundreds of accepted species. When gardeners and flower farmers talk about white buttercup, they almost always mean one of two plants. The first is Ranunculus asiaticus, the Persian or florist's buttercup, a tuberous geophyte native to the eastern Mediterranean. Ranunculus asiaticus, Plants of the World Online (RBG Kew) lists R. asiaticus as an accepted name and provides specimen images (digital images © RBG Kew, CC BY 3.0) Ranunculus asiaticus — Plants of the World Online (RBG Kew). Its flowers are large (3–5 cm across), fully double or semi-double, with tightly layered petals arranged like a small rose or peony. Stems are erect, typically 30–45 cm tall. This is the species sold as cut-flower corms at garden retailers. The second is Ranunculus aconitifolius 'Flore Pleno', sometimes sold as 'Fair Maids of France' or 'Fair Maids of Kent'. It is a vigorous herbaceous perennial with palmately divided basal leaves and smaller, fully double button-like white flowers (about 2 cm). It holds the RHS Award of Garden Merit and behaves quite differently from R. asiaticus, returning reliably each year in temperate gardens. A third species, Ranunculus acris (meadow buttercup), looks similar in name but bears small, single, glossy yellow flowers, not white, so it is a different plant entirely. For the ornamental white-flowered effect most gardeners are after, R. asiaticus and R. aconitifolius 'Flore Pleno' are your two real choices.
| Feature | R. asiaticus (Persian buttercup) | R. aconitifolius 'Flore Pleno' |
|---|---|---|
| Flower size | 3–5 cm, large layered petals | ~2 cm, small double buttons |
| Flower form | Double/semi-double, rose-like | Fully double, button-like |
| Stem height | 30–45 cm | 40–70 cm |
| Plant type | Tuberous geophyte (grown from corms) | Herbaceous perennial |
| Hardiness | Treat as annual; perennializes in zone 7+ | Hardy perennial in most temperate zones |
| Primary use | Cut flowers, pots, bedding | Border plant, cottage garden |
| White cultivars available? | Yes — widely available | Yes — the species flower is white |
For positive ID in the garden: R. asiaticus leaves are deeply divided and a bit fern-like at the base. Stems are mostly unbranched. The corms look like small octopus figures with stubby 'fingers' or claws, which is hard to confuse with anything else. R. aconitifolius 'Flore Pleno' has larger, more palmate leaves (think a small hand with three to five lobes) and produces its flowers in loose sprays on branching stems.
White-flowered varieties worth growing
Not all ranunculus sold at garden centers carry white forms, and not all white cultivars behave the same. Here are the ones I recommend based on availability and performance for home growers.
Ranunculus asiaticus white cultivars
- Romance White: Part of the widely grown Romance series from commercial breeders. Large, fully double flowers on sturdy 35–45 cm stems. Reliable germination from corms. One of the easiest for beginners.
- Butterfly White (Pon Pon): Smaller, more densely doubled flowers than Romance. Corms need a longer soak (around 12 hours) and slightly more spacing (10–12 inches within the row). Excellent for mixed arrangements.
- Elegance White / Tomer White: Taller cutting-type stems, popular with flower farmers. Less commonly stocked at small nurseries but easy to order online.
- Tecolote White: An older, dependable series with large blooms, widely available in mixed or single-color packs. Good all-around choice for garden beds.
Ranunculus aconitifolius 'Flore Pleno'
If you want a perennial white buttercup that comes back without lifting and storing, 'Flore Pleno' is the one. It is slower to establish than R. asiaticus and flowers in late spring rather than early spring, but once it settles in (typically by its second season), it is robust and long-lived. Buy it as a bare-root plant or pot-grown specimen from specialist herbaceous nurseries rather than trying to grow it from seed, which is slow and erratic.
Tools and supplies to get together before you start
You do not need much to grow white buttercup, but having everything ready before the corms arrive saves stress. Nothing derails a corm planting more than not having a container or the right soil mix to hand when those little claws land on your doorstep.
- Corms, seeds, or starter plants (see the sourcing section below)
- A shallow bowl or tray for pre-soaking corms (room temperature water, nothing special)
- Seed trays or module trays (if starting from seed indoors)
- 15–25 cm (6–10 inch) deep pots or a prepared garden bed — ranunculus roots need reasonable depth but are not massive
- Peat-free loam-based compost mixed with approximately 20% horticultural grit for pots, or garden soil amended with grit/coarse sand and organic matter for beds
- A soil pH meter or simple test kit — you are aiming for 5.8–6.3
- General balanced fertiliser (5-10-10 or similar low-nitrogen formula) and a liquid feed for when plants are actively growing
- Plant labels and a waterproof marker — critical when growing several cultivars side by side
- A cold frame, unheated greenhouse, or frost-fleece for zones 6–7 where late frosts are a risk
- Mesh or fleece to protect young growth from slugs and birds
Where to buy seeds, corms, and starter plants
Online sources
Online buying gives you the widest choice of white-specific cultivars. Johnny's Selected Seeds is the go-to for serious cut-flower growers in North America, they stock Romance and Butterfly series corms and publish detailed production guides. Swan Island Dahlias and Floret Farm also carry selected white ranunculus corms. In the UK, Sarah Raven, Hayloft Plants, and specialist bulb retailers such as Peter Nyssen stock R. asiaticus and, for the perennial type, R. aconitifolius 'Flore Pleno'. When ordering corms online, check that the supplier ships at the correct time for your region (autumn for mild zones, late winter/early spring for colder ones) rather than dispatching all orders at a single date.
Local nurseries and garden centers
Local nurseries stock ranunculus corms from late summer through early autumn in mild climates, and in February/March in colder areas. Mixed-color packs are more common than single white, so if pure white is your priority, you may need to order online. Independent nurseries that specialise in cottage-garden perennials are more likely to carry R. aconitifolius 'Flore Pleno' as a pot-grown plant in spring.
What to check on delivery
- Corms should be firm and dry, not shrivelled, mushy, or smelling of rot
- Each corm should show visible 'claws' or fingers — that is the root side, and it goes down
- A slight grey or beige dust on the surface is normal; active mould is not
- Seeds should arrive in sealed, labelled packets — check the packed-for year on the envelope
- Starter plants should have firm, dark green foliage with no yellowing, and no visible mould at the base of the stem
Seeds vs corms vs starter plants: which one makes sense for you
All three routes work, but they suit different situations and budgets. Here is an honest breakdown.
| Starting method | Pros | Cons | Rough cost (US, per plant) |
|---|---|---|---|
| Corms/tubers | Fastest to bloom (90 days), reliable, widely available, can lift and re-store | Need pre-soaking and sometimes pre-sprouting; variety range depends on supplier | $0.50–$2.00 per corm |
| Seeds | Cheapest per unit, more variety choice over time, satisfying for keen growers | Slow (130–150+ days to bloom), lower germination rate, harder for beginners | $0.05–$0.20 per seed |
| Starter plants | Quickest setup, no pre-treatment needed, can see the variety before buying | Most expensive, limited white-specific stock locally, shorter establishment window | $3.00–$6.00 per plant |
My recommendation: start with corms for your first season. They are forgiving, bloom relatively quickly, and give you a real feel for how ranunculus grows before you invest time in seeds. Once you have had one successful season, try growing a seed tray alongside your corm planting to broaden your varieties and keep costs down.
Planting timeline by climate and USDA zone
Ranunculus is a cool-season plant. It grows and flowers best when air temperatures stay between 40–65°F (5–18°C). Sustained heat above 65–70°F (18–21°C) can push it into dormancy, so the entire planting calendar revolves around giving it that cool window. In zones 8–11, that cool window is autumn through early spring. In zones 6–7, it is late winter through spring. In zones 5 and colder, you essentially grow it as a protected indoor/greenhouse crop until after last frost.
| USDA Zone | Climate type | When to plant corms | Expected bloom window | Notes |
|---|---|---|---|---|
| Zones 9–11 | Frost-free / mild winters | October–December | January–April | Plant directly in ground; no frost protection needed |
| Zone 8 | Mild, occasional frost | October–November | February–April | Light fleece protection on coldest nights |
| Zone 7 | Cool winters with moderate frost | Late February–March (pre-sprouted) | April–May | Pre-sprout indoors at 55–60°F; transplant after last frost |
| Zones 5–6 | Cold winters | March–April (after last frost risk) | May–June | Start pre-sprouted indoors in February; harden off carefully |
| Zone 4 and colder | Harsh winters | Treat as greenhouse/container crop | May–June under cover | Not practical for outdoor planting; grow in pots in a cold frame |
Step-by-step planting calendar for corms
- Week 1 (before planting date): Soak corms in room-temperature water (around 77°F / 25°C) for 8–12 hours. Romance series needs 8–12 hours; Butterfly series benefits from the full 12 hours. The corms will plump up noticeably.
- Weeks 2–4 (optional but recommended for cold zones): Chill soaked corms at 40–50°F (5–10°C) for approximately 3 weeks to simulate winter conditions. A spare refrigerator shelf works perfectly.
- Weeks 4–6 (pre-sprouting): Move chilled corms to a cool, bright spot at 55–60°F (12–16°C) for 2–4 weeks. Small white roots or shoots should emerge. This step is especially worthwhile in zones 5–7 where ground planting is delayed.
- Planting day: Set corms in prepared soil or containers with claws/fingers pointing downward and crown just at or just below the soil surface — cover with no more than 1/4 inch (6 mm) of soil above the crown. Space Romance types 6–8 inches apart within the row, 8–10 inches between rows. Space Butterfly types 10–12 inches within the row, 12–14 inches between rows.
- Weeks 5–8 after planting: First foliage emerges. Keep soil consistently moist but not waterlogged. This is when crown rot is most likely if drainage is poor.
- Weeks 10–14: Buds form. Begin liquid feeding every two weeks with a low-nitrogen, higher-potassium feed.
- Weeks 12–16: First flowers open. Harvest cut flowers when the bud is just beginning to unfurl (one or two outer petals showing colour) for the longest vase life.
Getting the soil and site right
Ranunculus will forgive a lot of beginner mistakes, but poor drainage is the one it will not overlook. Waterlogged soil around the corms almost always causes crown rot, and there is no coming back from that. Get drainage right first, then worry about everything else.
Site requirements
- Full sun: at least 6 hours of direct sun per day. Partial shade is tolerated but reduces flower number and stem length.
- Shelter from strong wind: the stems are relatively brittle once loaded with flowers; a hedge or fence as a windbreak is useful.
- Good air circulation: do not crowd plants against walls or dense shrubs; stagnant air encourages powdery mildew.
Soil preparation
Aim for a soil pH of 5.8–6.3 (slightly acidic to near-neutral). Test your bed before planting; if your pH is above 6.5, work in a little sulphur or acidic compost. If it is below 5.5, add garden lime a few weeks before planting. Ranunculus wants cool, moist, very well-drained soil. For clay-heavy soils, dig in a 5–8 cm layer of coarse horticultural grit and well-rotted organic matter (compost or aged manure) to open up the structure. For sandy soils, add more organic matter to improve moisture retention. Raised beds 20–30 cm high are ideal in areas with naturally poor drainage, they give instant drainage improvement without major excavation.
Bed preparation steps
- Test soil pH and correct if needed at least 2–3 weeks before planting.
- Dig the bed to a depth of about 25 cm (10 inches), breaking up any compaction.
- Incorporate a 5–8 cm layer of well-rotted compost and, on heavy soils, the same depth of coarse grit.
- Rake level and allow to settle for at least a week before planting.
- Apply a balanced slow-release fertiliser (follow pack rate) and rake it into the top 10 cm of soil at planting time.
Sowing from seed: step-by-step
Growing ranunculus from seed takes real patience, expect 130–150 days from sowing to first flower, compared to around 90 days from corms. Germination is also more variable, sometimes reaching 60–70% at best. That said, seed-grown plants can yield a wider genetic variety of whites and creams than buying pre-selected corms, and the per-plant cost is very low. I always start seed indoors rather than direct sowing.
Indoor sowing (recommended method)
- Timing: Start seeds 12–15 weeks before your planned outdoor planting date, or in autumn for mild-climate growers. For zones 7–8, that often means sowing in October or November. For zones 5–6, sow in January or February.
- Fill module trays or 7 cm pots with fresh, peat-free seed compost. Firm lightly and water in.
- Sow one or two seeds per module at the surface — ranunculus seeds need light to germinate and should not be buried. Press gently onto the surface and mist with a spray bottle.
- Cover trays with a clear plastic lid or cling film to retain moisture. Place in a cool location: 50–55°F (10–13°C) is ideal. A cool windowsill, unheated porch, or cold frame works well.
- Germination takes 10–21 days at cool temperatures. Do not let the trays dry out, but avoid standing water in the base tray.
- Once seedlings show their first true leaves, remove the cover, maintain cool temperatures, and begin watering from below.
- Pot on into individual 9 cm pots when seedlings are large enough to handle. Harden off over 7–10 days before transplanting outdoors.
Direct sowing outdoors
Direct sowing works in mild climates (zones 8–11) in autumn. Prepare the bed as described, scatter seed thinly, press into the surface, and keep moist. Thin seedlings to 15–20 cm apart once they reach 5 cm tall. Germination is less reliable outdoors because of temperature fluctuations, but in a warm, stable autumn climate it is a low-effort option. Protect seedlings from slugs immediately, young ranunculus foliage is one of their favourites.
Light, water, and feeding through the growing season
Once ranunculus is in the ground or container, it needs consistent attention through its relatively short active season. It is not a plant you can set and forget, but the routine is simple once you understand what it wants.
Watering
Keep soil consistently moist but never waterlogged. In practical terms, water when the top 2–3 cm of soil is dry to the touch. During active growth, that might mean every 2–3 days in dry weather. Reduce watering once temperatures rise and the plant begins to yellow and die back toward dormancy, at that point, extra water encourages rot rather than growth. For containers, ensure water runs freely from the drainage holes at each watering and then let the pot drain completely.
Feeding
At planting, a balanced slow-release fertiliser mixed into the soil is enough to get corms established. Once the first flower buds form, switch to a liquid feed every two weeks with a formulation higher in potassium than nitrogen, something like a tomato feed works well. High-nitrogen feeds push leafy growth at the expense of flowers. Stop feeding entirely once the plant starts to go dormant.
Mulching
A 5–7 cm layer of fine organic mulch (shredded leaves, fine bark, or straw) around the base of plants helps retain soil moisture, moderates soil temperature, and suppresses weeds. Keep mulch just clear of the crown to avoid trapping moisture against the stems, which can encourage rot.
Container growing vs in-ground: how to decide
Containers are ideal if your garden soil has drainage problems, if you are in a colder zone and need to bring plants under cover, or if you simply want ranunculus on a patio. The RHS recommends planting Persian buttercup tubers in peat-free loam-based compost mixed with around 20% horticultural grit, placing corms claws-down, spacing them about 10 cm (4 inches) apart, and covering with approximately 5 cm (2 inches) of compost. Use a pot at least 20 cm (8 inches) deep to give roots room. Place containers in a cool greenhouse or cold frame to protect from frost through establishment.
In-ground planting gives better results in good, well-drained soil because roots can spread freely and the microclimate around a larger soil mass stays more stable. Plants in the ground also tend to produce more stems per corm. If you are choosing between the two and your garden bed has good drainage, go in-ground. If you live in zone 6 or colder, containers that can be moved to shelter give you much more control over the timing.
Routine care through flowering
- Deadhead spent flowers regularly to encourage more buds to form and extend the flowering window by 2–3 weeks
- Check for slug and snail damage on young foliage, especially after rain — set traps or apply organic iron phosphate pellets early
- Stake tall-stemmed varieties (such as Elegance or Tomer) loosely with bamboo canes if your site is exposed to wind
- Once more than half the leaves have yellowed and stems are flopping, stop watering and allow the plant to die back naturally — this signals dormancy and is healthy, not a problem
- Remove dead foliage once it is completely dry to reduce slug habitat and disease carryover
Pests and diseases to watch for (and what to do)
Common pests
| Pest/Disease | What you see | Organic fix |
|---|---|---|
| Slugs and snails | Ragged holes in young leaves; slime trails | Iron phosphate pellets, copper tape around pots, hand pick at dusk |
| Aphids | Sticky residue, distorted new growth, visible colonies on stems | Strong jet of water; spray with diluted neem oil or insecticidal soap |
| Thrips | Silvery streaks on petals; flowers fail to open properly | Remove affected buds; use yellow sticky traps; neem oil spray |
| Crown rot (Sclerotinia / Pythium) | Sudden wilt at base; mushy brown stem tissue at crown | Improve drainage immediately; remove and destroy affected plants; do not replant in the same spot |
| Powdery mildew | White dusty coating on leaves, usually late season | Improve air circulation; spray with dilute potassium bicarbonate solution; remove worst-affected leaves |
| Botrytis (grey mould) | Grey fuzzy growth on stems and petals in humid conditions | Remove affected material; reduce overhead watering; improve ventilation |
Crown rot is the one to take most seriously because it can wipe out an entire planting quickly. It almost always stems from waterlogged soil or planting corms too deep. If you get the soil drainage right before planting, your risk drops dramatically. For everything else, early intervention and good airflow are the most reliable defences.
Harvesting white buttercup as a cut flower
White ranunculus is exceptional as a cut flower, the clean colour works with almost everything and the layered petals hold up for 7–10 days in a vase. Cut stems in the early morning when temperatures are cool. The right harvest stage is when the flower bud is just beginning to open: one or two outer petals have unfurled but the centre is still mostly closed. Flowers cut at this stage will open fully in the vase and last significantly longer than flowers cut when fully open. Use clean, sharp scissors or a knife and plunge stems immediately into a bucket of cool water. Remove any foliage that would sit below the waterline in your vase. Change the vase water every two days and re-cut the stem bases at an angle to extend vase life.
Lifting, storing, and propagating corms for next season
When and how to lift corms
In zones 6 and colder, corms must be lifted after flowering and stored through summer and autumn. Wait until the foliage has completely yellowed and died back, then carefully dig up the corms with a fork, working well away from the crown to avoid spearing them. Shake off the soil and allow corms to dry in a warm, well-ventilated spot for about a week. Once fully dry, store in paper bags or a mesh onion bag filled with dry vermiculite or dry peat-free compost in a cool (40–50°F / 5–10°C), dry, dark location until planting time the following season.
In zones 7 and milder
Ranunculus corms can perennialize in the ground in USDA zone 7 and warmer, especially with a layer of mulch over them in winter. Many gardeners in zones 8–9 simply leave corms in the ground year-round. Check each autumn by gently probing around the crown, if the corms are firm and dry, leave them. If the soil stays wet through summer, it is usually safer to lift and store.
Propagation
Ranunculus corms do not divide the way dahlia tubers do, but over time each corm produces offsets, small daughter corms attached to the parent. When lifting corms, detach these offsets carefully, dry them, and store separately. They can be planted the following season and will typically reach flowering size in their second year. For R. aconitifolius 'Flore Pleno', division of the clump in early spring (as growth begins) is the standard propagation method, lift the clump, split into sections with at least two or three growing points each, and replant immediately.
Troubleshooting the most common problems
| Problem | Likely cause | Fix |
|---|---|---|
| Corms rot before sprouting | Waterlogged soil, planted too deep, or not pre-soaked properly | Improve drainage; plant crown at surface; soak corms 8–12 hours before planting |
| No flowers after 16+ weeks | Too warm (above 65°F); planted too late; corms too shallow | Check temperature; adjust planting timing for next season; confirm corm orientation |
| Yellowing leaves early in season | Overwatering, poor drainage, or nutrient deficiency | Check drainage; reduce watering; apply balanced liquid feed |
| Leggy, pale seedlings (from seed) | Insufficient light or too-warm germination temperature | Move to brighter location; keep at 50–55°F during germination |
| Flowers open but are not pure white | Mixed-color corm pack was used, or cross-pollination in seed stock | Source single-color 'white' corms explicitly next time |
| Plant collapses suddenly at soil level | Crown rot (Pythium or Sclerotinia) | Remove plant; do not water area; improve drainage before replanting |
| Flowers open quickly and drop petals fast | Harvested too late, or indoor temperature too warm in vase location | Harvest at earlier bud stage; keep vase water fresh and cool |
Seasonal checklist at a glance
Use this as a quick reference to keep your white buttercup planting on track through the year. The exact months shift depending on your zone, but the sequence stays the same.
| Stage | Task | Zone 8–11 timing | Zone 6–7 timing |
|---|---|---|---|
| Pre-plant | Source corms/seeds; test soil pH; amend bed | August–September | December–January |
| Soak and pre-sprout | Soak corms 8–12h; optionally chill and pre-sprout | September–October | January–February |
| Plant out | Set corms claws-down, crown at surface, correct spacing | October–December | March–April (after frost risk) |
| Early growth | Monitor moisture; protect from slugs; avoid overwatering | November–January | April–May |
| Budding | Begin liquid feeding every 2 weeks; stake if needed | January–February | May |
| Flowering | Harvest cut flowers at bud stage; deadhead for more blooms | February–April | May–June |
| Post-flowering | Reduce watering; allow foliage to die back naturally | April–May | June–July |
| Lift and store (colder zones) | Lift corms when foliage is fully dead; dry and store in cool, dry place | Not usually needed | July–August |
A few extra tips from hands-on experience
The pre-soaking step surprises a lot of first-time growers because the corms look so small and strange before soaking. After 8–12 hours in water, they plump up visibly and the claws become much easier to identify, that moment of recognition (this goes down, that goes up) makes the planting step far less daunting. If you are in a colder zone and find your ranunculus bloom window is very short because summer heat arrives early, try starting corms in individual 9 cm pots indoors in late January and transplanting out as soon as your last frost date passes. The head start gives you an extra two to three weeks of cool-weather flowering before the heat shuts things down. If you’re exploring other easy-to-grow, heat-tolerant flowering vines, see a short guide on how to grow butterfly pea for a reliable summer bloomer and natural dye source.
If you enjoy growing for pollinators, single-flowered ranunculus varieties are far more useful to bees than the fully double types, which have so many petals that insects struggle to reach the pollen. See butterfly plants how to grow for guidance on selecting and cultivating pollinator-friendly species that complement your ranunculus. If you'd like another pollinator-friendly option, see how to grow butterfly pea flower for a vigorous, nectar-rich annual. The single whites are less showy but genuinely bee-friendly, worth planting a row alongside your doubles. If you want to attract and support monarch butterflies as well, see a short guide on how to grow milkweed for monarchs. For those already interested in other plants that support pollinators and beneficial insects, growing plants like butterfly weed, milkweed, or butterfly pea flower alongside your ranunculus bed creates a far richer garden ecosystem through the season.
Finally, do not panic if your first season produces uneven results. Ranunculus has a bit of a learning curve around drainage and timing, but once you have grown it through one full cycle from corm to flower to dormancy, the whole thing clicks. The second year is almost always better than the first.
FAQ
How do I identify white buttercup types (which species/varieties produce white flowers)?
Look at flower form, size and leaves. Common white types sold to home gardeners include: Ranunculus asiaticus (florist/Persian buttercup) — larger 3–5 cm layered, rose‑like single or double blooms on erect stems; Ranunculus aconitifolius 'Flore Pleno' — small (~2 cm) fully double button‑like white flowers with palmately divided basal leaves; (note) R. acris is a meadow buttercup (usually yellow). Use leaf shape (basal divided leaves for R. aconitifolius) and flower size/structure to confirm. If buying, use the seller’s botanical name (R. asiaticus or R. aconitifolius) to avoid confusion.
Where can I source white buttercup plants, corms/tubers or seeds?
Options: online bulb/tuber specialists (search for Ranunculus asiaticus tubers/corms or R. aconitifolius plants), reputable seed companies (for seeds or specialty mixes), local nurseries and garden centers (spring/summer sales), growers’ markets or plant swaps (starter plants), and mail‑order cut‑flower suppliers. Buy from vendors that list the botanical name and freshness date. For R. asiaticus buy tuberous corms (often sold as “corms/tubers”); seeds are less common and slower for florists’ types.
When should I plant white buttercup by climate/zone (general timeline)?
General schedules: Zones 8–11 (mild winters): plant pre‑soaked corms in autumn (Oct–Dec) for late winter/spring bloom. Zones 6–7 (cooler): pre‑sprout corms indoors in late winter (Jan–Mar) and transplant out after frost risk; you can plant outdoors in early spring once soil is workable. Zones ≤5 (cold): start tubers in pots in a protected, cool bright spot or greenhouse in late winter and transplant out mid/late spring. If using seed, sow indoors 8–10 weeks before last frost or sow outdoors in cool spring/early autumn if local seed strains permit.
What exact pre‑plant preparation do corms/tubers need (soak/chill/sprout)?
Typical commercial/home protocol: soak corms in tepid water (about 20–25°C / 68–77°F) for 8–12 hours to rehydrate. Optional: place on a tray in a cool, dark spot to allow roots to start. For earlier/surer flowering, chill soaked corms at 4–10°C (40–50°F) for ~3 weeks, then move to 12–16°C (55–60°F) to sprout for 2–4 weeks until shoots appear. Orient corms with the ‘fingers/claws’ (root side) down when planting; crown/shoot side up, just beneath the surface.
What planting depth, spacing and orientation should I use for corms and seedlings?
Corms (R. asiaticus): plant with crown just below soil surface — industry recommendation ranges from very shallow (1/8–1/4 in / ~3–6 mm) to about 2 in (5 cm) in containers depending on guide; a safe home rule: place corms 2–3 cm (about 1 inch) below surface in well‑draining medium. Space 15–25 cm (6–10 in) apart for Romance series; butterfly/large types 25–30 cm (10–12 in). For R. aconitifolius, follow label spacing (~20–30 cm / 8–12 in). For seedlings started indoors, pot up into individual pots and transplant outdoors when foliage is established and frost risk has passed, spacing as above.
What soil/media, pH and drainage do buttercups need?
Use a cool, moist but well‑drained soil or loam‑based compost. Target slightly acidic to neutral pH ~5.8–6.5. Improve heavy soils with coarse horticultural grit or sharp sand and organic matter (compost) to ensure drainage. In containers use a loam‑based, peat‑free compost blended with 10–25% grit or perlite. Avoid water‑logged conditions which cause rot.
Butterfly plants how to grow: Step-by-step guide gardeners
How to grow butterfly plants: step-by-step planting, seed care, variety tips, pest control & seed-saving.