Plant a locally native milkweed species for your region, direct-sow it in fall so winter cold handles the stratification for you, keep the soil moist during germination, and give it full sun with well-drained soil. That is the whole formula. Everything below fills in the details so you can go from seed packet to a yard full of monarch eggs this season.
How to Grow Milkweed for Monarchs: Step-by-Step Guide

Marcus Holloway
4 May 2026

Which milkweed to plant for monarchs
The single most important decision you will make is choosing a species that is native to your region. Monarchs evolved alongside native milkweeds, and local species are best matched to your soil, your climate, and the timing of the monarch migration through your area. The Xerces Society and Monarch Joint Venture both emphasize this strongly, and neither recommends tropical milkweed (Asclepias curassavica) even when native seed is hard to find. Tropical milkweed can disrupt monarch migration cues because it stays green too long, and it harbors a protozoan parasite called OE at higher rates.
Nearly 40 milkweed species are available as seed nationwide, but what you can actually get depends heavily on where you live. Here are the most widely available native species and where they tend to thrive:
| Species | Common Name | Best Regions | Soil/Moisture Notes |
|---|---|---|---|
| Asclepias tuberosa | Butterfly weed | East, Midwest, South, parts of West | Well-drained, dry to average, sandy loam, full to part sun |
| Asclepias incarnata | Swamp milkweed | East, Midwest, South | Moisture-retentive to damp soils, full sun |
| Asclepias syriaca | Common milkweed | East and Midwest | Average to poor, well-drained, full sun, spreads by rhizome |
| Asclepias speciosa | Showy milkweed | Western U.S. | Dry to average, well-drained, full sun |
| Asclepias fascicularis | Narrowleaf milkweed | Pacific Coast, Southwest | Dry, well-drained, full sun |
| Asclepias viridis | Green-flowered milkweed | South-Central, Southeast | Well-drained, average to dry, full sun |
To find the exact priority species for your county, use the Xerces Society Milkweed Finder or check the Monarch Joint Venture's region-specific milkweed fact sheets. They do the regional homework for you. If you are in the Southeast, for example, the Monarch Joint Venture fact sheet will list several species with notes on what monarchs in that corridor need most. Butterfly weed (A. tuberosa) is a reliable starting point almost everywhere east of the Rockies, and it is genuinely beautiful, which does not hurt.
A quick note: if you are also interested in growing butterfly weed specifically, it gets its own deep-dive treatment elsewhere on this site since it has some quirks worth knowing about (especially its deep taproot, which makes transplanting tricky).
When to plant: timing and season planning
In most parts of the United States, fall is the best time to direct-sow milkweed seed. You scatter the seeds before the ground freezes, winter does the cold stratification work naturally, and seeds germinate the following spring when temperatures are right. This mimics exactly what milkweed does in the wild, and it dramatically improves germination rates compared to trying to force spring-sown seed without preparation.
If you missed the fall window or want to start seeds indoors for spring transplanting, here is the timing math: most native milkweeds benefit from 4 weeks of cold, moist stratification followed by about 8 weeks of indoor seedling growth before transplanting. That means you need to start the whole process roughly 3 months before your last frost date. For most of the Midwest and Northeast, that puts indoor stratification starting in late January or early February for a late April or May transplant date.
| Method | When to Start | Target Outcome |
|---|---|---|
| Fall direct sow (recommended) | October to November, before ground freezes | Natural spring germination, no extra work needed |
| Indoor stratification + seed starting | ~3 months before last frost (often late Jan to Feb) | Transplant-ready seedlings by late April/May |
| Spring direct sow (some regions) | 2 to 4 weeks before last frost | Lower germination rates without prior stratification |
Early-season milkweed matters a lot for monarchs. The first wave of adults returning from Mexico in spring needs plants ready to go for egg-laying. If your milkweed is just emerging in late June, you are missing the early breeding window. Planning for fall sowing or early indoor starts is how you serve that first monarch generation.
How to get milkweed seeds to germinate
Cold stratification is the key. Most native milkweed seeds have a dormancy that needs a cold, moist period to break. Skip this step and you will sit staring at a pot of dirt for weeks wondering what went wrong. Oklahoma State University Extension specifically flags stratification as critical for germination success, and in my experience it makes a night-and-day difference.
How to cold stratify milkweed seeds at home
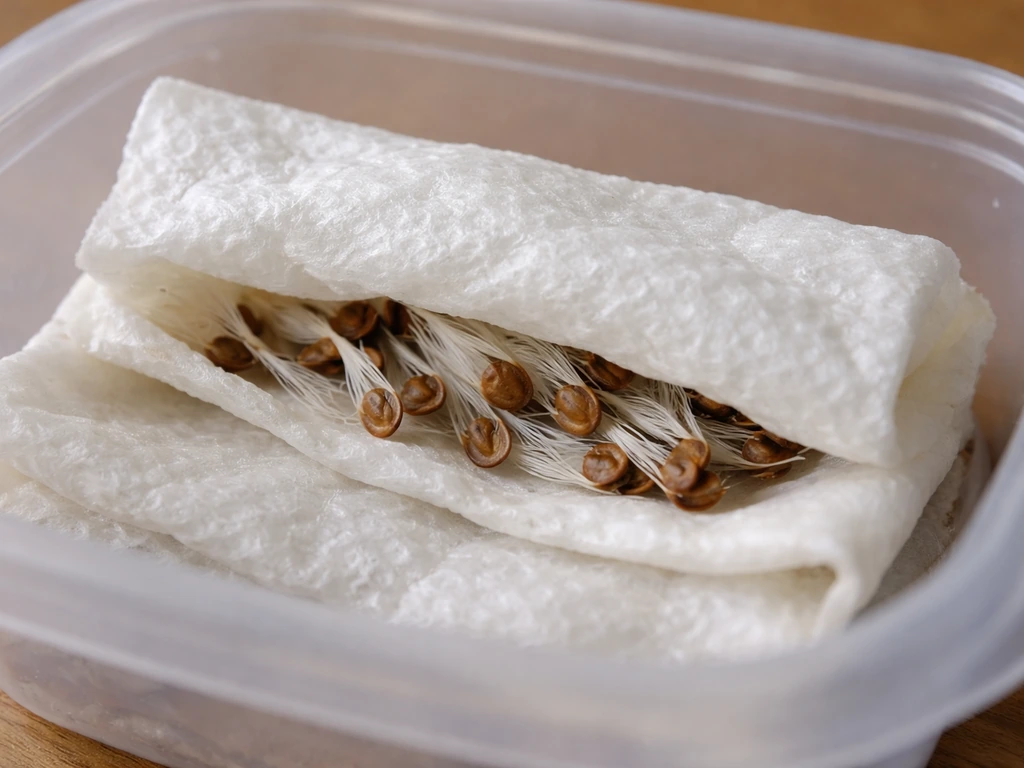
- Dampen a paper towel until it is moist but not dripping. Wring it out if it is soggy.
- Spread your seeds on one half of the towel, then fold the other half over them.
- Slip the towel into a zip-top plastic bag and seal it.
- Label the bag with the species and date, then put it in your refrigerator (not the freezer) at around 35 to 40 degrees F.
- Leave it there for 4 weeks. Check every week or so to make sure the towel is still damp. Mist if needed.
- After 4 weeks, plant the seeds immediately. Do not let them dry out between stratification and sowing.
If you are fall direct-sowing outdoors, you skip all of the above. Just press seeds into prepared soil before the ground freezes, and nature handles stratification through winter. The soil needs to stay moist during the germination period the following spring, so keep an eye on moisture levels in early spring if rainfall is scarce.
Troubleshooting poor germination
If you have done stratification and planted indoors but see nothing after about 2 weeks, check a few seeds by gently digging them up. If they are shriveled or rotted, the soil was too wet. If they look intact and plump but have not cracked open, they may need more warmth. Milkweed germinates best when soil temperatures are consistently around 65 to 75 degrees F after stratification. A heat mat under your seed tray helps a lot. If seeds have started to sprout inside the bag during stratification (it happens), plant them immediately and handle them carefully.
Soil, sun, and watering requirements
Most milkweeds are not fussy, but they do have some non-negotiables. Here is what actually matters:
Sunlight
Full sun is what milkweed wants. Aim for at least 6 hours of direct sun per day. Butterfly weed (A. tuberosa) tolerates part sun but will be leggier and bloom less. Swamp milkweed prefers full sun even though it grows naturally along stream banks. If your only available spot gets 4 to 5 hours, it can work, but do not expect the same vigor.
Soil
Different species want different moisture levels, which is worth matching to your yard. Butterfly weed thrives in poor, dry, well-drained soil, including sandy loam or even rocky ground. It actively dislikes rich, wet soil and will rot or perform poorly if planted in clay that holds water. Swamp milkweed is the opposite, growing happily in moisture-retentive or even damp soils. Common milkweed and showy milkweed are somewhere in the middle and are the most forgiving of average garden conditions. For butterfly weed specifically, the University of Tennessee notes a preference for moderately acidic to neutral pH (roughly 5.5 to 7.0). Amend heavy clay with coarse sand and a bit of compost before planting.
Watering
During germination and establishment, keep soil consistently moist but never soggy. Once established (typically after the first full growing season), most native milkweeds are quite drought-tolerant. Butterfly weed in particular wants you to back off watering once it is settled in. Overwatering established butterfly weed is one of the most common ways to kill it. For seedlings started indoors, the biggest risk is damping-off, a fungal problem that attacks stems at soil level when things stay too wet. Use a well-draining seed-starting mix, water from the bottom when possible, and make sure there is good airflow around your seedlings.
Fertilizer
Skip the fertilizer, honestly. Milkweed evolved in poor soils and does not need or want rich feeding. Heavy nitrogen will push lots of lush green growth at the expense of flowers, and it can make plants more attractive to aphids. Compost worked into the planting hole at establishment is all you need.
Planting milkweed: in-ground vs containers
Both work, but they come with different trade-offs. Here is how to think about the choice:
In-ground planting
In-ground is ideal for long-term monarch habitat. Milkweed plants establish deep root systems over time, become more drought-tolerant, and naturalize into stable colonies that return every year. USDA-NRCS plug-planting guidelines recommend spacing plants 18 to 24 inches apart, which is a good general target for most species. If you are planting densely for maximum impact, research on spacing density suggests 8 to 12 inches apart can maximize plant numbers per area, though plants may be a bit smaller individually. Block planting (a cluster of the same species together rather than isolated specimens) is much more visible to monarchs and creates a better egg-laying target.
Before you plant, pull every weed from the planting area. Milkweed seedlings are slow to establish and will get smothered by fast-growing weeds in their first season. Clear the area thoroughly, plant, then mulch lightly around (but not directly against) the stems. Expect the first year to look underwhelming. Many native milkweeds focus on root development in year one and do not bloom heavily until year two or three. Do not give up on them.
Container growing
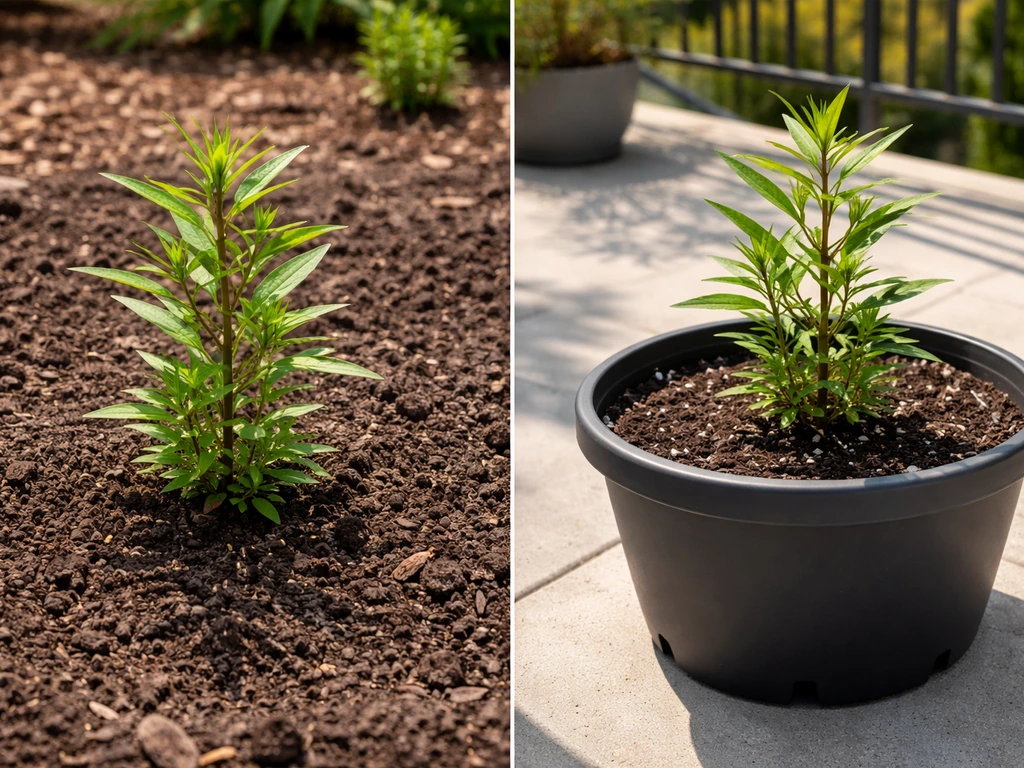
Containers are a solid option if you have a patio, balcony, or limited ground space. Swamp milkweed does especially well in containers because of its more upright form and tolerance for regular moisture. Butterfly weed can work in containers if drainage is excellent. If you are learning butterfly pea flower plant how to grow, you will want to focus on sun, soil drainage, and consistent watering during establishment. Use a container that is at least 12 to 14 inches deep (milkweed has a significant taproot even in pots), go with a fast-draining potting mix, and water more frequently than you would in-ground since containers dry out faster. The downside of containers is that you will need to water consistently through the season, and plants may need dividing or replacing after a few years as roots crowd the pot. You also lose the perennial naturalizing effect that makes in-ground planting so powerful for long-term monarch support.
| Factor | In-Ground | Container |
|---|---|---|
| Long-term monarch habitat | Excellent, naturalizes over years | Good short-term, less stable long-term |
| Watering demands | Low once established | Higher, requires consistent monitoring |
| Best species | All native milkweeds | Swamp milkweed, butterfly weed (with care) |
| Root depth needed | Unlimited | Minimum 12 to 14 inches |
| Weed management | Important in first year | Minimal |
| Mobility | Fixed | Can move for sun optimization |
Ongoing care, pests, and troubleshooting
Caring for established plants
Once milkweed is established, your main jobs are weeding in spring before plants get tall, cutting back dead stems in late fall or early spring (leave some stems standing through winter since hollow stems provide insect habitat), and watching for the issues below. Do not cut milkweed back in midsummer if there are monarch caterpillars on it. That is the whole point.
Aphids
Bright yellow-orange oleander aphids (Aphis nerii) are almost guaranteed to show up on milkweed at some point. They cluster in large numbers on stems and new growth. Here is the thing: they are annoying but rarely lethal to an established plant. More importantly, if you blast them off with a strong jet of water, you risk knocking monarch eggs or tiny caterpillars off the plant too. SDSU Extension specifically cautions against high-pressure water removal for this reason. Your best approach is to squish aphid clusters by hand when populations are small, encourage natural predators like ladybugs and parasitic wasps, and tolerate moderate aphid levels on plants without caterpillars present. Never use insecticides on milkweed or anywhere near it.
Pesticides: the hard rule
Do not use pesticides on or near milkweed. Monarch Joint Venture guidance on mowing and habitat management recommends pruning tropical milkweed stalks down to about 6 inches in fall or winter to help prevent winter-breeding colonies cutting tropical milkweed stalks down to about 6 inches in fall or winter to help prevent winter-breeding colonies. This is non-negotiable. Systemic insecticides in particular (like imidacloprid and other neonicotinoids) are absorbed into plant tissue and will kill monarch caterpillars that eat the leaves, even if you applied the product weeks earlier. The Monarch Joint Venture states clearly that avoiding pesticides is critical, and the EPA recommends integrated pest management approaches and spray drift reduction. If a neighboring area needs treatment, flag your milkweed plants and make sure there is a buffer. Even organic pesticides like spinosad can harm caterpillars.
Leggy or weak seedlings
If your indoor seedlings are stretching and falling over, they are not getting enough light. Move them under grow lights positioned 2 to 3 inches above the seedling tops, or to your sunniest window. Running a small fan near seedlings for an hour or two a day also strengthens stems. Leggy seedlings planted in the garden rarely catch up well, so fix the light problem early.
Damping-off
If seedlings suddenly keel over at the soil line, that is damping-off, a fungal problem. It spreads fast to neighboring seedlings once it starts. Remove affected plants immediately, reduce watering, improve airflow, and consider a light dusting of cinnamon (a mild natural antifungal) on the soil surface. Prevention is much easier than cure: use fresh seed-starting mix, do not reuse old potting soil, and never let trays sit in standing water.
Plants not coming back in spring
Native milkweed is one of the last perennials to emerge in spring. If you are trying to raise a specific variety like white buttercup, choose a species-appropriate planting spot and follow its sowing and soil needs alongside your milkweed plan. Do not panic in April. Butterfly weed especially can stay dormant until late May in colder zones. Mark your plant locations with a stake so you do not accidentally dig them up. If there is still no sign of life by early summer, gently scratch the soil near the crown. If you see white or pale tissue, it is alive and just slow. Give it more time.
Monarch-focused garden planning and next steps checklist
Growing milkweed is the foundation, but a monarch-friendly garden needs a bit more thought to really work. Monarchs need milkweed for egg-laying and larval food, but they also need nectar plants to fuel adults during migration and breeding. Pair your milkweed with native nectar sources that bloom in spring (for returning adults), summer (for breeding generations), and late summer through fall (for the generation making the journey to Mexico). Plants like native asters, goldenrod, and coneflowers are classic companions.
Plant milkweed in visible, sunny blocks rather than scattered individual plants. A cluster of five or more plants is far more effective at attracting egg-laying females than a single specimen tucked in a corner. If you have room, plant two or three milkweed species with different bloom times to extend availability through the season.
Your season-by-season action checklist
| Timing | Action |
|---|---|
| Now (spring/early summer) | Identify native milkweed species for your region using Xerces Milkweed Finder or Monarch Joint Venture fact sheets |
| Now (spring/early summer) | Source seed or plugs from a native plant nursery or native seed supplier |
| Now (spring/early summer) | If planting plugs, prepare planting area: clear weeds, amend soil if needed, plan spacing at 18 to 24 inches |
| Now (spring/early summer) | Plant plugs and water in thoroughly; check soil moisture daily for first 2 to 3 months |
| Summer | Monitor for aphids; manage by hand-squishing; watch for monarch eggs on leaf undersides |
| Summer | Do NOT cut back milkweed if caterpillars are present |
| Late summer/fall | Collect seed heads if you want to save seed for next season |
| October to November | Direct-sow saved or purchased seed in prepared outdoor beds before ground freezes |
| January to February (indoor option) | Begin cold stratification of seeds in refrigerator for 4 weeks if planning indoor start |
| February to March (indoor option) | Sow stratified seeds under grow lights in well-draining seed-starting mix; maintain 65 to 75 degrees F |
| Late April to May (indoor option) | Harden off seedlings and transplant after last frost date |
| Early spring | Mark plant locations before dormant plants emerge; resist digging; wait patiently for late-emerging species like butterfly weed |
One last thing worth knowing: newly established milkweed plants may not flower much in their first year, and that is completely normal. They are busy building root systems. By year two they will hit their stride, and by year three you will likely have more monarchs than you expected. The work you do this season is an investment that pays off over many years of monarch habitat.
FAQ
Can I use any milkweed species if I do not know what is native to my area?
If your goal is monarch breeding, prioritize local species over any “off-brand” milkweed from other regions. Even if a non-native milkweed grows well in your yard, the migration timing and monarch egg-laying preferences are usually better matched with your county’s native species.
What if I only have spring seed, can I still grow milkweed for monarchs?
Yes, but only if you can provide the cold, moist stratification consistently. The safest approach is to mimic the same schedule as an indoor start, then transplant after last frost, using well-drained soil to avoid rotting. Without that preparation, spring sowing often leads to poor, uneven germination.
My milkweed seeds sprouted but then died, what’s the most likely cause?
You may be watering too little during germination or too much after sprouting. During the seedling stage, aim for soil that feels evenly moist but not wet, and make sure containers have drainage holes. For indoor seedlings, top-up watering too frequently is a common cause of damping-off.
How often should I water milkweed after it is established?
A good rule is to treat established milkweed like a drought-tolerant perennial, not a houseplant. Once the first full growing season is done, reduce watering significantly and only irrigate during extended dry spells. Overwatering, especially for butterfly weed, is one of the fastest ways to lose plants.
Do I need fertilizer to get more milkweed flowers for monarchs?
Mixing potting soils, compost, or fertilizer can create conditions milkweed does not want. Use a fast-draining seed-starting mix for indoor sowing, and for outdoor planting keep amendments light, typically only compost at establishment. Skip any high-nitrogen fertilizer since it can reduce flowering and attract more aphids.
Can I grow milkweed for monarchs in partial shade and still have good results?
Not usually. If your area has monarchs, the best milkweed placement is in full sun and in visible, clustered blocks so females can find it quickly. You can grow in partial shade, but expect slower growth and fewer flowers on species that really want strong light.
Is it better to transplant milkweed seedlings or direct-sow the seed?
Yes, but be careful about handling and placement. Milkweed is easiest when you plant seeds where you want the mature plants, especially if you are starting with species that form deep roots. If you must transplant, keep root disturbance minimal, keep seedlings moist but not soggy, and expect slower establishment.
When should I cut back milkweed, and should I ever do it during caterpillar season?
Leave stems through winter so beneficial insects can overwinter, then cut back in late winter or early spring before new growth accelerates. Also remove any dead, damaged parts, but avoid pruning mid-season if caterpillars are present.
What should I do about oleander aphids on milkweed?
Use integrated pest management that avoids harming caterpillars, and start with the least disruptive option. For aphids, squish small clusters by hand and use natural predators when possible, and do not blast plants with a strong jet that can knock off eggs or tiny larvae.
My neighbor needs to spray for pests, how do I protect my milkweed and monarchs?
If you must deal with a pest in nearby vegetation, create a buffer around milkweed and avoid spray drift. Choose strategies that do not introduce insecticides into plant tissue, and prioritize physical controls and spot treatments away from milkweed plants.
My indoor seedlings are leggy and falling over, what should I change first?
Leggy growth is almost always a light issue. Increase light intensity by moving seedlings closer to grow lights (commonly a few inches) or using a consistently bright window, then add a gentle fan for short sessions daily to strengthen stems before planting out.
How long should I wait before assuming milkweed seed did not work?
Yes, even if it looks like nothing is happening. Milkweed, especially in colder zones, can stay dormant well into spring. Mark the spot, wait through late spring, and if you still see no growth by early summer, gently check near the crown for living tissue before assuming it failed.
What nectar plants should I add alongside milkweed to make the garden truly monarch-friendly?
For monarch-focused habitat, combine milkweed with nectar plants that bloom across seasons. Focus on spring for returning adults, summer for breeding generations, and late summer through fall for the migration to Mexico, so monarchs are not only reproducing but also fueling.
How should I space milkweed plants if I am trying to attract monarchs quickly in a small yard?
If you have limited space, put multiple milkweed plants together rather than one plant scattered away from pollinator traffic. A sunny cluster improves visibility and egg-laying opportunities, and it also makes maintenance like weeding and inspections easier.
Next Article
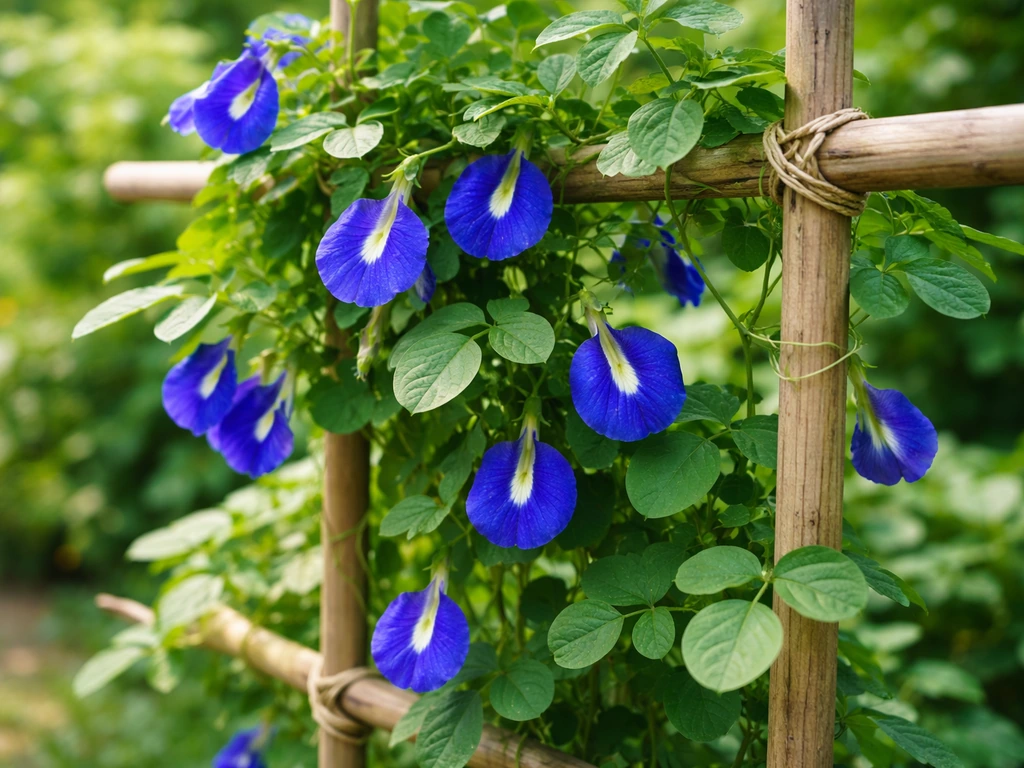
How to Grow Butterfly Pea Flower From Seed to Harvest
Step-by-step grow guide for blue butterfly pea from seed to harvest: timing, soil, watering, pruning, and repeat blooms.