
Rainbow chrysanthemum is not a single named cultivar you will find on a seed packet. It is a market term used to describe multicolored or bi-color chrysanthemum selections, or it refers to the popular florist trick of placing white mum stems in dyed water so the petals absorb color. If you want to grow a genuinely colorful chrysanthemum display at home, you are working with Chrysanthemum x morifolium (the standard garden or florist mum), choosing bi-color or mixed-color seed blends, or combining distinct varieties such as Snowland and Robinson Red for a range of colors in one bed. All of these are very achievable for a beginner with good timing, a bit of pinching, and decent drainage.
Rainbow Chrysanthemum How to Grow: Complete Home Guide

Marcus Holloway
25 Jul 2026
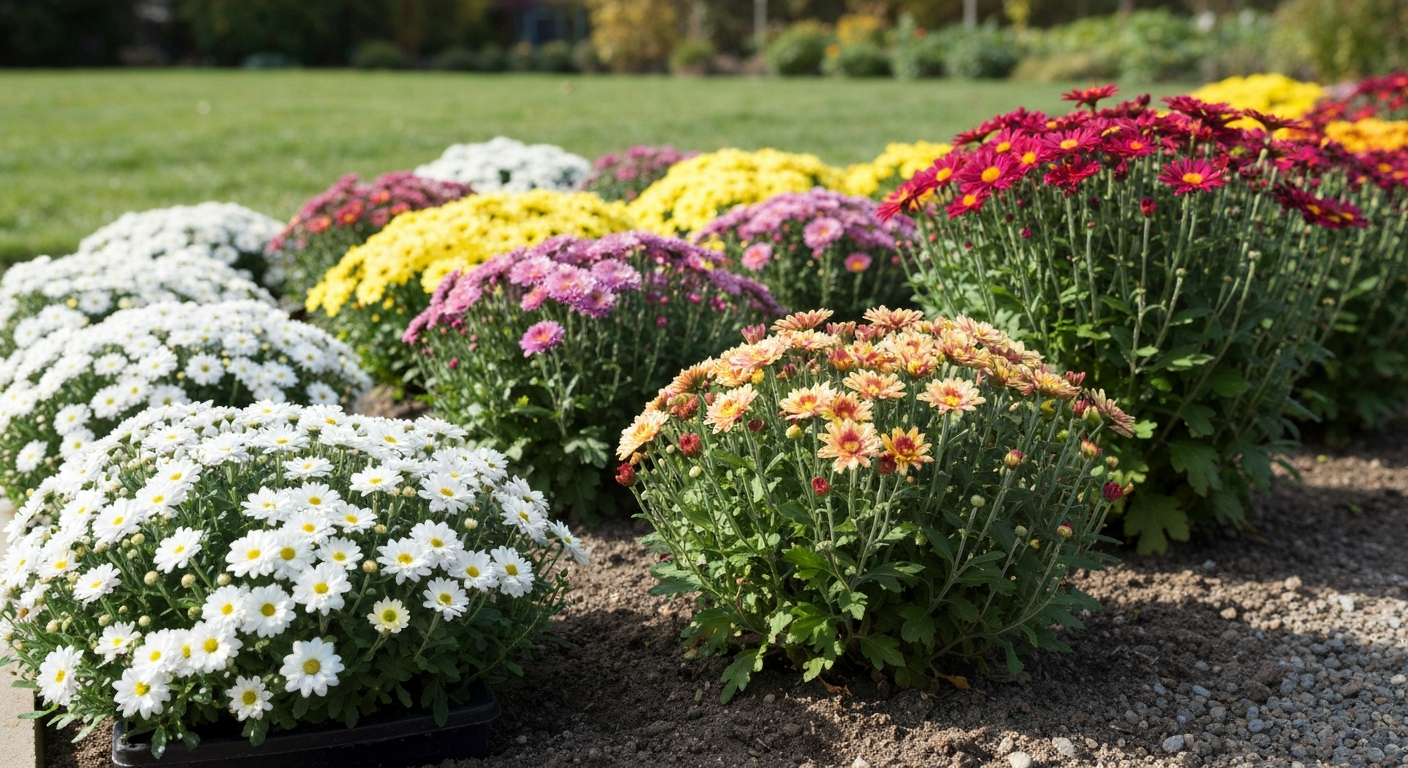
What 'rainbow chrysanthemum' actually means and how chrysanthemums grow
The term 'rainbow chrysanthemum' turns up in flower markets, craft tutorials, and seed catalogs without a fixed botanical meaning. Most often it points to one of three things: a multicolored seed mix of Chrysanthemum x morifolium cultivars sold as a single packet, a dye-uptake technique where white mum stems are split and placed into different food-coloring solutions so each petal section turns a different shade, or simply any bi-color cultivar with petals that blend two distinct hues. All three uses are legitimate and worth knowing about, because they inform completely different growing approaches.
Understanding how chrysanthemums grow helps you plan a season that actually delivers flowers when you want them. These plants move through five broad stages: seed germination or rooting of cuttings, vegetative growth and branching (the phase you encourage with pinching), bud initiation triggered by shortening days in late summer, anthesis (the flowers fully opening), and finally senescence or dormancy. The critical detail for home gardeners is that most garden mums are short-day plants. Authoritative studies confirm chrysanthemums are photoperiod‑sensitive short‑day plants: long nights (short days) induce flower bud initiation, and photoperiod length and light spectrum quantitatively affect time to visible bud and anthesis (blank" rel="noopener noreferrer">Floral Induction in the Short‑Day Plant Chrysanthemum Under Blue and Red Extended Long‑Days (Frontiers in Plant Science, PMC)). They begin forming flower buds only when nights lengthen to roughly 12 hours or more, which in temperate climates happens naturally from late summer into autumn. If you understand that, every timing decision in this guide will make immediate sense.
Varieties worth growing: rainbow types, Snowland, and Robinson Red
Before buying seeds or plants, it helps to know that the word 'chrysanthemum' covers several distinct species sold under the same common name, and they behave quite differently in the garden.
Rainbow and bi-color mixes (Chrysanthemum x morifolium)
The large, bushy garden mum (Chrysanthemum x morifolium, sometimes listed as Dendranthema x grandiflorum) is the plant most people picture when they hear chrysanthemum. Bi-color and mixed-color seed selections within this group are what most suppliers market as 'rainbow' types. For a step-by-step guide on how to grow rainbow flowers, see our detailed how to grow rainbow flowers resource. These grow 18 to 36 inches tall, need full sun, and bloom in autumn following the natural short-day trigger. They are perennial in USDA zones 5 to 9 but are commonly grown as annuals in colder climates. If you want the classic dye-uptake rainbow effect, start here: cut white-flowered C. x morifolium stems, split the stem base into two or three sections, and place each section in a separate jar of food-colored water. Petals absorb color over 24 to 48 hours.
Snowland (Chrysanthemum paludosum)
Snowland is a compact, white daisy-type cultivar of Chrysanthemum paludosum (also listed under Leucanthemum paludosum in some catalogs). It grows 6 to 8 inches tall, making it excellent for containers and edging. Seed catalogs typically list it at 60 to 65 days from sowing to first flower, which is considerably faster than standard garden mums. It is not a short-day plant in the same strict sense and will flower freely through summer when other mums are still in vegetative growth. It received a Fleuroselect quality award, which is a reliable signal that it performs consistently from seed. If you want reliable early-season color or a neat container display, Snowland is an easy win. For step-by-step growing instructions specifically for Snowland, see chrysanthemum Snowland how to grow.
Robinson Red (Chrysanthemum coccineum / Tanacetum coccineum)
Robinson Red is sold by seed houses including Jelitto under Chrysanthemum coccineum or its synonym Tanacetum coccineum, and it is also commonly known as painted daisy or pyrethrum. It is a different species entirely from the florist mum. It produces single, vivid crimson-red daisy flowers on stems up to 24 to 30 inches tall, blooms in late spring to early summer rather than autumn, and is a hardy perennial to zone 3. It does not share the short-day flowering trigger of C. x morifolium. Robinson Red is worth growing alongside Snowland and bi-color morifolium types if you want a season-long color sequence: Robinson Red in early summer, Snowland through midsummer, and the larger rainbow morifolium types in autumn. For detailed growing instructions specifically for Robinson Red, see our guide on how to grow chrysanthemum Robinson Red.
| Variety / Type | Species | Height | Bloom Season | Days to Flower (from seed) | Best Use |
|---|---|---|---|---|---|
| Rainbow / Bi-color mix | C. x morifolium | 18–36 in (45–90 cm) | Autumn | 16–20 weeks | Border, cutting garden |
| Snowland | C. paludosum | 6–8 in (15–20 cm) | Summer | 60–65 days | Containers, edging |
| Robinson Red | C. coccineum (T. coccineum) | 24–30 in (60–75 cm) | Late spring / early summer | 12–16 weeks | Border, cutting garden |
| DIY rainbow (dyed) | C. x morifolium (white) | 18–36 in (45–90 cm) | Autumn | Same as morifolium | Floral arrangements |
Seed, cuttings, or division: which should you choose?
You have three ways to start chrysanthemums, and the right choice depends on what you are growing, how much time you have, and whether you already own plants.
Seed
Seed is the most accessible and cheapest starting point, especially for Snowland and Robinson Red, both of which come true and perform reliably from packet seed. Garden mum (C. x morifolium) seed is available in mixed or bi-color selections, though named cultivars are usually propagated vegetatively to maintain consistency. Seed works best when you start early indoors and have the patience to manage seedlings for 6 to 8 weeks before transplanting. The main limitation is that exact color and form vary in open-pollinated seed mixes, which is actually fine if you want a rainbow effect.
Cuttings
Softwood cuttings are the professional's method for multiplying a specific named cultivar (a particular color, flower form, or height) exactly. If you bought a garden mum you love and want more of the same plant, take cuttings in spring from the new growth. The downsides are that it requires a little more equipment (rooting hormone, a humid propagation setup) and takes 2 to 6 weeks before you have a rooted cutting ready to pot on.
Division
Division is the simplest way to multiply established garden mums you already grow in a border. In spring, when shoots are actively emerging, dig the clump and split it with a spade into sections of 3 to 5 shoots each. Replant immediately and water well. Division also rejuvenates old clumps that have become woody and flowering less freely. It is genuinely the least effort of the three methods if you already have plants.
| Method | Best For | Time to Flowering | Difficulty | Cost |
|---|---|---|---|---|
| Seed | Snowland, Robinson Red, mixed morifolium | 60 days (Snowland) to 20 weeks (morifolium) | Easy to moderate | Low |
| Cuttings | Named garden mum cultivars, exact color match | 10–21 days to root, then 8–14 weeks to bloom | Moderate | Low (needs hormone powder) |
| Division | Established border mums, bed renewal | 1 season to re-establish and bloom | Easy | Free |
Container vs. garden bed, and how much work do you want?
Both containers and garden beds work well for chrysanthemums, but they suit different situations. A garden bed is lower maintenance once established: the soil buffers moisture, roots have space to spread, and hardy perennial types can overwinter in the ground in zones 5 to 9. Spacing of 12 to 18 inches (30 to 45 cm) between plants gives air circulation and room for the bushy mounds that develop with regular pinching. Beds suit the taller garden mum types and Robinson Red, which can reach 2 to 3 feet.
Containers are ideal for Snowland (which stays compact at 6 to 8 inches), for gardeners with patios or balconies, and for anyone who wants to move plants to a sheltered spot for overwintering. Use a 10 to 12 inch (25 to 30 cm) pot as a minimum for a single plant, with drainage holes open and a free-draining bark or peat-based potting mix. Avoid very large pots for small plants as excess moisture around roots increases rot risk. Containers dry out faster than beds, so you will water more frequently, making them slightly higher maintenance in summer heat. The payoff is flexibility and the ability to place color exactly where you want it.
| Factor | Garden Bed | Container |
|---|---|---|
| Best varieties | Morifolium, Robinson Red | Snowland, compact morifolium types |
| Watering frequency | Every 2–3 days in dry spells | Daily in summer heat |
| Overwintering | In-ground in zones 5–9 | Move under cover or indoors |
| Maintenance level | Lower once established | Higher (watering, feeding) |
| Drainage control | Amend soil at planting | Use quality potting mix |
| Flexibility | Fixed position | Move to best light or shelter |
Planting calendar by climate and season
Timing is the single biggest factor in getting chrysanthemums to bloom when you want them. For a quick reference on timing, see when to grow chrysanthemums. Use the table below as a planning reference, then adjust by a week or two based on your specific last and first frost dates.
| Climate Zone | Start Seeds Indoors | Last Frost (approx.) | Transplant Outside | Pinching Ends | Expect Bloom |
|---|---|---|---|---|---|
| Temperate (USDA 6–7) | Late Feb – early Mar | Mid-Apr | Early May | Early Aug | Sep – Oct |
| Cold (USDA 4–5) | Early – mid Mar | Mid-May | Late May – early Jun | Mid-Aug | Sep – Oct |
| Warm (USDA 8–9) | Jan – Feb | Late Feb – early Mar | Mar – Apr | Late Jul | Oct – Nov |
| Snowland (all zones) | 8 weeks before desired bloom | N/A (not frost-tender once established) | After last frost | Not needed | 60–65 days from sow |
| Robinson Red (all zones) | Early – mid Mar | Varies | After last frost | Not needed | Late spring / early summer, year 2 from seed |
One practical note on Robinson Red: like most perennials grown from seed, it typically produces foliage in year one and flowers from year two onward. If you want flowers in the first season, buy a plug or established plant rather than starting from seed.
How to grow chrysanthemum from seed, step by step
Indoor sowing (recommended for most climates)
Starting chrysanthemums indoors gives you a head start and avoids the patchy germination that often results from direct outdoor sowing. Here is exactly what to do:
- Fill a seed tray or small pots with a fine-grade seed-starting mix. Moisten it thoroughly before sowing so the mix is damp but not waterlogged.
- Scatter seeds thinly on the surface. Chrysanthemum seeds are small and light-sensitive: press them gently onto the surface of the mix with your fingertip rather than covering them. If you prefer a light covering, no more than 1/16 inch (1–2 mm) of fine vermiculite is enough.
- Set the tray in a warm spot or on a heat mat. Target soil temperature is 65 to 72°F (18 to 22°C). At this range, germination typically takes 5 to 14 days. Below 60°F (15°C), germination slows dramatically.
- Keep the surface evenly moist using a misting bottle or a tray of water under the cells for bottom-watering. Never let the surface dry out completely while seeds are germinating.
- Once seedlings emerge, move them to a bright window or under grow lights (14 to 16 hours of light per day keeps them in vegetative growth and prevents premature budding). Keep air temperature at 60 to 70°F (15 to 21°C).
- When seedlings have two true leaves, thin or prick out to individual 2 to 3 inch cells or small pots. Hold seedlings by a leaf, not the stem, to avoid crushing delicate tissue.
- Harden off for 7 to 10 days before transplanting outdoors: start with an hour of outdoor shade, gradually increasing sun and wind exposure.
- Transplant after your last frost date, setting the rootball with its top at or just slightly above the surrounding soil level to aid drainage. Water in well.
Direct outdoor sowing
Direct sowing works best for Snowland in warm to temperate climates after frosts have passed. Prepare a fine seedbed, rake it level, and scatter seeds on the surface pressing them in lightly. Cover with the thinnest dusting of fine compost or vermiculite, no more than 1/16 inch (1–2 mm). Keep the seedbed moist until germination occurs (5 to 14 days). Thin seedlings to 6 inches (15 cm) apart once they have two true leaves, then to final spacing of 12 inches (30 cm) as they grow. Direct sowing for garden mum types (C. x morifolium) is less reliable because the long growing season required often means plants do not reach sufficient size to bloom well before autumn.
Propagating from cuttings and division
Softwood cuttings
Take cuttings in spring when new shoots are 3 to 4 inches (7 to 10 cm) long and the growth is soft and green. This is typically April to May in temperate and cold climates.
- Cut just below a node with a clean, sharp blade. Your cutting should be 3 to 4 inches (7 to 10 cm) long with two or three sets of leaves.
- Strip the lowest set of leaves cleanly, leaving a bare stem section of about 1 to 1.5 inches (2.5 to 4 cm) to insert into the rooting medium.
- Dip the cut end into rooting hormone powder at an IBA concentration of roughly 500 to 1,250 ppm (standard softwood strength). Tap off any excess powder.
- Insert cuttings 1 to 1.5 inches deep into a perlite-and-peat mix (50: 50) or a proprietary cuttings compost. Space them 2 to 3 inches (5 to 7 cm) apart so leaves do not overlap.
- Water in gently, then cover the tray with a clear propagation lid or a loose polythene bag to maintain humidity. Aim for 70 to 75°F (21 to 24°C) at the base — a heat mat helps.
- Check for rooting after 10 days by gently tugging: resistance means roots have formed. Full rooting typically takes 2 to 6 weeks.
- Once rooted, pot on into 3 to 4 inch (7 to 10 cm) pots of standard potting mix, harden off, then plant out after last frost.
Division
Divide established garden mum clumps in spring, as soon as new shoots are clearly visible and roughly 2 to 4 inches (5 to 10 cm) tall. Dig around the whole clump generously to avoid root damage, then lift it. Drive a sharp spade straight through the center to split it into sections, each with at least 3 to 5 healthy shoots and a root system attached. Discard the oldest woody center sections if the clump has been in place for 3 or more years, the vigorous outer portions are what you want. Replant divisions at the same depth they were growing before, with the crown at soil level, firm in, and water thoroughly. Space new divisions 12 to 18 inches (30 to 45 cm) apart.
Soil, light, and where to plant for the best color
Chrysanthemums are not demanding about soil type, but they are specific about two things: drainage and sunlight. Get both right and you are almost guaranteed good results.
Light
All chrysanthemum types covered here need full sun, meaning at least 6 hours of direct sunlight per day. Less than that and you get leggy growth, fewer flowers, and increased disease pressure. In very hot climates (zones 8 to 9), afternoon shade protects plants from heat stress during bud development, since temperatures above 75°F (24°C) at night can delay flowering or cause bud drop in garden mum types. Greenhouse production guidance recommends an 8–12 hour light period with cooler nights (~55°F/13°C) and moderate day temperatures (~70–72°F/21–22°C) during short‑day induction, because high day or night temperatures (≥75°F/24°C) during bud development can delay flowering or cause bud abortion (Potted Flowering Plants (ScienceDirect topical/production review)). Morning sun with some afternoon shade is the practical compromise in those regions.
Soil mix and pH
The ideal soil is a well-drained, loamy mix with moderate organic matter. Target a pH of 6.0 to 7.0. Heavy clay soils need generous amendment with coarse grit and compost before planting. Sandy soils benefit from added compost to improve moisture retention without waterlogging. If you are using raised beds or containers, a quality bark or peat-based potting mix amended with 20 to 30 percent perlite delivers the drainage chrysanthemums need while holding enough moisture between waterings. One thing to avoid at all costs is wet feet: sitting water around the crown is the fastest route to root rot and stem base collapse.
Drainage and site selection
Before planting in a border, do a simple drainage test: dig a hole 12 inches deep, fill it with water, and check after one hour. If water is still standing, improve drainage with grit or choose a raised bed. In containers, always confirm drainage holes are fully open and never stand pots in saucers of water. On a sloping site, plant at the top or mid-slope rather than at the base where cold air and water collect.
Routine care, feeding, and pinching schedule
Once planted, chrysanthemums need consistent water, regular feeding, and one specific pruning technique (pinching) to produce the bushy, flower-covered plants you see in garden center displays. None of this is complicated, but the timing matters.
Watering
Water deeply and less frequently rather than shallowly every day. Let the top inch of soil dry before watering again. In a garden bed, every 2 to 3 days in dry spells is typical through summer. Container plants dry faster and may need daily watering in heat. Water at the base of plants, not over the foliage, to reduce fungal disease risk.
Feeding
Chrysanthemums are moderate to heavy feeders during their vegetative growth phase. A balanced NPK fertilizer (such as 10-10-10) applied every 2 to 3 weeks from transplanting until mid-summer builds the strong stems and leaf mass that support good flowering. Switch to a low-nitrogen, high-potassium feed (such as a tomato fertilizer) from mid-summer onward to encourage bud formation rather than continued leafy growth. Stop fertilizing once buds are clearly visible and starting to show color.
Pinching for more flowers
Pinching is the single most impactful thing you can do to get a bushy plant covered in flowers rather than a few tall stems with one bloom each. When plants reach about 6 inches (15 cm) tall, pinch out the growing tip using your thumb and forefinger or small scissors, removing the top 1 to 2 inches (2.5 to 5 cm) of stem back to a pair of healthy leaves. Each pinched stem produces two or more lateral shoots. Repeat every 2 to 3 weeks as new growth reaches 6 inches again. The critical rule: stop all pinching at least 6 to 8 weeks before your expected bloom date. Any pinching after that point delays flowering. For autumn-blooming garden mums in a temperate climate, the last pinch is typically in early August.
Staking
Tall varieties of garden mum and Robinson Red (which can reach 24 to 30 inches) benefit from a bamboo cane and soft ties inserted when plants are about 12 inches tall. This avoids stem snap during heavy rain or wind. Compact types like Snowland need no staking.
Pest and disease identification and management
Chrysanthemums attract a predictable set of pests and diseases. Catching problems early makes them easy to manage.
| Problem | What You See | Prevention | Treatment |
|---|---|---|---|
| Aphids | Clusters of soft insects on new shoots, sticky residue | Encourage ladybirds; avoid excess nitrogen | Blast off with water; neem oil spray |
| Leaf miners | Pale winding trails on leaves | Remove affected leaves early | Remove affected leaves; insecticidal soap |
| Spider mites | Fine webbing, pale stippled leaves in dry heat | Keep plants watered; increase humidity | Neem oil or miticide; improve air circulation |
| Powdery mildew | White powdery coating on leaves | Full sun, good spacing, avoid overhead watering | Remove affected growth; potassium bicarbonate spray |
| Botrytis (grey mold) | Grey fuzzy mold on stems, petals in wet conditions | Good air circulation, avoid wet foliage at night | Remove affected tissue; reduce moisture |
| Root rot | Wilting despite moist soil, brown/soft crown | Sharp drainage, no overwatering | Improve drainage; remove badly affected plants |
| Damping-off (seedlings) | Seedlings collapse at soil level | Sterile seed mix, good air flow, avoid overwatering | Remove affected seedlings; improve ventilation |
Harvesting cut flowers and postharvest care
Cut chrysanthemum stems when roughly half the flowers on a stem are fully open and the rest are showing color but still slightly closed. This gives you the longest possible vase life. Cut early in the morning when stems are fully hydrated. Use sharp, clean scissors and cut at a 45-degree angle to maximize water uptake. Immediately place stems into a bucket of clean, room-temperature water. Strip any leaves that would sit below the waterline in your vase to prevent bacterial rot. Change the vase water every two days and recut stems by half an inch each time. Kept this way, cut mums typically last 7 to 14 days in a vase. If you are creating a rainbow dye effect, cut stems at the height of bloom and perform the split-stem color uptake process immediately after cutting.
Overwintering and year-to-year care
Hardy garden mum types (C. x morifolium) can overwinter in the ground in zones 5 to 9 with a few simple steps. After the first hard frost blackens the foliage, cut stems back to about 4 to 6 inches (10 to 15 cm) above ground level. In zones 5 to 6, apply a 3 to 4 inch (7 to 10 cm) layer of dry mulch (straw or shredded leaves) over the crown after the ground has frozen to prevent freeze-thaw heaving. Remove mulch gradually in early spring as temperatures rise. Container mums should be moved to a cool, frost-free space (an unheated garage or shed at 35 to 45°F (2 to 7°C) works well) over winter. Robinson Red is hardy to zone 3 and rarely needs winter protection. Snowland is best grown as an annual and resown each year.
Quick troubleshooting guide
| Symptom | Most Likely Cause | Fix |
|---|---|---|
| No flowers by late summer | Too much pinching too late, or insufficient sun | Stop pinching 6–8 weeks before bloom; move to full sun |
| Leggy, tall seedlings | Not enough light indoors | Move under grow lights or to a brighter window |
| Poor germination | Seeds buried too deep or soil too cold | Surface sow; use heat mat for 65–72°F (18–22°C) |
| Yellowing leaves | Overwatering, poor drainage, or nitrogen deficiency | Improve drainage; adjust watering; apply balanced feed |
| Wilting despite moist soil | Root rot from waterlogging | Check drainage; reduce watering; consider replanting |
| Flower buds drop before opening | High night temperatures (above 75°F/24°C) | Provide afternoon shade in hot climates; improve air flow |
| Plants do not overwinter | Crown too wet or zone too cold without protection | Mulch after first frost; check variety hardiness |
Supplies and tools checklist
- Chrysanthemum seeds: bi-color or mixed morifolium blend, Snowland (C. paludosum), Robinson Red (T. coccineum)
- Seed-starting mix (fine-grade, sterile) and small seed trays or modules
- Propagation heat mat (optional but helpful for germination and rooting cuttings)
- Propagation lid or clear polythene bag for cuttings humidity
- Rooting hormone powder (IBA, softwood strength, approx. 500–1,250 ppm)
- 10 to 12 inch (25 to 30 cm) pots with drainage holes for container growing
- Free-draining potting mix with added perlite (20 to 30 percent) for containers
- Balanced granular fertilizer (10-10-10) for vegetative growth phase
- High-potassium liquid feed (tomato fertilizer) for bud initiation phase
- Bamboo canes and soft plant ties for taller varieties
- Sharp scissors or a clean knife for cuttings and harvesting
- pH meter or test strips (target 6.0 to 7.0)
- Mulch (straw or shredded leaves) for overwintering in colder zones
- Misting bottle for seedling watering and cutting humidity maintenance
FAQ
What exactly is a “rainbow chrysanthemum” and how does it differ from Snowland and Robinson Red?
“Rainbow chrysanthemum” is a market/descriptor term, not a single botanical cultivar. It refers to multicolored or bi‑color chrysanthemums sold as brightly variegated selections or produced by florists via stem‑uptake dyeing. Most garden/florist mums belong to Chrysanthemum × morifolium (garden/florist mums). Snowland is a compact, daisy‑type Chrysanthemum paludosum (used for bedding/containers, ~60–65 days to flower from sowing). Robinson Red is typically sold as Tanacetum/Chrysanthemum coccineum (painted daisy) — a different species with distinct habit and culture than garden mums. Choose based on habit: Snowland = low, spreading bedding mum; Robinson Red = daisy‑type perennial; rainbow/bi‑color = selected cultivars or dyed florist mums (C. × morifolium).
What are the life stages of chrysanthemum (how they grow) and why does that matter?
Key stages: 1) Germination/establishment (seedlings develop first true leaves), 2) Vegetative growth (branching, root establishment), 3) Bud initiation/flower induction (photoperiod sensitive—short days or long nights trigger buds), 4) Flower development (visible buds to bloom), 5) Senescence/harvest, 6) Dormancy/overwintering (perennial types). Management differs by stage: pinching during vegetative growth increases branching; control of daylength and cooler nights influences bud initiation; correct timing of the last pinch avoids delaying bloom; overwintering requires different actions for tender florist mums versus hardy garden mums.
Seed vs cuttings vs division — which propagation method should I choose? Decision points.
Seed: choose when you want many inexpensive plants, cultivars sold true‑to‑type from seed, or to experiment. Seeds are surface‑sown/shallow sown and take ~5–14 days to germinate; start 6–8 weeks before last frost for spring planting or timed for fall bloom. Cuttings (softwood terminal cuttings): best for exact clone of a named cultivar, faster to flower, higher success and uniformity—root in 10–21 days with rooting hormone (IBA ~500–1,250 ppm), mist and bottom heat. Division: use for established perennial garden mums (spring) to rejuvenate and multiply; divide into sections with 3–5 shoots. Choose cuttings for predictability/quality, seeds for quantity/variety exploration, division for established clumps or hardy perennials.
Exact seed sowing protocol (depth, medium, timing, temps) for home gardeners.
Medium: sterile, well‑draining seed mix. Sow: press small chrysanthemum seeds onto the surface or cover very lightly (max 1–2 mm). Moisture: keep evenly moist but not waterlogged. Temperature: 18–22°C (65–72°F). Germination: 5–14 days. Timing: start 6–8 weeks before last expected frost for spring planting; for season‑long growth to fall bloom, calculate from supplier’s days‑to‑flower (e.g., Snowland ~60–65 days) backward from target bloom date. Harden off seedlings 7–10 days before transplant.
Cutting protocol (timing, length, hormone, rooting conditions).
Use softwood terminal cuttings 2–4 in (5–10 cm) long with 2–3 nodes in spring or early summer. Remove lower leaves leaving top 1–2 leaf pairs. Quick‑dip rooting hormone: IBA approx. 500–1,250 ppm (follow product instructions). Insert in moist, well‑draining propagation mix (perlite/peat or coarse mix). Environment: high humidity (mist or dome), bright indirect light, bottom heat around 20–24°C (68–75°F) speeds rooting. Roots visible in 10–21 days; transplant to pots after 3–6 weeks when well rooted.
Division protocol (when and how many shoots per division).
Divide in spring as new growth begins. Dig the clump, wash soil from roots if helpful, and split with a sharp spade into sections each with 3–5 healthy shoots and roots. Replant divisions with crown at soil level, firm soil, water well. Space appropriately to allow air circulation.
Next Article
How to Grow Rainbow Flowers: Step-by-Step Guide
Step-by-step guide to grow rainbow flowers from seed mix: pick spot, sow timing, care, troubleshoot, and extend blooms.