A forget-me-not grow kit gives you everything you need to raise a carpet of those classic sky-blue flowers from seed, and the process is genuinely beginner-friendly once you understand two things: these seeds need light to germinate (never bury them), and they prefer cool conditions over warmth. Open the kit, follow the steps below, and you can expect seedlings in 7–21 days and flowers within a season.
Forget-Me-Not Grow Kit Instructions: Step-by-Step Guide for Beginners

Marcus Holloway
15 Jul 2026
What this guide covers and who it's for
This article walks you through every stage of using a forget-me-not grow kit, from the moment you open the box to the point where you're looking at a froth of blue blooms in your garden or on your patio. If you've never grown flowers from seed before, this is a great place to start. Forget-me-nots (typically Myosotis sylvatica, the garden or wood forget-me-not) are short-lived perennials or biennials that tolerate beginner mistakes better than most. You'll find exact timings, step-by-step sowing instructions, germination troubleshooting, transplant guidance, and a practical timeline that takes the guesswork out of every milestone. For readers interested in similar low-maintenance blooms, see our guide on how to grow blanket flowers for tips on spacing, deadheading, and long-season color.
What's in a typical forget-me-not grow kit
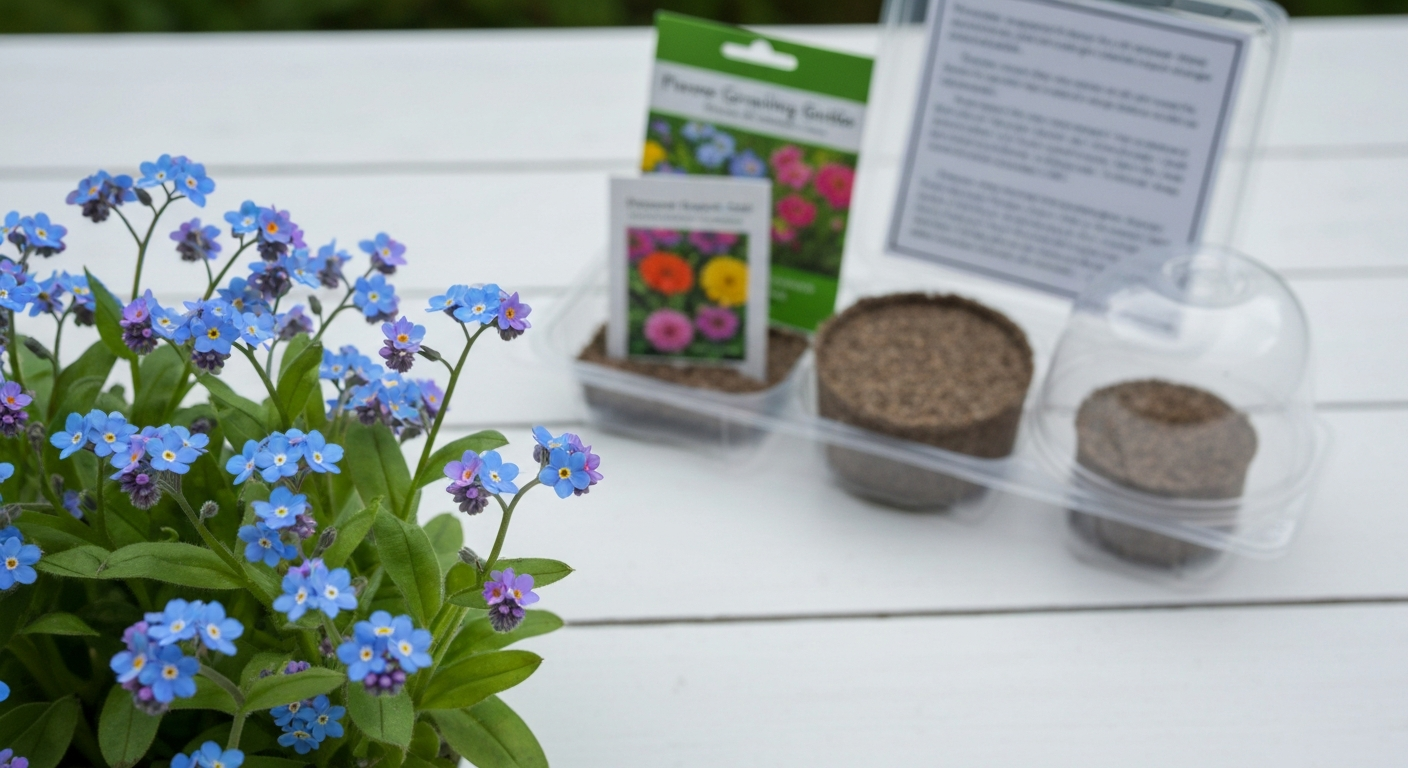
Most commercially sold flower grow kits follow a similar formula. Before you do anything else, lay everything out on a table and check it against this list so you know what you have and what you might still need.
- Seed packet: usually 50–300 seeds of Myosotis sylvatica or a named cultivar; check the count on your packet because it varies between brands
- Compressed peat or coco coir pellets (or a pre-filled cell tray): these expand when you add water and act as your seed-starting medium
- Plastic cell tray or growing tray: holds the expanded pellets in place
- Clear humidity dome or propagator lid: sits over the tray to lock in moisture during germination
- Plant labels or markers: for noting sow date and variety
- Printed instruction card: the kit's own quick-start guide; keep it handy but use this article alongside it for more detail
- Optional extras depending on brand: wicking mat, water reservoir tray, or a small fertilizer sample
A note on the seeds: forget-me-not seeds are tiny, and the packet may feel almost empty. That's normal. Even a small packet of 100 seeds is enough to fill a tray, because you'll surface-sow them quite densely and thin later.
Extra tools and supplies worth having on hand
Your kit covers the basics, but a few extra items make the process noticeably easier and improve your success rate.
- Fine spray bottle or mister: essential for watering tiny seeds without dislodging them from the surface
- Fine seed-starting mix: if your kit's pellets feel coarse, top them with a thin layer of fine coir or peat-based seed compost (pH around 6.0–6.5) to improve seed-to-soil contact
- Vermiculite: a light dusting over sown seeds lets in light while helping seeds stay moist — useful but optional
- Full-spectrum grow light or a south-facing windowsill: bright light is critical once seeds germinate
- Thermometer: helps you keep the tray at the ideal 55–65°F (13–18°C) germination range
- Small fan: running it on low for a few hours daily from the seedling stage prevents damping-off and builds stronger stems
- Slow-release granular fertilizer or dilute liquid feed: for feeding seedlings from about week three onward
- Small plastic pots (9cm): useful if you want to pot seedlings on before transplanting outdoors
When to sow: indoor start vs direct sow, and what to know about cold stratification
Myosotis sylvatica is a biennial or short-lived perennial by nature, which means timing your sow correctly makes a real difference to when (and whether) it flowers. You have two main options.
Option 1: Autumn direct sow (the natural route)
Sowing directly into prepared garden soil in late summer to early autumn (roughly August through October in most temperate climates) closely mimics how the plant self-seeds in the wild. Seeds germinate in cool autumn soil, establish a small rosette before the cold really sets in, overwinter naturally, and burst into flower the following spring. This is the lowest-effort approach and often produces the most reliably vigorous plants. University of Maine Extension specifically recommends this method for biennial Myosotis.
Option 2: Indoor sowing in late winter or early spring
If you're using a grow kit in late winter or spring, start seeds indoors 6–10 weeks before your last expected frost date. This is the method your kit is designed for. Keep conditions cool: germination is better at 55–65°F (13–18°C) than at typical warm indoor room temperatures. WSU Extension's Propagating Plants From Seed (temperature and light tables) lists recommended germination temperatures and light exposure for many species, commonly citing about 55–65°F (13–18°C) and noting when light is required. Don't blast seeds with heat mat warmth the way you might with tomatoes, cool and bright is the rule.
Cold stratification: do you need it?
Cold stratification (a period of cold, moist storage that mimics winter) can improve germination uniformity for temperate Myosotis seed. If your seeds are fresh from the current season or the packet specifically says pre-stratified, you can sow straight away. If seeds are older or you're sowing in warm indoor conditions, try a simple fridge stratification: place seeds on a damp paper towel inside a sealed bag and refrigerate for 2–4 weeks before sowing. WSU Extension notes this treatment as a standard tool for temperate perennial seeds, and it genuinely helps if germination seems slow or patchy.
Choosing your soil, containers, and light setup
Tiny forget-me-not seeds demand fine, sterile growing medium. Garden soil straight from the ground is too coarse, too compacted, and harbors pathogens that cause damping-off in fragile seedlings. Use the peat or coco coir pellets from your kit, or a purchased seed-starting mix based on peat or coir with added vermiculite or perlite. Aim for a pH of around 6.0–6.5. If your kit supplies a coarser potting mix, either swap it out for a finer seed compost or press a thin layer of fine coir onto the surface before sowing.
For containers, the cell tray that came in your kit is ideal. Cells around 36–50mm (roughly 1.5–2 inches) in diameter give seeds enough room to develop without drowning in excess moisture. If you're not using a kit tray, a standard 72-cell plug tray or a small seed tray works just as well.
Light is the other non-negotiable. Forget-me-not seeds need light to germinate, and once they sprout, weak seedlings stretch hopelessly toward dim winter windows. A south-facing windowsill can work from late February onward in the northern hemisphere, but a full-spectrum grow light positioned 3–4 inches above the tray gives far more consistent results and is worth the investment if you're sowing indoors regularly. Aim for 14–16 hours of light per day.
Step-by-step: how to sow forget-me-not seeds (surface sowing technique)
The biggest mistake beginners make is burying these seeds. They need light to germinate, so the entire approach is about placing them on the surface and getting them snug against the medium without covering them. Here's exactly how to do it.
- Expand the pellets or fill the tray: place your peat or coir pellets in the tray and pour lukewarm water over them. Let them fully expand (usually 5–10 minutes), then drain off any excess water. The medium should feel like a wrung-out sponge — moist but not soggy. If using loose seed-starting mix, fill cells to within about 5mm of the rim and firm gently.
- Level and smooth the surface: press the tops of expanded pellets gently flat with a clean finger or the base of a small pot. A smooth, level surface is important so seeds don't roll into clumps or low spots.
- Tip seeds onto a piece of white paper first: fold a small square of white paper into a crease and tap the packet so seeds settle into the crease. This lets you see the tiny seeds clearly and control how many you release at a time.
- Broadcast seeds across the surface: tilt the paper and gently tap to release a light, even scatter of seeds across each cell or across the tray surface. Aim for roughly 3–5 seeds per cell for plug trays. Don't panic about perfect spacing — you'll thin later.
- Press seeds into contact with the medium: use a clean finger, a flat piece of card, or the base of a small pot to press seeds very gently against the surface. Good seed-to-soil contact matters more than anything else for germination. Do not bury or cover the seeds.
- Mist gently with a spray bottle: a fine mist settles seeds slightly and ensures they're in contact with moist medium. Avoid a direct stream of water — it will move the seeds off the surface.
- Optional light vermiculite dusting: a very fine dusting of vermiculite (just enough to barely cover seeds) is sometimes recommended. It lets light through while keeping seeds from drying out. Skip this if you find it fiddly.
- Place the humidity dome over the tray: close the propagator lid or cover with a clear plastic bag. This keeps humidity high and reduces the need for watering during germination.
- Position in a bright, cool spot: place the covered tray where temperatures are 55–65°F (13–18°C). A north-facing or east-facing windowsill away from heating vents, or a cool spare room with a grow light, is ideal. Avoid warm south-facing sills in full sun during warm spring weather — heat pushes temperatures too high.
- Ventilate briefly every day: lift the dome for a few minutes each morning to prevent mold and allow some air exchange. This matters from day one.
Germination timeline and what to do when things go wrong
Under good conditions, cool temperatures, consistent moisture, and bright indirect light, you should see the first tiny green seedlings emerging from 7 days. Most seeds in a fresh packet germinate within 14–21 days. Some batches with older seed or less-than-ideal conditions stretch to 30 days, so don't give up too quickly.
Common germination problems and fixes
| Problem | Likely cause | Fix |
|---|---|---|
| No germination after 3 weeks | Old or low-viability seed; room too warm | Sow fresh seed at higher density; move tray to a cooler spot (55–65°F) |
| Patchy, scattered germination | Uneven moisture or seed not pressed into medium | Re-mist and gently press any remaining ungerminated seeds; check moisture levels daily |
| Seeds germinated but seedlings collapse at the base | Damping-off fungus (common in warm, damp, stuffy conditions) | Remove affected seedlings immediately; increase ventilation, reduce watering, use a small fan |
| Seedlings are very tall and spindly (leggy) | Not enough light | Move closer to grow light or brighter window; aim for 14–16 hours of light daily |
| White or grey mould on surface of medium | Too much moisture with poor airflow | Remove dome for longer periods each day; reduce misting; thin crowded seedlings |
| Seeds seem to disappear (washed off) | Overwatering with a heavy-flow watering can | Always use a fine mister; bottom-water the tray by adding water to the base reservoir if your kit has one |
Damping-off is the most common killer of forget-me-not seedlings and it's almost entirely preventable with sterile medium, good airflow, and avoiding overwatering. Penn State Extension identifies cultural sanitation (clean tools, sterile mix, ventilation) as the primary defence for home growers, you don't need any chemical treatment. Penn State Extension's 'Safeguard Your Seedlings from Damping‑Off' recommends cultural sanitation, sterile mix, avoiding overhead watering, and improved air movement as the primary prevention measures for damping‑off Safeguard Your Seedlings from Damping‑Off — Penn State Extension (seedling disease prevention & remedies).
Quick reference: growing conditions at a glance
| Factor | Ideal range | Notes |
|---|---|---|
| Germination temperature | 55–65°F (13–18°C) | Some suppliers quote up to 70°F (21°C) as acceptable; cooler is generally safer |
| Light during germination | Bright indirect light or grow light | Seeds need light to germinate — do not cover with soil |
| Light after germination | Full sun to partial shade outdoors; 14–16 hrs under grow light indoors | Leggy seedlings are the result of insufficient light at this stage |
| Watering during germination | Consistently moist, never waterlogged | Mist daily; bottom-water if possible; allow slight dry-out between mistings |
| Watering established plants | Regular but moderate; allow top cm of soil to dry between waterings | Containers dry faster than beds and need more frequent checks |
| Expected germination time | 7–21 days (up to 30 days for older/unstratified seed) | Fresh, pre-stratified seed germinates faster and more uniformly |
| Days to flower (spring sown) | 60–90 days from early indoor sowing to first blooms | Autumn-sown plants typically flower the following spring regardless of sow date |
Seedling care: thinning, watering, feeding, and timing before transplant
Once seedlings show their first true leaves (the second pair after the initial seed leaves), they're ready to be managed. True leaves on forget-me-nots are slightly rounder and more textured than the narrow seed leaves.
Thinning: if you sowed 3–5 seeds per cell, thin to the single strongest seedling per cell by snipping the weaker ones at soil level with scissors. Don't pull them out, you'll disturb the roots of the keeper. In an open tray, aim to leave about 2.5cm (1 inch) between seedlings.
Watering: from germination onward, reduce the frequency of misting and switch to watering from below (bottom-watering). Pour water into the base tray and let the growing medium absorb it upward. This keeps leaves dry, which reduces disease risk significantly. Allow the top of the medium to begin to dry slightly between waterings.
Feeding: seedlings don't need feeding for the first 2–3 weeks because the seed-starting mix (or peat pellet) has enough nutrients. After that, apply a half-strength liquid balanced fertilizer (such as a 10-10-10 formulation diluted to half the recommended rate) once a week. Don't overfeed, excessive nitrogen produces lush, soft growth that's more prone to pests and disease.
Timing before transplant: seedlings are ready to move outdoors once they have 3–4 true leaves, the root system is holding the plug together (roots visible but not circling), and all risk of hard frost has passed. This usually means 4–8 weeks of indoor growing time after germination, depending on your conditions and how quickly they grow.
How and when to transplant, with spacing and hardening off
Hardening off is the step most beginners skip, and it's almost always the reason transplants slump or die. Indoor seedlings are soft, their leaves unaccustomed to direct wind, UV, and fluctuating temperatures. Harden them off over 7–14 days before planting out permanently.
- Days 1–2: place the tray in a sheltered outdoor spot (or cold frame) for 1–2 hours during the warmest part of the day, then bring back inside
- Days 3–5: extend outdoor time to 4–5 hours, still in a sheltered, partially shaded spot
- Days 6–9: leave outdoors most of the day, including some direct sun exposure; bring in at night if frost is still possible
- Days 10–14: leave outdoors day and night (unless frost is forecast); at this point they're ready to plant
Spacing: plant Myosotis sylvatica at 15–30cm (6–12 inches) apart depending on the cultivar and how you want them used. Compact edging varieties can go closer together; taller spreading forms need more room. Closer spacing (15cm) gives a denser carpet effect that suppresses weeds nicely.
Transplanting technique: water plugs well an hour before transplanting. Dig a hole the same depth and slightly wider than the plug. Firm soil gently around the roots without compacting it. Water in well immediately after planting.
Planting out: choosing the right spot for beds vs containers
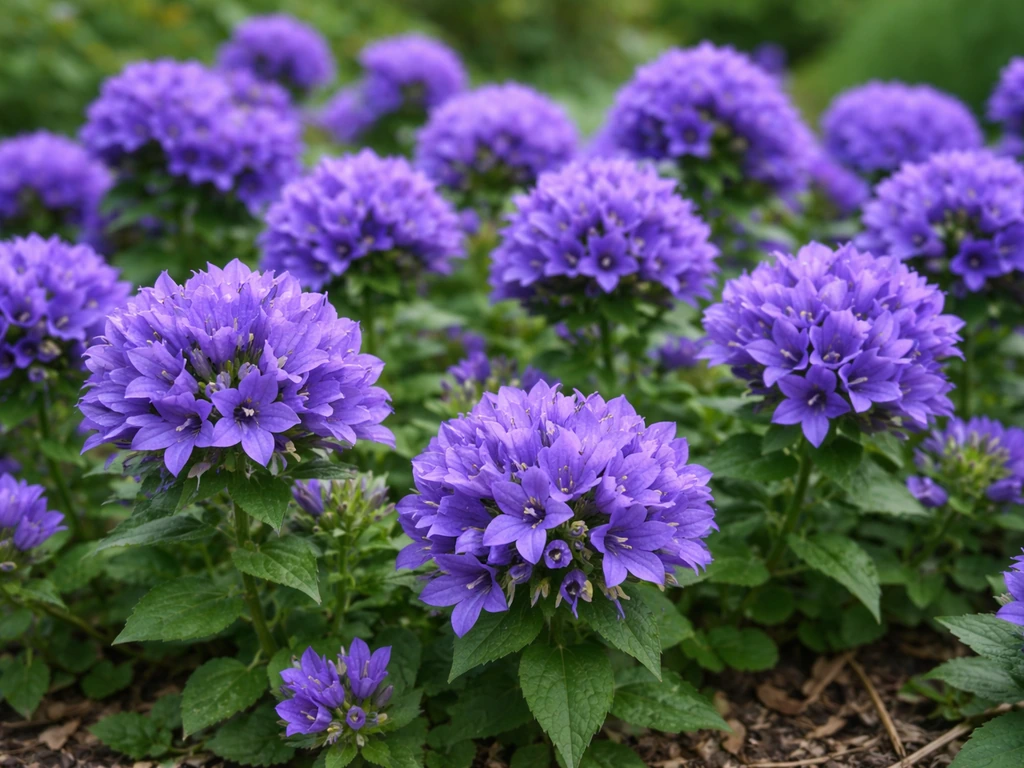
Forget-me-nots are extremely adaptable but they do have preferences. In garden beds, they perform best in partial shade to full sun with consistently moist, humus-rich soil. For gardeners growing shade-loving ornamentals, see our guide on how to grow white bat flower for tips on cultivating a dramatic, shade-tolerant specimen. For detailed cultivation advice on a similar spring-flowering perennial, see how to grow clustered bellflower. They're excellent under deciduous trees and shrubs where they get dappled light in spring, and they self-seed freely once established, meaning you may never need to sow again after the first year.
For containers, choose a pot at least 20cm (8 inches) deep with drainage holes. Use a good-quality peat-free multi-purpose compost and mix in some slow-release granular fertilizer at planting time. Container plants dry out faster than bed plants and need more attentive watering, especially once they're flowering. A sunny to partly shaded position on a balcony or patio works well. Note that M. scorpioides (water forget-me-not) is a different species suited to pond margins and very wet conditions, the standard grow kit variety is almost certainly M. sylvatica, which does not tolerate waterlogging.
Ongoing care: watering, feeding, deadheading, and keeping them blooming
In garden beds
Established plants in beds are relatively low maintenance. Water during dry spells, especially in the first season while roots are establishing. Once per week during dry weather is usually sufficient. Feed once a month with a balanced liquid fertilizer from spring through early summer. Deadhead spent flower stems regularly to extend the flowering period and reduce self-seeding if you don't want them spreading. If you do want them to naturalize, let a few stems go to seed.
In containers
Container plants need watering every 1–2 days in warm weather (check the top centimetre of compost and water when it starts to feel dry). Feed every two weeks with a liquid fertilizer during the flowering period. Deadheading is more important in containers because spent blooms on a patio plant look untidy and sap energy from new flowers. Cut spent stems back to the next set of leaves with clean scissors.
Light
Full sun to partial shade works for both beds and containers. In hot climates, a spot that gets morning sun and afternoon shade prolongs flowering by a week or two. For guidance tailored to tropical, hot-climate flowering bulbs, see a practical guide on how to grow tuberose in Hawaii. Forget-me-nots are cool-season plants that naturally wind down as summer heat arrives, regardless of how well you care for them.
Pests, diseases, and common problems with straightforward fixes
| Problem | Signs | Fix |
|---|---|---|
| Powdery mildew | White powdery coating on leaves, usually in late spring as plants age | Improve airflow; remove badly affected plants; a diluted neem oil spray can slow progression |
| Aphids | Clusters of tiny green or black insects on new shoots and flower buds | Blast off with a firm water jet; apply insecticidal soap; introduce ladybirds if possible |
| Slugs and snails | Ragged holes in leaves, silvery slime trails | Use copper tape around containers; place grit or eggshells around bed plants; use wildlife-safe slug pellets if needed |
| Damping-off (seedlings) | Seedlings collapse at the base; grey-brown discolouration at soil level | Remove affected plants; improve ventilation; use sterile mix; avoid overwatering |
| Grey mould (Botrytis) | Fluffy grey mould on stems or flowers in cool, wet conditions | Remove affected parts; improve airflow; avoid overhead watering |
| Leggy, sparse growth | Long stems, few flowers, pale leaves | Move to a brighter position; cut back lightly to encourage bushier regrowth |
Forget-me-nots are genuinely one of the easier flowers to keep healthy. The most common problems are either seedling-stage damping-off (prevented by good airflow and sterile medium) or late-season mildew as plants age past their peak. Neither requires chemical intervention if you act early.
Overwintering: protecting plants in pots and garden beds
Myosotis sylvatica is reasonably hardy and typically survives UK winters and USDA Zone 5 winters without protection when grown in the ground. Plants that were sown in autumn and have established a good root system before the cold arrives will generally come through without any special treatment. A light mulch of bark chips or straw over the root zone in late autumn is a good precaution in colder zones (Zone 4 and below).
Container plants are more vulnerable because the roots are above ground and exposed to freeze-thaw cycles. Move pots to a sheltered spot against a house wall, or into an unheated greenhouse or cold frame, once temperatures drop below -5°C (23°F) consistently. Wrap pots in horticultural fleece or bubble wrap for extra insulation. Reduce watering significantly in winter but don't let the compost dry out completely.
Succession sowing for continuous blooms
Forget-me-nots have a relatively short flowering window (typically 4–8 weeks in mid to late spring), so if you want a longer display, succession sowing is the answer. The strategy depends on whether you're treating them as annuals or biennials.
- Sow batch one indoors in late January/February for late spring flowers after hardening off (6–10 weeks before last frost)
- Sow batch two directly outdoors in late summer (August–September) for the following spring's main display — this mimics natural self-seeding and requires no indoor setup
- Allow some spent plants to self-seed in place each year; once established in a bed, forget-me-nots often maintain themselves with minimal intervention
- For containers where self-seeding isn't practical, keep a small tray of fresh seedlings coming along each late summer to replace the previous year's plants
The beauty of this system is that after the first year, you're barely buying seeds. The plants do the work for you if you let a few seed heads ripen before pulling spent plants.
How to save forget-me-not seeds
Seed saving is one of the most satisfying parts of growing forget-me-nots, and it's very easy. The seeds are tiny but plentiful, and a single plant can produce enough seeds to sow a large area.
- Watch for ripe seed: after flowers finish, small seed pods form along the stems. They're ripe when the stems start to brown and the pods feel dry and papery — typically 4–6 weeks after flowering ends
- Harvest on a dry day: cut stems into a paper bag and shake gently. The tiny black seeds fall out readily once ripe. Avoid collecting on damp days because moisture speeds up mould during storage
- Clean and dry: tip the contents of the bag onto a piece of white paper and gently blow away chaff. Spread seeds on a paper plate or sheet for 1–2 weeks in a warm, airy place indoors to finish drying completely
- Store correctly: place dry seeds in a labelled paper envelope (note the variety and harvest year), and store inside an airtight jar in a cool, dark location such as a refrigerator. Properly dried and stored seeds remain viable for 2–3 years
- Test viability before sowing: if seeds are more than a year old, do a quick test — place 10 seeds between two damp paper towels in a warm spot for two weeks. Count how many germinate; if fewer than 5 out of 10 sprout, increase sowing density to compensate
Practical timeline: from unboxing to flowering
Use this as your season planner. Dates assume a typical temperate northern hemisphere climate with a last frost in mid-April. Adjust forward or back by a few weeks depending on your local conditions.
| Milestone | Timing (indoor spring route) | Timing (autumn direct-sow route) |
|---|---|---|
| Unbox kit and gather supplies | Late January to mid-February | Late August |
| Sow seeds (surface sow) | Late January to mid-February | Late August to mid-September |
| Germination expected | 7–21 days after sowing | 7–21 days (or after winter stratification) |
| First true leaves visible | 3–4 weeks after sowing | Before first hard frost |
| Begin hardening off | 6–8 weeks after sowing (late March–April) | N/A — plants overwinter in the ground |
| Transplant outdoors | After last frost (mid to late April) | N/A — already in final position |
| First flower buds | 8–12 weeks after sowing (April–May) | Following spring (March–May) |
| Peak flowering | May–June | April–May |
| Seed collection (if saving) | June–July | June–July |
| Plants die back or are pulled | Late June–July after seeding | Late June–July |
Milestone checklist: key tasks at each stage
- Unboxing: check kit contents, gather extra tools, confirm sowing window for your location
- Sowing day: expand pellets, surface-sow seeds, press into contact, mist, close dome, label tray with variety and date
- During germination (days 1–21): mist daily, lift dome to ventilate for 5–10 minutes each morning, check temperature
- After germination: remove dome, introduce fan for airflow, begin watering from below
- Week 2–3: thin to strongest seedling per cell, start half-strength liquid feed weekly
- Week 4–6: check roots visible through pellet base (ready to pot on or begin hardening off)
- Hardening off (7–14 days): structured outdoor exposure as per the steps above
- Transplant day: water plugs beforehand, plant at correct spacing, water in well
- Ongoing: deadhead regularly, water as needed (check soil first), feed monthly in beds or fortnightly in containers
- End of season: collect seeds from best plants, label and store; decide whether to leave some plants to self-seed
Suggested images and what to photograph at each stage
Good photos make these guides far more useful for beginners who've never seen what a healthy seedling should actually look like. If you're photographing your own grow-kit journey, here's what to capture at each stage.
- Unboxing flatlay: lay all kit components out on a clean surface and photograph from above — tray, pellets, dome, seed packet, labels. Caption: 'Everything in a typical forget-me-not grow kit laid out before setup.'
- Expanded pellets: close-up of a pellet before and after expansion with water. Caption: 'Peat pellets expand from disc to full size in about 10 minutes — they should feel like a damp sponge.'
- Seeds on white paper: seeds tipped onto a crease in white paper to show their tiny size next to a ruler or coin. Caption: 'Forget-me-not seeds are dust-like — a coin shows scale.'
- Surface sowing close-up: macro shot of seeds resting on the surface of the medium after pressing, showing no coverage. Caption: 'Seeds sit on the surface, pressed gently in — never buried.'
- Covered tray under dome: tray with dome on, in position by a window or under a grow light. Caption: 'The dome keeps humidity high during germination — ventilate briefly every morning.'
- First germination: close-up of the first tiny green seedlings emerging, ideally 5–10 days after sowing. Caption: 'First seedlings appearing around day 10 — a very satisfying moment.'
- True leaves stage: seedlings at 3–4 true leaf stage in the cell tray. Caption: 'At this stage, seedlings are ready to thin and will soon be ready to harden off.'
- Hardening off in progress: tray of seedlings sitting outside in a sheltered spot on a sunny day. Caption: 'Day three of hardening off — just a few hours outside to begin with.'
- Planted out in the garden: a row or patch of transplanted seedlings settled into a bed. Caption: 'Freshly transplanted forget-me-nots at 20cm spacing — they'll fill in quickly.'
- Peak flowering: mature plants in full blue flower, ideally with companion plants or in a natural garden setting. Caption: 'A mass of Myosotis sylvatica in full bloom — the whole process is worth it for this.'
- Seed collection: close-up of a browning seed stem with tiny black seeds visible. Caption: 'Ripe seed heads ready to collect — shake into a paper bag on a dry day.'
FAQ
What should be listed under “What's in the kit” so readers know what to expect?
List each physical item and note common variants: seed packet (state approximate count from vendor), compressed peat/coco‑coir pellets or soil discs, plastic seed tray or cell insert, clear humidity dome/propagator (or resealable bag), water‑wicking mat or reservoir if included, plant labels, brief printed instructions (and any sample fertilizer). Mention that some kits include commercial potting mix while others provide only pellets, and advise readers to check the vendor product page for exact contents. Cite vendor kit pages and product specs for accuracy (example: Jiffy/Lowe’s kit listings).
Which forget‑me‑not species/cultivars do growers commonly encounter and why does it matter?
Identify common taxa: Myosotis sylvatica (garden/wood forget‑me‑not — short‑lived perennial or biennial), Myosotis scorpioides (true/water forget‑me‑not — prefers very moist sites), and alpine/annual types (sold as M. alpestris/M. verna). Explain practical implications: moisture needs, lifespan, expected flowering timing and ideal planting locations (borders, damp areas, rock gardens). Use RHS and university extension species profiles for authority. (RHS plant profile; University of Maine Extension.)
When is the best time to sow: indoors, direct‑sow in spring, or sow in autumn?
Give region‑dependent guidance: Direct sow in autumn or very early spring for many garden forget‑me‑nots (M. sylvatica) to allow natural cold stratification and reliable spring blooms. For indoor sowing, start ~6–10 weeks before the planned transplant date or last frost; use indoor sowing mainly if you need earlier, controlled starts. Note that M. scorpioides (water‑loving) may be better direct‑sown into consistently damp sites. Reference extension recommendations (University of Maine Extension).
Do forget‑me‑not seeds need cold stratification?
Many temperate Myosotis seeds benefit from cold, moist stratification (mimicking winter) for more uniform germination. For hobby growers, a short fridge stratification of 1–4 weeks in a moist medium can help; alternately, fall sowing achieves natural stratification. Always check vendor notes for 'pre‑stratified' seed. Support: extension publications and WSU propagation guidance on stratification for temperate perennial seeds.
How do I sow the tiny forget‑me‑not seeds so they will germinate reliably?
Use surface sowing: moisten a fine, sterile seed‑starting mix or expand the kit’s peat/coir pellets; evenly broadcast seeds on the surface (do not bury), press gently to ensure contact, and mist to settle. Cover with the dome or place in a clear bag to retain humidity but vent daily. Keep medium consistently moist and provide bright light after emergence. Cite seed‑starting best practices from WSU Extension and common kit instructions (Jiffy example).
What temperature, light and watering conditions should I expect and how quickly will seeds germinate?
Provide a short table‑style answer in text: typical ranges — Temperature: 55–65°F (13–18°C) ideal; Light: bright indirect or bottom light during germination; Watering: keep medium consistently moist (not waterlogged); Germination time: typically 7–30 days depending on species and stratification. Note that warmer temps may speed germination but can increase fungus risk; cooler temps slow it. Source: WSU Extension and multiple seed suppliers.
Next Article
How to Grow Clustered Bellflower From Seed to Clumps
Step-by-step how to grow clustered bellflower from seed to dense clumps with sowing, spacing, care, and troubleshooting.