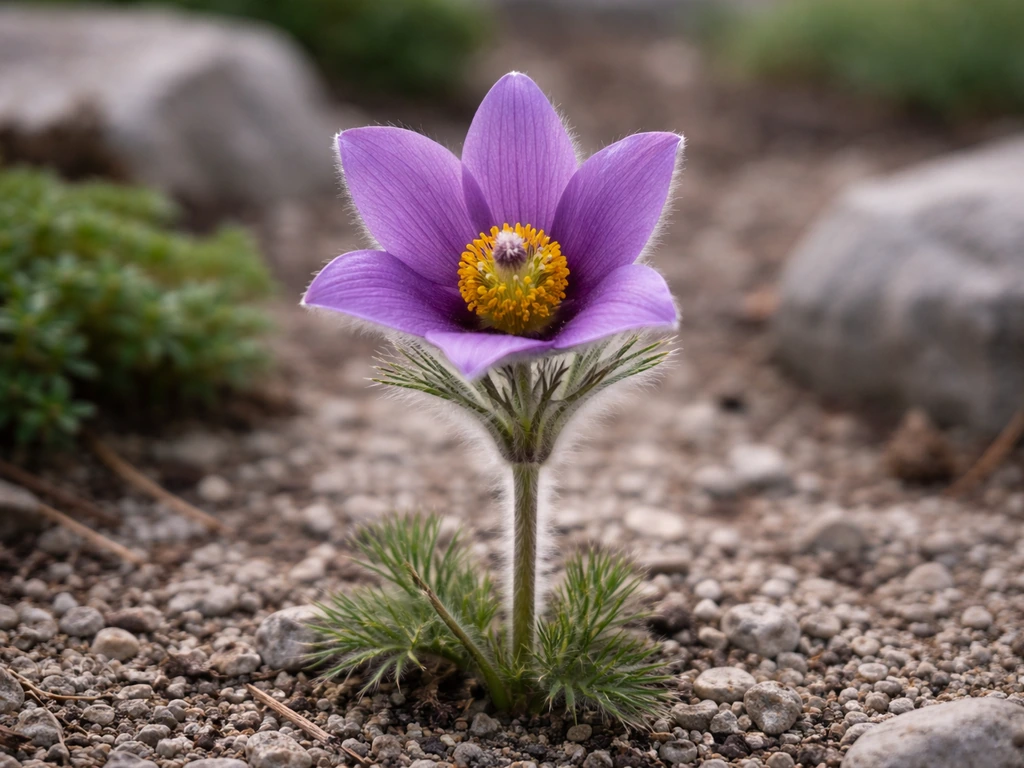
Windflowers (Anemone species) are some of the most rewarding flowers you can grow, whether you start from seed or drop a handful of knobby little corms into the ground. The key is matching the right species to your climate and giving them well-drained, humus-rich soil with the right amount of light. Get those basics right and you'll have daisy-like blooms in jewel tones, including some gorgeous purples and blues, from late winter through autumn, depending on which species you choose.
How to Grow Windflower: Step-by-Step Guide for Gardeners

Marcus Holloway
30 Jul 2026

What windflowers are and why they belong in your garden
Anemone is a large genus of flowering plants in the buttercup family (Ranunculaceae), and the name 'windflower' refers to a handful of species that home gardeners actually grow. The three you'll encounter most often are Anemone blanda (Grecian or winter windflower), Anemone coronaria (the showy poppy anemone, sold in the De Caen and St. Brigid groups), and the Japanese anemones (Anemone hupehensis, A. × hybrida, and close relatives). Each one occupies a different seasonal slot in the garden: A. blanda opens in late winter and early spring, A. coronaria puts on its biggest show in spring and early summer, and the Japanese types close out the season with late-summer and autumn flowers. Together, they can give you anemone color from February through October without any gaps.
In the garden, windflowers pull their weight in a number of ways. Low-growing A. blanda is perfect for naturalizing under deciduous trees or tucking into rock gardens, where it lights up bare ground before the canopy leafs out. A. coronaria is the classic cut-flower anemone with those bold, poppy-like blooms on long stems, exactly the type you see in florist bouquets. Japanese anemones fill the late-season gap when most perennials are winding down, making them a go-to choice for any border that needs life in September and October. A quick note on taxonomy: Japanese anemones are sometimes listed as Eriocapitella in botanical databases, but every nursery and seed supplier still sells them as Anemone, so that's the name we'll use here.
Which windflower species to grow, and the best purple varieties
Choosing the right species starts with two questions: what season do you want flowers, and are you planting seed or corms? A. coronaria and A. blanda are both corm/tuber-grown and are the easiest entry points for beginners. A. coronaria is also the best species for deep purple and violet blooms, while A. For step-by-step guidance on how to grow purple windflowers, see our dedicated guide. blanda leans toward soft blue-purple through white. Japanese anemones lean toward pink, white, and soft mauve rather than true purple, so if bold violet is your goal, stick with the coronaria group.
If purple tones are a priority, here are the cultivars worth looking for. A. blanda 'Blue Shades' carries an RHS Award of Garden Merit and produces starry, soft blue-violet flowers in early spring, it's one of the most reliable performers in that color range for a naturalized planting. In the A. coronaria De Caen group, 'Mister Fokker' is a widely grown deep violet-blue single, 'Violet Star' delivers a rich purple with a contrasting white center, and 'Radar' is a vivid magenta-red with a white eye that reads as deep jewel-toned in a mixed planting. The St. Brigid group offers semi-double and double forms in similar color ranges if you prefer a frillier look. If you want to explore the full purple windflower spectrum in more depth, the dedicated guide to growing purple windflowers covers these cultivars and their color nuances in detail.
On the seed vs. corms question: A. coronaria and A. blanda are both readily available as corms (sometimes called tubers, the terms are used interchangeably in the trade), and corms are genuinely the easiest and fastest path to flowers. The University of Missouri Extension explains that the term ‘bulbs’ in herbaceous ornamentals is often used broadly to include corms, tubers and rhizomes, which aligns with how the trade commonly uses these storage‑organ terms interchangeably Herbaceous Ornamentals — University of Missouri Extension (storage organ definitions; ‘bulbs’ includes corms/tubers/rhizomes). Starting A. coronaria from seed is absolutely possible but requires cold stratification and patience, and it typically adds a full season before you see blooms. For most beginners, I recommend starting with corms and experimenting with seed once you have a feel for how the plants grow.
Site and soil: what windflowers actually need
The single most important thing you can do for windflowers is give them sharp drainage. These plants, especially A. coronaria and A. blanda, will rot in waterlogged soil faster than almost anything else in the garden. Beyond drainage, they want humus-rich loam that holds some moisture during active growth without ever sitting wet. That balance is easier to achieve than it sounds: dig in a generous amount of well-rotted compost or leaf mold before planting, and if your soil is heavy clay, work in horticultural grit or coarse perlite to open it up.
For soil pH, aim for slightly acid to neutral, in the range of approximately 5.6 to 7.5. Most garden soils already fall in this window, so unless you've had a soil test flagging a problem, you probably don't need to amend for pH specifically. If you're gardening on chalky or very alkaline ground, adding sulfur-based acidifiers gradually over a season or two will help.
Light requirements vary by species. A. blanda is flexible, it grows in full sun or dappled shade and actually does well under deciduous trees because it finishes its above-ground growth before the canopy fully closes. A. coronaria prefers full sun to light shade; if you're in a hot climate (zone 8 or warmer), afternoon shade will extend the flowering period and prevent bleaching. Japanese anemones are the shade-toleraters of the group, performing well in partial shade and even in north-facing borders where other sun-lovers would struggle.
| Species | Light | Drainage | Best pH | USDA Hardy Zones |
|---|---|---|---|---|
| A. blanda (Grecian windflower) | Full sun to partial shade | Well-drained | 5.6–7.5 | 4–8 |
| A. coronaria (poppy anemone) | Full sun, light afternoon shade in hot zones | Sharp drainage essential | 5.6–7.5 | 7–10 (perennial); zones 4–6 as annual or lifted |
| Japanese anemone (A. hupehensis / A. × hybrida) | Partial shade to light sun | Moist but well-drained | 5.6–7.5 | 4–8 |
Planting schedules and timelines by USDA zone
Timing is where a lot of beginner windflower attempts go wrong, so let's be specific. The schedule depends on which species you're growing and where you live.
Anemone blanda (zones 4–8)
Plant A. blanda corms in autumn, typically September through October. They need a cold period to root and establish before blooming in late winter to early spring. In zones 4 to 6, plant them by mid-October so they have time to settle in before the ground freezes. In zones 7 and 8, October through November is fine. These are reliably hardy and don't need lifting.
Anemone coronaria (zones 4–10)
This is where timing gets climate-specific. In mild winter areas (zones 7–10), plant coronaria corms in autumn, October through November, for a spring flower display starting as early as February or March. This is the natural growing season for this Mediterranean-native plant: cool and moist with mild temperatures. In cold-winter zones (zones 4–6), you have two options: plant in early spring as soon as the ground can be worked and after the last hard freeze (late March to April), or start corms in containers indoors in late winter and move them outside after frost. In zones 4–6, treat A. coronaria as an annual unless you're prepared to lift and store the corms before hard frost arrives in autumn.
Japanese anemones (zones 4–8)
Plant bare-root or container-grown Japanese anemones in spring (April to May) or early autumn (August to September). Spring planting gives roots the full growing season to establish before winter. Autumn planting works in zones 6 and warmer; in zones 4 to 5, spring planting is safer because young plants need time to anchor before hard freezes arrive. These are perennials, so once established, they return and expand year after year.
| Species | Zone 4–6 Timing | Zone 7–8 Timing | Zone 9–10 Timing | Method |
|---|---|---|---|---|
| A. blanda | Plant corms: Sept–Oct | Plant corms: Oct–Nov | Plant corms: Oct–Nov | Autumn corm planting |
| A. coronaria | Plant corms: late March–April (spring); or lift in autumn | Plant corms: Oct–Nov for spring bloom | Plant corms: Oct–Nov for winter/spring bloom | Autumn (warm zones) or spring (cold zones) |
| Japanese anemone | Plant: April–May (spring preferred) | Plant: April–May or Aug–Sept | Plant: Aug–Sept (autumn preferred) | Container or bare-root planting |
Your planting checklist before you start
Getting organized before planting day saves a lot of frustration. Here's everything you need to gather and check off.
- Corms/seeds: inspect corms on arrival; discard any that are soft, moldy, or shriveled past recovery
- Soil test: optional but useful — confirm pH is between 5.6 and 7.5; available from most garden centers for a few dollars
- Compost or well-rotted manure: a 5 cm (2 inch) layer worked into the top 20–25 cm (8–10 in) of soil
- Horticultural grit or perlite: for heavy clay soils, add a generous handful per planting hole
- Trowel and dibber or bulb planter: for setting corms at the right depth without disturbing neighbors
- Plant labels and waterproof marker: you will forget what you planted where
- Watering can with a rose head: for gentle watering-in without dislodging corms
- Small bowl of room-temperature water: for soaking A. coronaria corms before planting (3–12 hours)
- Pot with drainage holes (at least 20–25 cm / 8–10 in deep): for container growing or cold-zone overwintering
- Timeline: confirm your last/first frost dates and count backward to set your planting window
How to direct-sow windflower seeds outdoors
Direct sowing works best for A. coronaria and is most successful in mild climates (zones 7 and above) where you can sow in autumn and let natural winter temperatures provide the cold stratification the seeds need. In colder zones, direct sowing is trickier because seeds may not stratify reliably in freeze-thaw cycles, and germination can be patchy. If you're in zone 6 or colder, the indoor stratification method in the next section will give you more control.
- Choose your timing: in mild climates, sow outdoors in September or October, about 6–8 weeks before your first expected frost. The seeds will receive natural cold stratification through winter and germinate in late winter or early spring.
- Prepare the bed: clear weeds and debris, then dig in a 5 cm (2 in) layer of compost. Rake to a fine, even tilth. Good seed-to-soil contact is essential for germination.
- Sow shallowly: scatter seeds thinly across the surface or in shallow drills about 3 mm (⅛ in) deep. Anemone seeds are relatively small and feathery — don't bury them deeply.
- Cover lightly: rake gently or press seeds in with the back of your hand so they're in contact with the soil but barely covered. A light scatter of fine compost or vermiculite over the top works well.
- Water gently: use a watering can with a rose head to avoid washing seeds away. Keep the seedbed consistently moist but not wet.
- Mark the area clearly: sown seeds are invisible. Label the bed and resist the urge to dig it up when nothing appears for weeks.
- Thin after germination: once seedlings have two true leaves, thin to approximately 15–20 cm (6–8 in) apart to give each plant room to develop.
- Expect slow germination: A. coronaria seeds have a built-in dormancy mechanism. Even with good stratification, germination can take 4–8 weeks and is sometimes uneven. Don't give up on a sown bed too soon.
How to start windflower seeds indoors (with cold stratification)
Indoor seed starting with stratification is the most reliable method for cold-climate gardeners (zones 4–6) and for anyone who wants to get a head start on the season. It takes some patience, plan for 10–14 weeks from stratification start to transplant-ready seedlings, but the process is straightforward once you understand why each step matters.
Anemone coronaria seeds have what botanists call morphophysiological dormancy, which basically means the seed won't germinate until it's experienced a cold, moist period that mimics winter. The research on this is clear: cold-moist stratification of 8–12 weeks at around 4–5°C (39–41°F) gives the best germination results. Skipping stratification leads to poor, erratic germination, that's the reason a lot of beginners give up on growing anemones from seed unnecessarily.
- Start stratification 10–14 weeks before your last frost date. For zone 5 (last frost late April), that means starting in mid-January.
- Mix seeds with slightly damp vermiculite or fine peat — just moist enough to feel damp but not dripping. Place in a sealable plastic bag or small covered container.
- Label the bag with the date and species, then place it in the vegetable crisper drawer of your refrigerator. Keep it at approximately 4–5°C (39–41°F). Check every 2 weeks to make sure the medium stays moist.
- Stratify for 8–12 weeks. Toward the end of that period, check for early germination — if seeds begin to sprout in the bag, move immediately to step 5.
- After stratification, fill seed trays or small pots (4–5 cm / 1.5–2 in cells work well) with a fine seed-starting mix. Sow seeds on the surface and cover with a shallow 3 mm layer of vermiculite.
- Keep the trays at 10–20°C (50–68°F) for germination. This is the optimal temperature window from germination research — avoid warm windowsills or heat mats above 20°C, as higher temperatures actually suppress germination in this species. A cool spare room or unheated greenhouse is ideal.
- Keep the growing medium consistently moist. Germination typically begins within 2–4 weeks at optimal temperatures, though it can be slower and uneven — that's normal for this species.
- Once seedlings have 2–3 true leaves, pot them up individually into 7–9 cm (3 in) pots filled with a free-draining potting mix.
- Harden off seedlings over 7–10 days before transplanting: move trays outside to a sheltered spot for increasing periods each day, starting with a couple of hours in morning sun.
- Transplant to the garden after all frost risk has passed, spacing plants 15–20 cm (6–8 in) apart. Water in thoroughly.
How to plant windflower corms and tubers
Planting corms is genuinely easy once you get over the initial confusion about which end goes up. The corms of A. coronaria and A. blanda look like small, dried-out lumps of bark, and many of them don't have an obvious pointed tip the way daffodil bulbs do. If you truly cannot tell which end is which, just plant them on their side, they'll figure it out. That said, if you can spot a slightly flatter or rougher surface (the base, which roots from) versus a more domed or textured side (the top, where shoots emerge), plant with the dome upward.
Pre-planting soak
Before planting A. coronaria corms, soak them in room-temperature water for 3–12 hours. Dry corms can take a long time to hydrate in the soil, which delays sprouting. A soak rehydrates them and gets germination moving significantly faster. Don't soak for longer than 12 hours or in warm water, extended soaking at high temperatures can cause rot. A. blanda corms can also benefit from a short soak (3–4 hours), though it's less critical for this species.
Planting depth and spacing
A. blanda corms are small and should be planted shallowly, about 2–5 cm (1–2 in) deep and spaced 5–10 cm (2–4 in) apart. For a naturalized effect under trees, scatter them and plant where they fall. A. coronaria corms are planted a little deeper, roughly 3–8 cm (1–3 in) deep depending on tuber size, with spacing of 10–20 cm (4–8 in) for a cut-flower bed or 15 cm (6 in) for a border planting. A good rule of thumb for any corm: plant at a depth equal to one to two times its largest dimension.
Step-by-step corm planting
- Inspect all corms before planting. Squeeze each one gently — firm corms are healthy, soft or mushy spots indicate rot. Discard any that are slimy or mostly soft.
- Soak firm corms in a bowl of room-temperature water for 3–12 hours. They will swell noticeably.
- Prepare the planting hole with a trowel or bulb planter. Work in a small handful of compost at the base of each hole if your soil is lean.
- Set the corm at the correct depth (see above), dome or bud-bearing side up where identifiable.
- Backfill with soil, firm gently with your fingers to eliminate air pockets, and level the surface.
- Water in thoroughly after planting to settle the soil and initiate root contact. After this initial watering, hold off until you see shoots emerging — overwatering unrooted corms in cool soil is one of the main causes of rot.
- Mark the planting area clearly. Nothing is visible above ground for several weeks, and it's easy to accidentally dig up newly planted corms.
Autumn planting (zones 7–10, A. coronaria)
In mild winter climates, plant A. coronaria corms in October or November for a January-to-April flower display. The cool, moist autumn and winter conditions are exactly what these plants evolved for. You'll typically see shoots emerging within 3–5 weeks of planting, and flowers follow 12–16 weeks after that depending on temperatures and cultivar. Expect first blooms as early as January in zone 9 and closer to March or April in zone 7.
Spring planting (zones 4–6, A. coronaria)
In cold-winter zones, plant A. coronaria corms in late March or April, as soon as the soil can be worked and after the last hard freeze. Soil temperature should be at least 5–7°C (40–45°F). Plants will grow and flower from May through June, then go dormant as summer heat arrives. Dig corms after the foliage dies back (late June or July), dry them for a few days in a shaded, airy spot, and store them in a paper bag or mesh bag in a cool, dry place (around 15–18°C / 60–65°F) until replanting the following spring.
Container planting
Containers are a great option for A. coronaria in cold climates because you can start them inside, move them outdoors when conditions are right, and bring them back under cover before hard frost. Use a pot at least 20–25 cm (8–10 in) deep with drainage holes in the base. Fill with a mix of quality potting compost and 20–30% perlite or horticultural grit to ensure free drainage. Plant corms at the same depth as in-ground planting. In zones 4–6, move containers to an unheated garage, cold greenhouse, or sheltered porch before the first hard frost in autumn to protect corms overwinter.
Ongoing care: watering, feeding, and support
Windflowers don't need a lot of fussing once they're established, but getting the watering right is important. For tips on growing purple coneflowers (Echinacea) as complementary plants in mixed borders, see how to grow purple cone flowers. For container-growing advice that also applies to tender bulbs, see how to grow purple angel trumpet. For a related step-by-step guide on growing similar small, daisy-like perennials, see how to grow pinwheel flower. For similar care and cutting tips for another popular spring bloomer, see how to grow pincushion flower. During active growth, keep the soil evenly moist but never soggy. In practice, that usually means watering when the top 2–3 cm (1 in) of soil feels dry. As plants approach dormancy (foliage yellowing and dying back), reduce watering significantly, this is when overwatering causes corm rot.
Feeding is light-touch for most windflowers. Work a balanced granular fertilizer (10-10-10 or similar) into the soil at planting time, or top-dress with compost. During the growing season, a dilute liquid feed (half-strength balanced liquid fertilizer) once every 3–4 weeks is plenty. Avoid high-nitrogen feeds that push leafy growth at the expense of flowers.
Japanese anemones grow tall (60–120 cm / 2–4 ft depending on cultivar) and can flop in exposed positions or after heavy rain. Stake plants loosely with bamboo canes and soft garden twine, or use peony rings around clumps before they reach flowering height. A. coronaria grown for cut flowers also benefits from light support on windy sites, a low wire grid or grow-through support keeps stems upright.
Deadheading, dividing, and keeping plants productive
Deadheading A. coronaria and A. blanda regularly extends the flowering period by preventing the plant from putting energy into seed production. Snip spent flowers just above the next bud or leaf node. For Japanese anemones, deadheading is less critical because they bloom over a long period naturally, but removing spent stems keeps the planting looking tidy.
Division is the easiest way to propagate Japanese anemones and to keep established clumps flowering well. Lift and divide clumps every 3–4 years in spring or early autumn. Use a sharp spade to cut the rootstock into sections, each with a few healthy shoots and a good root system. Replant divisions immediately at the same depth and water in well. A. blanda will naturalize and self-seed gradually over time, you can also lift and separate the small corms in late summer and replant immediately or store for autumn planting. For A. coronaria, dig up corms after the foliage dies back, allow them to dry, and store as described above for replanting.
Quick-care reference
| Task | A. blanda | A. coronaria | Japanese anemone |
|---|---|---|---|
| Watering (active growth) | Moist, not wet | Even moisture; reduce as foliage dies | Moist, especially in dry spells |
| Feeding | Light compost top-dress | Balanced feed every 3–4 weeks in growth | Annual compost mulch; low-feed |
| Deadheading | Remove spent flowers to prolong display | Deadhead regularly for longer flowering | Optional; tidy spent stems |
| Dividing | Separate corms late summer | Lift/store corms after dormancy | Divide clumps every 3–4 years |
| Staking | Not needed | Support on windy sites | Stake tall cultivars |
| Winter care | Hardy to zone 4; mulch in coldest zones | Lift in zones 4–6; mulch in zone 7 | Mulch in zones 4–5; hardy to zone 4 |
Pests, diseases, and organic controls
Windflowers are generally tough, but a few problems come up regularly. Knowing what you're looking at early makes all the difference.
- Vine weevil (Otiorhynchus sulcatus): the grubs eat corms and roots, often causing plants to suddenly collapse. Look for C-shaped cream grubs in the soil around affected plants. Organic control: apply nematodes (Heterorhabditis bacteriophora) to moist soil in late summer when soil temperatures are above 12°C (54°F). In containers, repot annually and inspect soil.
- Slugs and snails: target emerging shoots in spring, leaving ragged holes or removing seedlings entirely. Organic control: use copper tape around containers, place beer traps, or apply wildlife-safe slug pellets (iron phosphate). Go out at night with a torch to hand-pick.
- Powdery mildew: a white, dusty coating on leaves, most common on Japanese anemones in hot, dry conditions. Prevention: water at the base, ensure good air circulation, avoid overcrowding. Treatment: remove affected leaves; spray with a solution of 1 part whole milk to 9 parts water, or a baking soda spray (1 tsp per 1 litre water with a drop of dish soap).
- Botrytis (grey mold): fuzzy grey mold on stems and foliage, often in cool, damp conditions. Remove affected plant material promptly and improve air circulation. Avoid overhead watering.
- Aphids: cluster on soft new growth and flower buds. Organic control: blast off with a strong stream of water, encourage natural predators (ladybirds, lacewings), or spray with insecticidal soap solution.
Troubleshooting: poor blooms, rot, and other common problems
If your corms planted in autumn produce lots of lush foliage but no flowers, the most likely culprit is either too much nitrogen in the soil (swap to a low-nitrogen, high-potassium feed), insufficient light (particularly for A. coronaria, which really does need sun for most of the day), or planting time that was too late for roots to establish properly before cold set in. Try again the following season with earlier planting.
Corm rot before sprouting is almost always a drainage and overwatering issue. If you dig up planted corms and find them soft and disintegrating, check your soil drainage first. Amend with grit, raise your bed, or switch to containers. Also revisit your watering habits: after the initial thorough watering-in at planting, soil should dry slightly between waterings during the pre-sprouting phase.
Poor or patchy germination from seed is the most common frustration when growing anemones from seed. If seeds fail to germinate indoors, the two most likely causes are insufficient stratification time (go the full 8–12 weeks) and germination temperatures that are too warm (keep trays at 10–20°C / 50–68°F, not on a warm heat mat). Darkness or low light during germination is actually fine for this species, a closed tray in a cool room will often outperform a bright warm windowsill.
Japanese anemones that fail to establish and flower well in their first year are normal, don't panic. These plants are notoriously slow to establish ('first year they sleep, second year they creep, third year they leap' is the old saying, and it applies very well here). Give them time and don't disturb them unnecessarily in the first two years.
Cutting windflowers for the vase
A. coronaria is one of the best cutting flowers in the spring garden. For the longest vase life, cut stems when the flower is still in bud or just beginning to open, the petals should be colored but the flower not yet fully unfurled. Cut in the early morning when stems are fully hydrated. Use sharp, clean scissors or snips and make the cut at a 45-degree angle just above a leaf node or at ground level if taking a long stem. Place stems immediately into a bucket of cool, deep water. They typically last 7–10 days in the vase with regular water changes.
Winter care and storing corms
For A. blanda in zones 4–8, winter care is minimal. These corms are reliably hardy in the ground and need only a light mulch of compost or leaf mold in zones 4 and 5 to protect against the harshest freezes. Leave them in place year after year and they'll naturalize steadily.
A. coronaria needs more attention in cold zones. In zones 7 and above, corms can stay in the ground with a protective mulch of 5–8 cm (2–3 in) of straw or shredded leaves over the planting area. In zones 4–6, lift corms after the foliage has yellowed and died back completely, usually in early summer. Brush off soil gently, let corms dry in a shaded, airy spot for 3–5 days, then store in paper bags or mesh bags (never airtight containers) in a cool, dry location at around 15–18°C (60–65°F). Check monthly for signs of rot and remove any affected corms before they spread.
Japanese anemones are perennial and hardy to zone 4 with minimal intervention. In zones 4 and 5, apply a 10 cm (4 in) mulch of straw or leaf mold over the root zone after the first hard frost to insulate the rootstock. Cut back dead stems to about 10 cm (4 in) in late autumn or leave them through winter for structural interest and cut back in early spring before new growth emerges.
FAQ
What are the common Anemone (windflower) species home gardeners grow and which have purple varieties?
Common garden species: Anemone blanda (Grecian/winter windflower), Anemone coronaria (poppy/garden anemone — De Caen and St. Brigid groups), and Japanese/Asian anemones (Anemone hupehensis, A. × hybrida; sometimes sold as Eriocapitella). Purple/blue‑toned choices: A. blanda ‘Blue Shades’ and similar blue selections; A. coronaria cultivars in De Caen and mixed groups often include violet/purple selections (trade names vary: ‘Mister Fokker’, ‘Violet Star’ types); some Japanese anemone hybrids are bred for pink‑to‑purple tones. Choose species by bloom season: A. blanda and A. coronaria flower in spring; Japanese anemones flower late summer–autumn.
What site and soil conditions do windflowers prefer?
General preference: humus‑rich, well‑drained loam that stays evenly moist during active growth but not waterlogged. pH: slightly acidic to neutral (~5.6–7.5). Light: A. blanda — full sun to partial/dappled shade; A. coronaria — full sun to light shade (afternoon shade in hot climates); Japanese anemones — partial/dappled shade to light sun. Improve heavy or clay soils with compost and grit/perlite to ensure drainage.
When should I plant Anemone corms/tubers by USDA zone?
General timing: Zones 7–10: plant Anemone coronaria and A. blanda in autumn for spring blooms. Zones 4–6: A. blanda generally planted in autumn (hardy); A. coronaria often planted in spring after last frost or grown in containers and overwintered indoors because coronaria is less reliably hardy. Japanese anemones (A. hupehensis) are typically planted in spring or autumn in zones ~4–8; spring planting allows root establishment before winter.
What are recommended planting depths and spacing for corms/tubers and containers?
Planting depths and spacing: A. blanda: shallow, ~1–2 in (2–5 cm) deep; space 2–4 in (5–10 cm) for naturalizing. A. coronaria: ~1–3 in (3–8 cm) deep depending on tuber size; space 4–8 in (10–20 cm) for cut‑flower production. Japanese anemones (rhizomatous): plant so crown is just below soil surface; space 12–24 in (30–60 cm) depending on cultivar vigor. Containers: use a pot at least 8–10 in (20–25 cm) deep with excellent drainage and a free‑draining premium mix amended with grit/perlite.
Should I soak/re‑hydrate anemone tubers before planting?
Soaking/rehydration is common and helpful: inspect tubers, discard soft/rotten ones, then soak or rehydrate in tepid water for a few hours to up to 12 hours (many suppliers recommend 3–12 hours). This speeds uniform sprouting. After soaking, plant with the bud/eye facing up, cover to recommended depth, firm soil and water in.
How do I sow Anemone seed: outdoor direct-sow vs indoor-start method?
Outdoor direct‑sow: in mild/wintered areas sow outdoors in autumn so seeds receive natural cold‑moist stratification over winter; keep seedbed consistently moist and protected from slugs/seed predators. Indoor/start (cold‑frame or trays): collect/hygienically sow seed into trays in late winter; perform artificial cold‑moist stratification for 6–12 weeks (refrigerator with moist medium or sow into a cold frame); after stratification move to germination temps (~10–20°C), provide light (many A. coronaria seeds germinate better with reduced light/darkness) and keep medium evenly moist. Transplant seedlings when strong enough and after frost risk passes.
Next Article
How to Grow Purple Windflowers: Seed to Bloom Guide
Step-by-step guide to grow purple windflowers from seed, with planting timing, soil, care, and troubleshooting to bloom.