Pincushion flower (Scabiosa atropurpurea and related species) grows best from seed started indoors 4 to 8 weeks before your last frost date, sown at the surface with just a light cover of vermiculite, kept at 65 to 70°F, and transplanted after all frost danger has passed into full sun with well-drained soil. Expect germination in about 10 to 12 days and flowers in roughly 90 to 100 days from sowing. It takes a little patience, but once it starts blooming it barely stops, especially if you keep deadheading it. If you want to keep windflower blooming as well, use similar deadheading and consistent watering for the best results.
How to Grow Pincushion Flower From Seed Step by Step

Marcus Holloway
13 May 2026
Pick the right pincushion flower and get your supplies together
The name 'pincushion flower' covers a handful of Scabiosa species, and knowing which one you're growing helps you set realistic expectations. The most commonly grown from seed is Scabiosa atropurpurea, also called sweet scabious. Cultivars like 'Black Knight' (deep burgundy-purple) and 'Beaujolais Bonnets' (rich wine-pink) are standouts in a cutting garden and widely available from seed companies. If you want something a bit different, Scabiosa stellata ('Drumsticks') is grown for its ornamental seedheads rather than just the blooms, great for dried arrangements. Both types grow as annuals in most climates and are easy enough for a complete beginner.
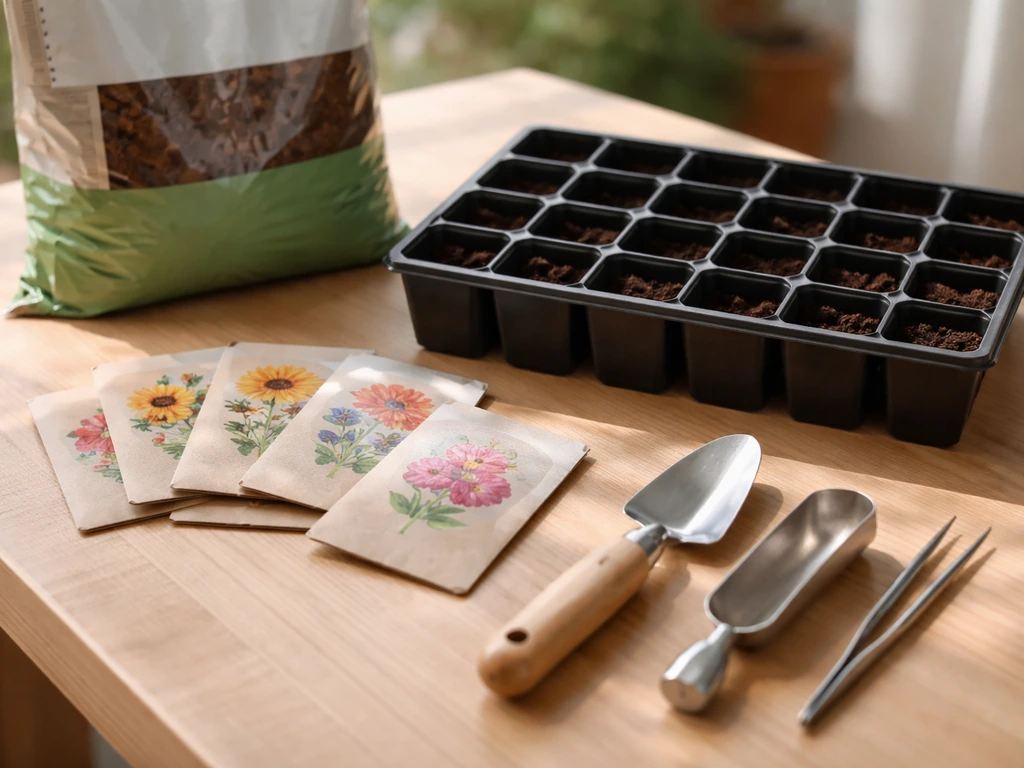
Before you sow anything, pull together what you'll need. A sterile, fine-textured seed-starting mix is essential, do not use garden soil in trays because it introduces the fungi that cause damping-off. You'll also want small cell trays or 3-inch pots, a spray bottle or gentle-head watering can, a bag of coarse vermiculite for covering the seeds, a heat mat (optional but helpful for hitting that 65 to 70°F sweet spot), and a grow light or a very bright south-facing windowsill. Grabbing all of this before sowing day makes the whole process calmer.
- Scabiosa atropurpurea seeds: 'Black Knight', 'Beaujolais Bonnets', 'Oxford Blue', or any cultivar labeled as sweet scabious or annual pincushion flower
- Scabiosa stellata 'Drumsticks' if you want ornamental seedheads for drying
- Sterile seed-starting mix (not garden soil, not potting mix with bark chunks)
- Cell trays or small pots with drainage holes
- Coarse vermiculite for the lightest possible seed cover
- Spray bottle and a humidity dome or clear plastic wrap
- Grow light or very bright windowsill (south-facing is best)
- Balanced liquid fertilizer for feeding once seedlings are established
When to sow: timing for your climate
Pincushion flower needs about 90 to 100 days from seed to first bloom, which means timing your sow correctly is probably the single biggest factor in getting flowers before summer heat kicks in. Work backwards from your last frost date and start seeds indoors 4 to 8 weeks before that date. If your last frost is around mid-April, for example, you'd be starting seeds indoors in late February or early March. That puts you on track to transplant in April and see flowers by late June or July.
In warmer climates (USDA zones 8 and above) where frosts are mild or brief, you can direct sow outdoors in early spring as soon as the soil is workable and temperatures are reliably above 50°F. Scabiosa actually appreciates cool spring conditions for establishing, and it tends to bloom before the heat of midsummer peaks. For a longer season of blooms, direct-sow successive batches every 2 to 3 weeks until late spring. This succession planting approach is something Johnny's Selected Seeds specifically recommends for best quality, and it really does make a difference, instead of one big flush, you get a steady supply of flowers for cutting.
| Climate/Zone | Indoor Start | Direct Sow Outdoors | Expected First Bloom |
|---|---|---|---|
| Cold winters (zones 4–6) | Late Feb to mid-March | Not recommended (season too short) | July to August |
| Mild winters (zones 7–8) | Late Jan to mid-Feb | Early March (after last frost risk) | June to July |
| Warm/frost-free (zones 9–10) | Optional — early Jan | February to March | May to June |
How to sow pincushion flower seeds
Scabiosa seeds need light to germinate, this is the detail that trips up the most beginners. Do not bury them. They should sit right at or just barely below the surface, then be covered with the thinnest possible layer of coarse vermiculite. Vermiculite keeps moisture around the seed without blocking the light it needs. Aim for no more than 1/8 inch (about 3 mm) of cover. Any deeper and germination drops noticeably.
Sowing indoors step by step
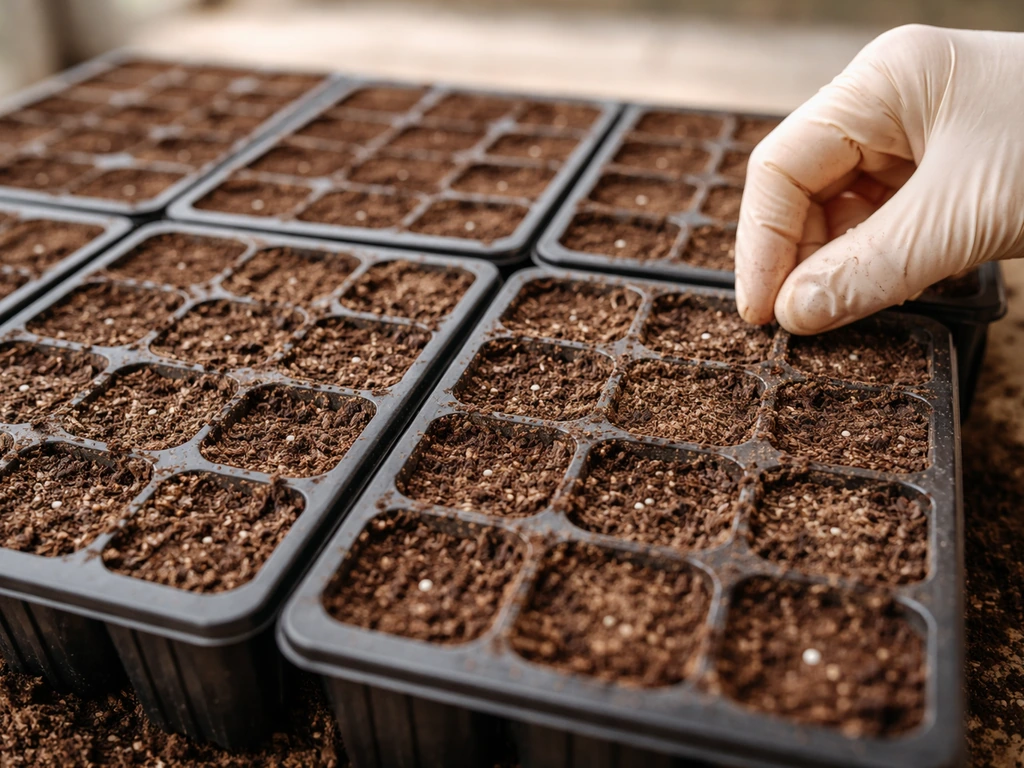
- Fill your cell trays or small pots with pre-moistened sterile seed-starting mix. Press it gently so there are no big air pockets, but don't compact it.
- Place 2 to 3 seeds per cell on the surface of the mix. Do not press them in deep.
- Sift or sprinkle just enough coarse vermiculite to barely cover the seeds — about 1/8 inch maximum.
- Mist gently with a spray bottle until the surface is evenly damp but not soggy.
- Cover with a humidity dome or loosely draped plastic wrap to hold moisture during germination.
- Place the tray somewhere that stays at 65 to 70°F consistently. A heat mat set to that range works perfectly. A warm spot on top of the refrigerator can also work in a pinch.
- Check moisture daily and mist if the surface is starting to dry out. Lift the dome for a few minutes each day to prevent fungal buildup.
- Once you see green shoots emerging (around day 10 to 12), remove the dome and move the tray immediately under grow lights or onto your brightest windowsill.
Direct sowing outdoors
For direct sowing, prepare the bed by loosening the soil and raking it to a fine, even surface. Scatter seeds thinly across the area or sow in shallow furrows about 1/8 inch deep, then rake very lightly over them. The principle is the same as indoors: minimal cover, just enough to keep seeds from blowing away and to retain moisture. Water gently with a fine rose attachment so you don't dislodge seeds. Keep the soil consistently moist until seedlings emerge, then thin to 12 to 24 inches apart once they're about 2 inches tall.
No stratification or scarification is required for Scabiosa atropurpurea or most annual types. Some perennial species benefit from a cold period, but for the sweet scabious cultivars sold by most seed companies, simply following the surface-sow method above is all you need.
Seedling care and fixing germination problems
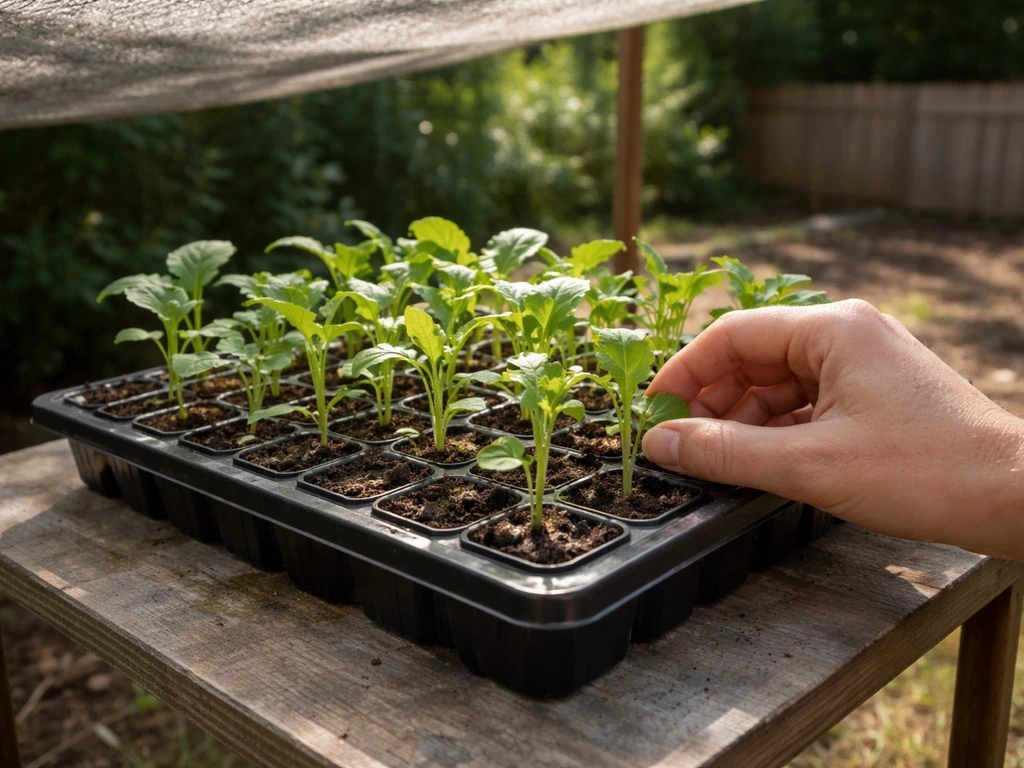
Once seedlings emerge, light becomes the top priority. Pincushion seedlings that don't get enough light become leggy almost immediately, long, pale, floppy stems that struggle to support themselves and never really recover their vigor. If you're using grow lights, keep them on for about 16 hours per day and position them 2 to 4 inches above the tops of the seedlings. If you're relying on a windowsill, a south-facing one in full sun is your best bet, but be prepared to rotate the tray every day or two so seedlings don't lean to one side.
When seedlings have their first true leaves (the second set of leaves, which look like real Scabiosa leaves rather than the round seed leaves), thin to one seedling per cell by snipping extras at the base with scissors. Don't pull them out, you'll disturb the roots of the one you want to keep. If you sowed in a larger flat, prick seedlings out carefully and pot them into their own 3-inch containers at this stage.
Troubleshooting common seedling problems
| Problem | Likely cause | Fix |
|---|---|---|
| No germination after 2+ weeks | Seeds buried too deep, soil too cold, or old/poor seed | Surface sow again with fresh seed; check temperature is 65–70°F |
| Seedlings collapse at soil line (damping-off) | Overwatering, poor drainage, or non-sterile mix | Use sterile mix; water less; improve airflow; discard affected trays |
| Tall, spindly seedlings | Not enough light | Move under grow lights 2–4 inches above seedlings, 16 hrs/day |
| Slow or patchy germination | Uneven moisture or temperature | Use a heat mat; mist daily; check dome is holding humidity evenly |
| Seedlings yellowing | Lack of nutrients in seed-starting mix | Begin diluted liquid fertilizer at half strength once first true leaves appear |
Damping-off is the most discouraging thing that can happen to a tray of seedlings. The fungal pathogens responsible thrive in warm, wet, still conditions, exactly the kind you create when you overwater under a dome. The fix is mostly preventive: start with a sterile mix (never garden soil), water from below when possible, lift the humidity dome daily for ventilation, and avoid letting water sit on the surface for long. For damping-off, Cornell notes that preplant fungicide strategies (including granular fungicide incorporation) can be considered with caution for possible phytotoxicity. If you lose a whole tray, start fresh with clean containers and fresh mix rather than trying to save the same tray.
Hardening off, transplanting, and garden conditions
About a week to 10 days before you plan to transplant, start hardening off your seedlings. Set them outside in a sheltered, partly shaded spot for an hour or two on the first day, then gradually increase their outdoor time and sun exposure over the following week. This step matters because seedlings grown under artificial light haven't experienced real wind, temperature swings, or intense sun, jumping straight from the windowsill to the garden can shock them badly or even bleach the leaves. By day 7 or 8 they should be spending most of the day outside and tolerating direct sun without wilting.
Transplant after your last frost date has passed and nighttime temperatures are staying above 40°F. Scabiosa roots are sensitive to disturbance, so handle the rootball gently and try not to break it apart when you remove each plant from its cell. Plant at the same depth it was growing in the pot. Space plants 12 to 24 inches apart, closer spacing works for smaller cultivars, wider for the tall cutting-garden types that can reach 2 to 3 feet.
Sun, soil, and water
Pincushion flower wants full sun, at least 6 hours of direct sun per day, and more is better. It can tolerate partial shade, but flowering drops off noticeably in shadier conditions. Soil drainage is non-negotiable: these plants are genuinely susceptible to root rot in heavy, waterlogged soil. If your garden beds tend to stay wet, either amend with grit and compost to improve drainage or grow in raised beds. Soil pH can range from slightly acidic to slightly alkaline and the plants adapt well, but avoid very acidic or very compacted ground.
Water newly transplanted seedlings regularly for the first couple of weeks while they establish their roots, but let the top inch of soil dry out between waterings after that. Once established, pincushion flower is reasonably drought-tolerant for short periods, but it blooms best with consistent moisture. The golden rule is: consistent but never waterlogged.
Feeding, deadheading, and keeping the blooms coming
Pincushion flower is a light feeder, which means it doesn't need heavy fertilizing. A balanced fertilizer formulated for flowering plants, applied every two weeks throughout the growing season, is plenty. Too much nitrogen will push leafy green growth at the expense of flowers, so avoid high-nitrogen formulas once plants are established in the garden.
Deadheading is the single biggest thing you can do to extend your bloom season. As soon as a flower head fades, clip the whole stem down to the basal foliage, the cluster of leaves at the base of the plant. Don't just snap off the flower head itself; cut the entire stem. This signals the plant to produce new flower stems rather than putting energy into setting seed. During peak season, check your plants every few days and deadhead anything that's past its best. You'll be rewarded with a steady supply of fresh flowers for weeks longer than if you leave them.
In very hot climates, Scabiosa can pause or slow blooming during the hottest part of summer. This is normal. Keep up with deadheading and watering, and the plants will usually rebound with a flush of new flowers when temperatures cool slightly in late summer or early fall.
Common problems and how to fix them fast
Pincushion flower is generally an easy-going plant, but a few issues do come up regularly. Here's what to watch for and what to do about it.
| Problem | Signs | Action |
|---|---|---|
| Powdery mildew | White powdery coating on leaves, usually in humid conditions | Improve airflow between plants; avoid overhead watering; remove badly affected stems; apply a fungicide if severe |
| Root rot | Wilting despite moist soil; yellowing lower leaves; mushy stem base | Stop watering immediately; check drainage; remove affected plants to prevent spread |
| Aphids | Clusters of small insects on stems and buds; sticky residue on leaves | Blast off with a strong stream of water; apply insecticidal soap if infestation persists |
| Slugs and snails | Ragged holes in leaves, especially on young plants and after rain | Set out slug traps or iron phosphate bait around the base of plants; check under pots and debris |
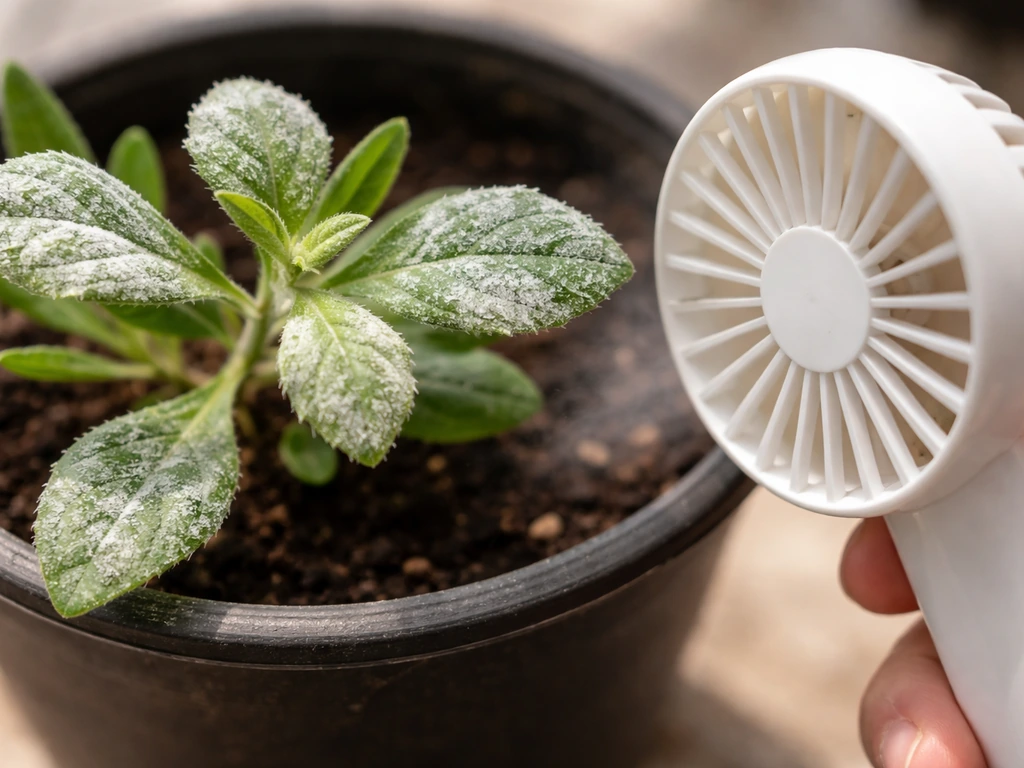
| Spider mites | Fine webbing on undersides of leaves; stippled, dry-looking foliage in hot/dry conditions | Increase watering; spray with insecticidal soap or neem oil; mist foliage regularly |
| Whiteflies | Tiny white insects that fly up when leaves are disturbed; yellowing foliage | Yellow sticky traps; insecticidal soap spray; encourage beneficial insects like ladybirds |
The fastest way to prevent most of these problems is getting the basics right from the start: full sun, good drainage, proper spacing so air can circulate between plants, and not watering overhead late in the day. Following UC IPM damping-off guidance can further reduce risk, including careful irrigation and proper planting conditions, and using seed treatments or soil fungicides only if needed with appropriate rotation limits for fungicide mode of action good drainage. Most pests and fungal diseases are opportunistic, they exploit plants that are already stressed. Healthy, well-sited pincushion flowers shrug off minor pest pressure without much intervention.
Your next steps for getting started today
If it's mid-May and you haven't started yet, don't give up on this season. Check your last frost date and count backwards, if you're past the point where indoor starts make sense, you can still direct sow outdoors now in most zones (zone 6 and warmer) and pick up succession sowings every 2 to 3 weeks through late spring. You'll get blooms by late summer rather than early summer, but you'll still get them. If you're in a cold zone and the window has closed for this year, use this guide to plan a head-start for next February.
- Order seeds now if you don't have them — look for Scabiosa atropurpurea cultivars like 'Black Knight', 'Beaujolais Bonnets', or 'Oxford Blue' from reputable seed companies.
- Find your last frost date and calculate whether indoor starting or direct sowing makes more sense for where you are right now.
- Gather sterile seed-starting mix, cell trays, and coarse vermiculite before sowing day.
- Surface sow seeds with no more than 1/8 inch of vermiculite cover; keep at 65 to 70°F until germination in 10 to 12 days.
- Move seedlings under grow lights (16 hours/day) or onto your sunniest windowsill immediately after germination.
- Harden off for 7 to 10 days before transplanting into a full-sun, well-drained bed after all frost risk is past.
- Deadhead consistently once blooming begins and feed with a balanced fertilizer every two weeks.
If you enjoy growing from seed, pincushion flower pairs beautifully with other cutting-garden favorites that have similar care needs. If you're specifically aiming for how to grow purple cone flowers next, you can use the same seed-to-bloom mindset while matching the timing and sun needs for that species. Purple angel trumpet is another dramatic cutting-garden plant, and learning its specific light, temperature, and watering needs will help you grow it successfully. If you want to grow pinwheel flowers too, you can use the same general approach for starting seeds, choosing a bright site, and timing planting around your last frost date how to grow pinwheel flower. Purple coneflower is another reliable seed-grown perennial worth exploring once you have Scabiosa under your belt, and windflower varieties offer a similarly delicate, long-season bloom habit. The skills you build starting pincushion flower from seed, surface sowing, hardening off, timing to your last frost date, transfer directly to almost everything else in a flower garden.
FAQ
Should I thin pincushion flower seedlings even if I’m aiming for a full, bushy look?
Yes. Thin once seedlings have a couple of true leaves to the recommended spacing (about 12 to 24 inches). Overcrowding reduces airflow, increases damping-off risk, and can lead to fewer, weaker flower stems even if plants look full at first.
Why did my pincushion flower seeds germinate but then stalled or turned weak?
The most common causes are low light (leggy seedlings) or water issues, seedlings need consistently moist medium until they emerge, then the top inch should dry slightly between waterings. Also check that seeds were not covered too deeply, even small extra burying can reduce early vigor.
Can I use a seed-starting heat mat and still germinate without grow lights?
You can start seeds with a heat mat, but you should not skip strong light once they sprout. Germinated seedlings still need intense light to avoid stretching, aim for full-spectrum grow lights around 16 hours daily or a genuinely bright south-facing window.
What’s the best watering method for preventing damping-off once seedlings have sprouted?
Water in a way that avoids soaking the surface repeatedly. Bottom watering helps, and you should remove domes for ventilation daily. Letting water sit on top for long periods is a major risk, especially in warm, humid trays.
Can I transplant pincushion flower seedlings from small cells without damaging the roots?
Handle rootballs gently and avoid pulling seedlings by stems. Keep the soil around roots intact, plant at the same depth, and transplant on an overcast day or late afternoon when possible to reduce transplant shock and leaf stress.
How do I know if my soil is draining well enough for pincushion flower before planting?
Run a simple drainage test: after watering or rain, see how long it takes for the bed to stop looking wet or puddled. If water lingers for many hours, amend with grit and compost or use raised beds, because root rot risk rises fast in chronically waterlogged soil.
Should I fertilize during seedling stage or only after transplanting?
For most home starts, wait until after transplant and use a light, balanced feeding during the established growing season. Too much nitrogen early can trade flowers for leafy growth, and seedlings grown in rich mixes may not need any additional fertilizer at first.
Do I deadhead pincushion flower by cutting just the faded head or the whole stem?
Cut the whole flower stem back to the basal foliage. Snapping off only the spent head often leaves the plant less able to redirect energy into new flower stems, the longer stem removal encourages repeat blooms.
My plants bloom early, then stop in the hottest part of summer. Is that a problem?
It’s often normal in heat. Keep deadheading and avoid letting plants go fully dry, then expect a rebound when temperatures ease in late summer. If plants wilt repeatedly during peak heat, increase mulching slightly while still maintaining fast drainage.
Can I direct sow pincushion flower instead of starting indoors, and how should I adjust expectations?
Yes in milder climates or when nights stay reliably warm, but you’ll usually get blooms later than indoor starts. Use shallow sowing (minimal cover), keep the top layer moist until emergence, and consider successive sowings every 2 to 3 weeks for a steadier harvest.
How long should I harden off pincushion seedlings before moving them to the garden?
Plan about 7 to 10 days. Start with a short time in part shade, then gradually increase sun exposure and outdoor hours. Skipping or rushing hardening off often leads to leaf burn or stunting because seedlings have not acclimated to wind and full sun.
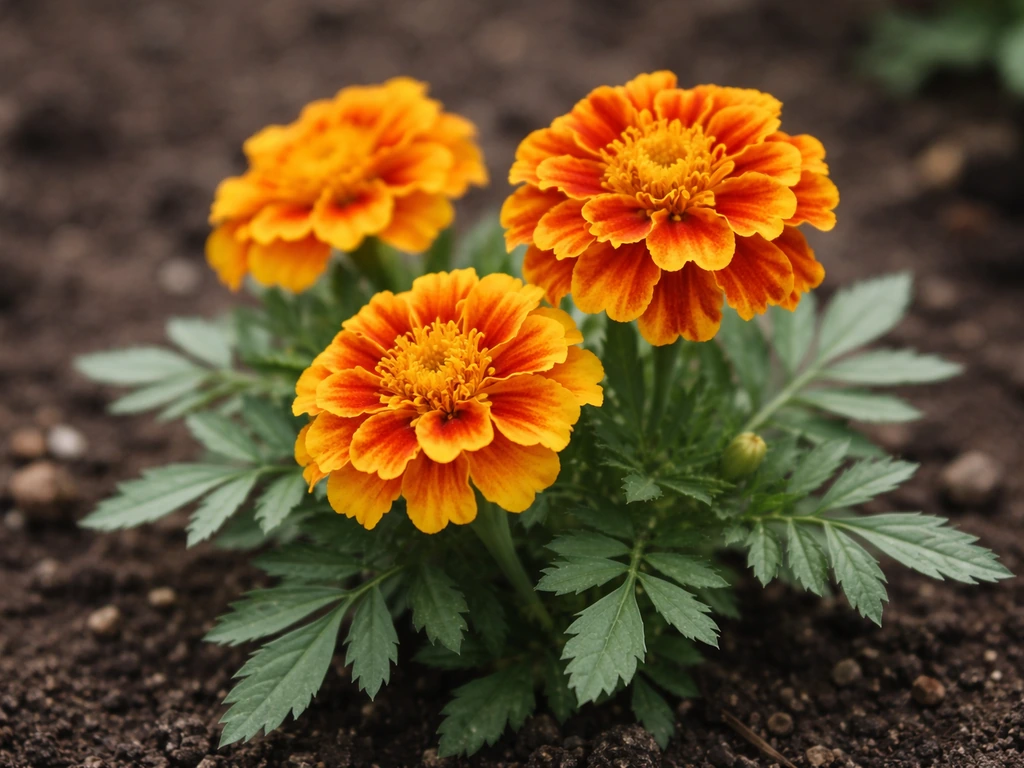
Next Article
How to Grow Marigold From Petals: What Works and What Fails
Learn why marigold petals rarely grow, plus seed and cutting steps, troubleshooting, and next-season tips for blooms.