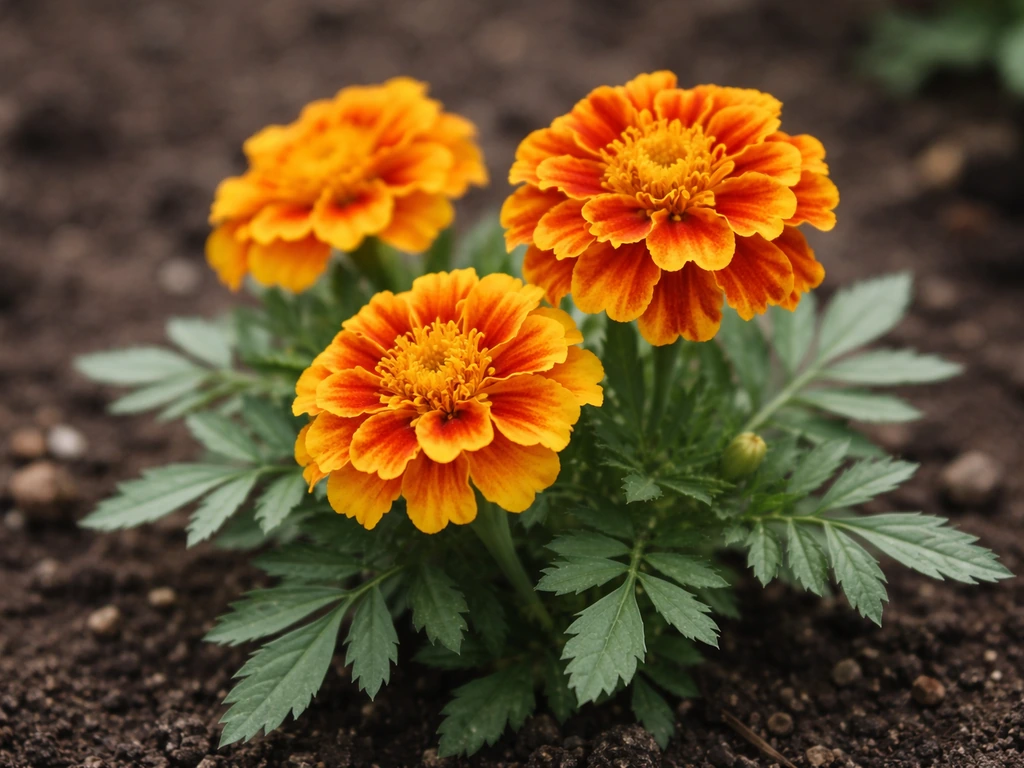
Yes, you can grow marigolds from a stem cutting, and it works better than most gardening guides let on. Take a 3–4 inch non-flowering shoot, strip the lower leaves, and push the cut end into moist, well-draining potting mix (or set it in water). Keep it warm, in bright indirect light, and roots usually appear within 10–14 days. That said, marigolds are one of the easiest flowers to grow from seed, so cuttings make the most sense when you want to clone a specific plant or don't have seeds to hand. Either way, this guide walks you through the whole process.
How to Grow Marigold From Stem Cutting: Step-by-Step

Marcus Holloway
8 Jul 2026
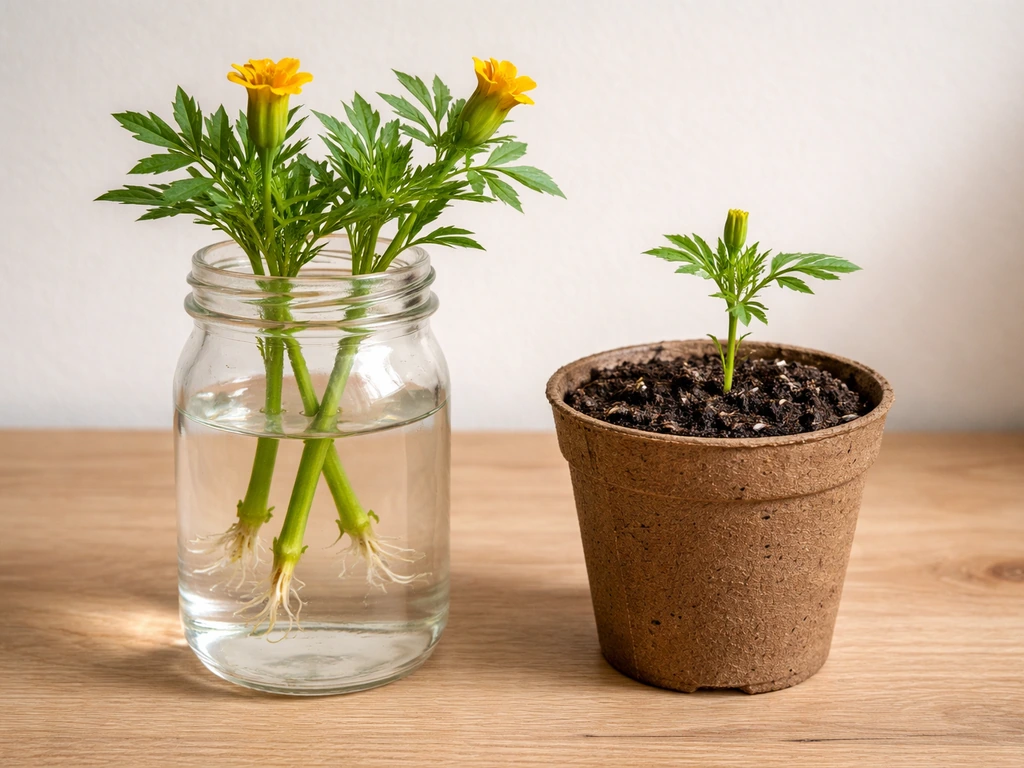
Can you grow marigold from a stem (and is it actually worth doing)?
Marigolds (both French marigolds, Tagetes patula, and African marigolds, Tagetes erecta) are propagated almost exclusively by seed in mainstream gardening. If you were trying to figure out how to grow marigold from petals, the good news is you can still use propagation from plant parts, but the method is different than seed or stem cuttings. The RHS, NC State Extension, and most commercial growers treat seed as the standard method, and for good reason: marigold seeds germinate fast, cost almost nothing, and can take a plant from sowing to bloom in about 8–10 weeks. Cuttings are a less common but completely workable alternative.
Where cuttings shine is when you've got a specific plant worth copying. Maybe you grew a marigold with an unusually deep orange color, or a form you haven't seen on seed packets. Cuttings let you reproduce that plant exactly, which seeds don't guarantee. They're also useful mid-season if you've run out of seeds but a healthy parent plant is sitting right there in the garden.
The honest caveat: marigolds are not the easiest plant to root from cuttings. They're soft-stemmed annuals, and soft stems can rot before they root if conditions aren't right. With a little care over humidity, moisture levels, and cleanliness, though, you'll get roots reliably. Think of it as a satisfying mini-experiment with a high success rate when you follow the steps.
Picking the right plant and stem before you cut
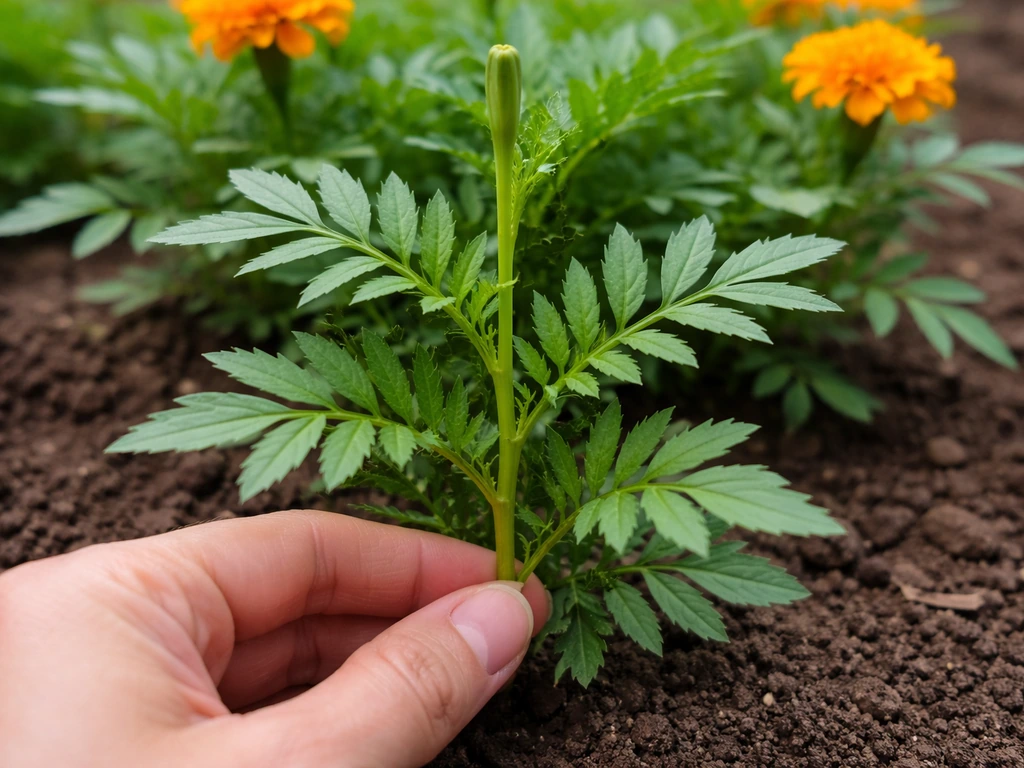
Not every marigold stem will root well. You want to take cuttings from a healthy, actively growing parent plant, and you want to choose the right kind of stem. Here's what to look for:
- Choose a stem that has no flowers or buds on it. A flowering stem puts its energy into making seeds, not roots. If a flower bud is the only option, pinch it off before you cut.
- Look for a stem that's firm but not woody. Young, green, slightly flexible growth roots the fastest.
- Aim for a shoot that's about 3–4 inches (roughly 10 cm) long with at least two or three sets of leaves.
- Avoid stems that look limp, diseased, or have any signs of pest damage. Weak parent material makes weak cuttings.
The best time to take marigold cuttings is late spring through early summer, roughly May to June in most temperate climates. At this point the parent plant is actively growing and the warm temperatures ahead will support fast rooting. You can also take cuttings later in summer if you want to overwinter the plant indoors, but mid-season cuttings tend to establish the quickest.
How to take the cutting (exactly where and how to cut)
This part matters more than most people think. A sloppy cut can damage stem tissue and invite rot before roots even have a chance to form. Use a sharp, clean blade every single time, and wipe it with rubbing alcohol between cuts if you're taking multiple cuttings from different plants.
- Find a non-flowering stem on your marigold plant and locate a leaf node, the point where a leaf grows from the stem.
- Make your cut just above a leaf node on the parent plant (this keeps the parent tidy and encourages new branching).
- Then re-trim the base of your cutting to just below a node. That node is where roots will initiate, so it needs to be in the rooting medium or water.
- Your finished cutting should be about 3–4 inches long with at least one node at the bottom and two to three leaves at the top.
- Strip off all leaves from the lower third of the stem. Any leaf sitting in the rooting medium or underwater will rot quickly and create problems.
- If there are any flowers or buds on your cutting, remove them now. This forces the cutting to put carbohydrates toward root and shoot development instead of seed production.
- Work quickly and keep cuttings out of direct sun while you prepare them. Wilted cuttings before they're even planted is a common beginner mistake.
Rooting marigold cuttings: water vs. soil
You've got two main options here, and both can work. They have slightly different pros and cons worth knowing before you choose.
Rooting in water
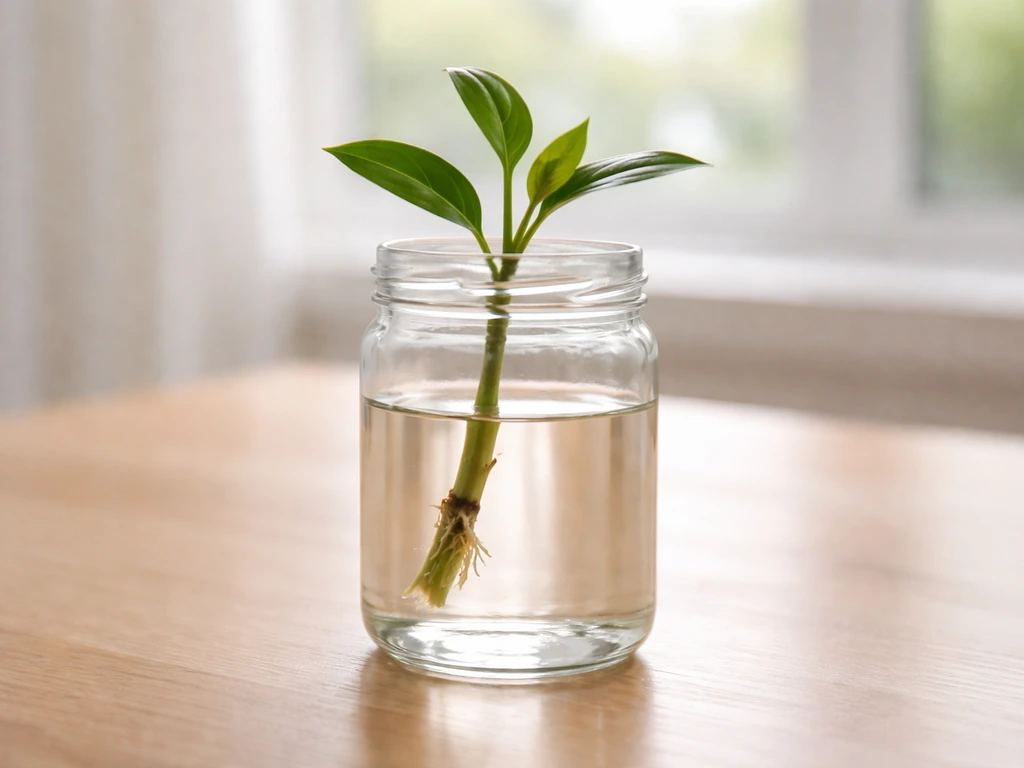
Water rooting is the most visible method, which makes it great for beginners. Place the stripped end of your cutting in a clean jar of room-temperature water, making sure the node is submerged but the leaves stay well above the waterline. Change the water every week to prevent bacterial buildup. Marigolds with their tender, water-filled stems can show root nubs in as little as 7 days under warm conditions. The downside is that water-grown roots can be more fragile and may struggle a little when you transplant into soil, so don't leave them in water so long that the roots become long and tangled. Some guides also warn that moving from water to another propagation medium can be a shock because the roots form differently, so well-draining, low-rot media are often preferable for many cuttings water-grown roots can be more fragile and may struggle a little when you transplant into soil. Move them to soil once roots are about half an inch long.
Rooting in a growing medium
Rooting directly in a well-draining, soilless mix is arguably the more reliable method for marigolds because the roots that form are already adapted to growing in a solid medium. Use a mix of perlite and peat, or straight horticultural sand, or any propagation mix labeled as fast-draining. Regular potting compost holds too much moisture and risks rotting the stems. Push the cutting about 1–2 inches deep into pre-moistened medium, making sure at least one node is buried. Firm the medium gently around the stem so it stands upright.
Should you use rooting hormone?
Rooting hormone (IBA, or indole-3-butyric acid) isn't essential for marigolds but it does speed things up and improve the consistency of results, especially if you're trying to root several cuttings at once. A standard powder formulation at around 1,500 to 2,000 ppm IBA is what extension guidelines recommend for softwood cuttings. Just dip the cut base in the powder, tap off the excess, and insert into your medium. Avoid getting it on your skin or eyes and wash hands after use. If you don't have any, don't worry. Marigolds can root without it.
Caring for cuttings while roots are forming
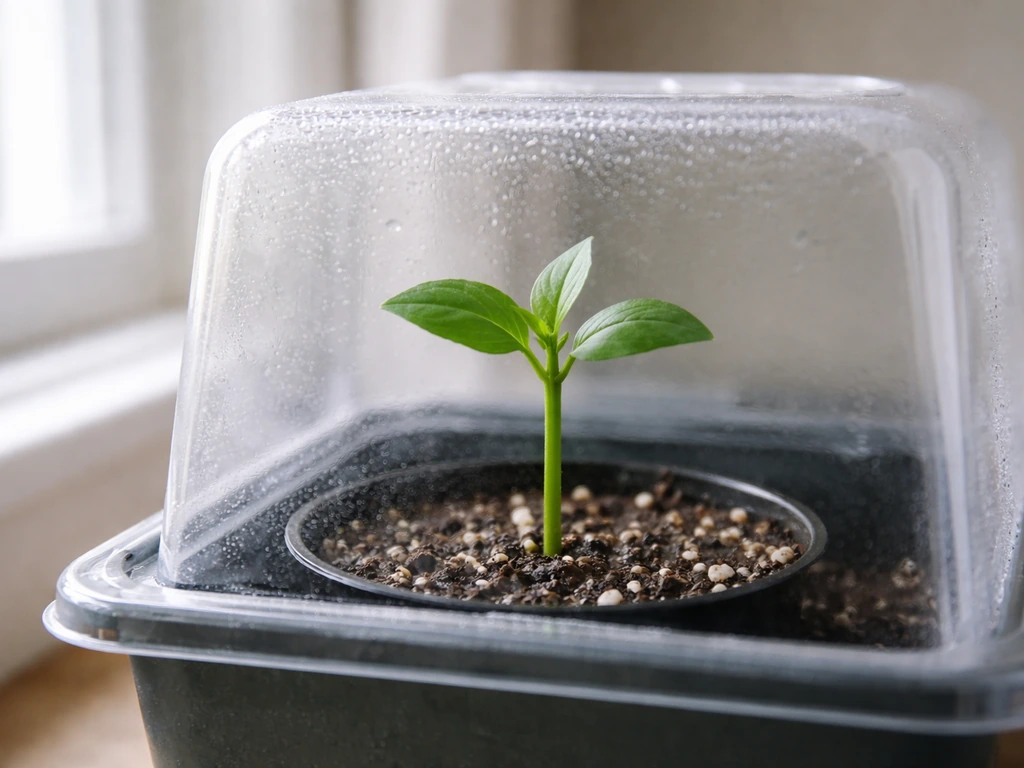
The window between taking the cutting and seeing roots is when most failures happen. The cutting has no roots yet, so it can't drink water from the medium. Instead, it needs to stay hydrated through its leaves while conditions encourage root growth. Here's how to manage that:
- Temperature: Aim for 65–75°F (18–24°C). Warmth speeds up root initiation. A windowsill above a radiator or a seed-starting heat mat set to low works well.
- Light: Bright, indirect light is ideal. Keep cuttings out of direct afternoon sun, which will dry them out faster than they can recover. A north or east-facing windowsill, or a spot a foot back from a south-facing window, is about right.
- Humidity: High humidity (around 70–90%) helps the cutting stay turgid while it waits for roots. Cover medium-rooted cuttings with a clear plastic bag, a cut-off plastic bottle, or a humidity dome. Don't seal it completely — leave a small gap for airflow to prevent mold.
- Watering the medium: Keep the propagation mix just barely moist, not wet. Soggy medium is the number one cause of stem rot. If you squeeze a handful and water drips out freely, it's too wet. It should feel like a wrung-out sponge.
- Water-rooting: Change the water weekly and keep the jar away from direct sun to limit algae growth.
- Leave them alone: Resist the urge to tug on the cutting to check for roots. You'll feel slight resistance when you gently tug after about 10–14 days if roots have formed.
Transplanting rooted cuttings and getting them to bloom
Once your cutting resists a gentle tug or you can see pale roots through a transparent pot, it's ready to move up. Give it another week after you first notice roots before transplanting, so the root system can strengthen a bit.
- If rooted in water, transfer to a small pot (3–4 inch) filled with good-quality potting mix. Plant it at the same depth it sat in the water. Water gently and keep it in indirect light for the first few days to reduce transplant stress.
- If rooted in a propagation medium, move the whole root ball into a slightly larger pot with regular potting mix. Avoid disturbing the roots more than necessary.
- Keep the newly transplanted cutting in bright indirect light for a week before moving it to full sun conditions. Marigolds love full sun once established, but freshly rooted cuttings benefit from a short hardening-off period.
- Harden off outdoor transplants over 5–7 days by placing them outside in a sheltered, part-shaded spot for increasing amounts of time before leaving them out full-time.
- Plant out in the garden into well-drained, evenly moist soil in a full sun position. Space French marigolds about 6–12 inches apart and African marigolds up to 18 inches apart.
- Deadhead regularly once flowering starts. Removing spent blooms keeps the plant producing new flowers rather than setting seed, which is exactly the same principle you applied when you stripped buds from your cutting.
Expect flowers about 3–5 weeks after a successfully rooted cutting is transplanted to a full-sun spot and growing strongly, though this varies depending on how mature the parent plant was and how warm your conditions are.
When things go wrong: cuttings that rot, wilt, or refuse to root
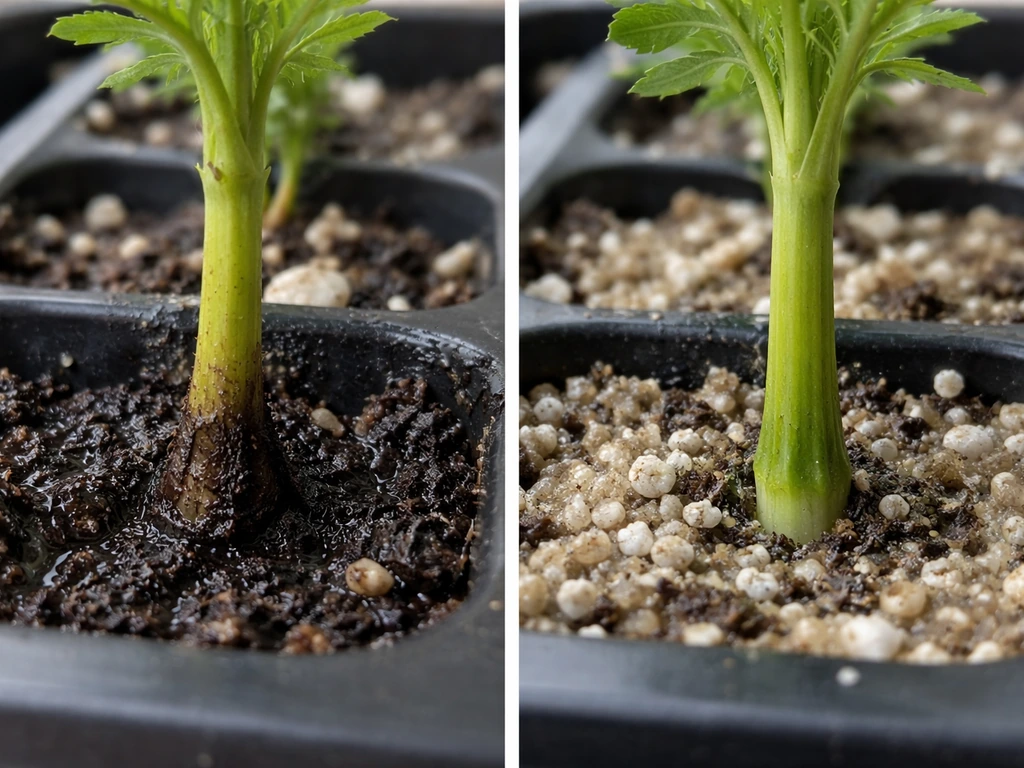
Marigold cuttings are fairly forgiving, but a few specific things cause most failures. Here's how to identify and fix the most common problems:
| Problem | Likely Cause | What to Do |
|---|---|---|
| Stem turns black or mushy at the base | Medium is too wet, or leaves left below the soil line are rotting | Let medium dry out slightly, remove any buried leaves, re-cut the stem above the rot, and re-insert into fresh dry-ish mix |
| Leaves wilt badly and the cutting collapses | Humidity too low, or cutting taken from a flowering stem | Cover with a humidity dome, move out of direct sun, make sure no flowers/buds were left on the cutting |
| White mold or fuzzy growth on soil or stem | Poor airflow inside the humidity dome | Open the dome for an hour each day, remove any mold with a cotton swab, reduce misting frequency |
| No roots after 3 weeks | Temperature too cold, stem too woody, or node not in contact with medium | Check that a node is buried, move to a warmer spot, try a fresh cutting from younger, greener growth |
| Roots form but cutting dies when transplanted to soil | Water-to-soil root shock, or transplanted too early | Move water-rooted cuttings when roots are short (0.5 inch), not long; keep in indirect light for 5–7 days after transplanting |
The single biggest mistake beginners make is overwatering the propagation medium. Soggy conditions create a film of water around the cut stem base that actually prevents root cells from getting the oxygen they need to differentiate. Purdue Extension warns that soggy propagation media can rot cuttings and that water films on the cutting base can hinder rooting, while rooting compounds like IBA can improve rooting uniformity and root mass water films on the cutting base can hinder rooting and IBA can improve rooting. Think damp, not wet, and you'll avoid 80% of cutting failures right there.
Stem cuttings vs. growing from seed: which one is right for you?
Both methods work. If you prefer starting from seed instead, follow our guide on how to grow marigolds from seed for reliable germination and strong seedlings. The question is which one makes sense for your situation right now. Here's an honest side-by-side:
| Factor | Stem Cuttings | Growing from Seed |
|---|---|---|
| Ease for beginners | Moderate (requires attention to humidity, moisture, cleanliness) | Very easy (marigolds germinate reliably with minimal fuss) |
| Cost | Free if you have a parent plant | Very cheap (a few dollars for a packet with dozens of seeds) |
| Time to bloom | 3–5 weeks after rooting (faster if parent plant was mature) | 8–10 weeks from sowing to first bloom |
| Genetic fidelity | Exact clone of the parent plant | Seeds may vary slightly, especially from hybrid varieties |
| Best use case | Cloning a specific plant you love, or propagating mid-season without seeds | Starting fresh, growing many plants, or trying new varieties |
| Risk of failure | Higher (rot, wilt, no rooting possible) | Lower (seeds are very forgiving) |
| Season flexibility | Best May–June; possible in summer | Sow indoors 6–8 weeks before last frost, or direct sow after frost |
My honest recommendation: if you're new to marigolds, start with seeds. They're faster to get going, cheaper, and almost foolproof. If you've already grown marigolds and want to preserve a particular plant, or you're curious to try propagation as a skill, cuttings are a genuinely satisfying project with a good success rate when you follow the steps above. It's also worth knowing that growing marigolds from dried flower heads (harvesting seeds from spent blooms) and other seed-based methods are options covered elsewhere on this site if you want to compare approaches.
Whichever route you choose, marigolds are one of the most rewarding flowers in the garden: bright, long-blooming, and remarkably tough once they're established. Getting there from a stem cutting is a small act of propagation magic that's well worth trying at least once.
FAQ
Can I grow marigold from a cutting if the stem is already flowering or looks woody?
Yes, but it is much less reliable. For “from stem” cuttings, pick soft, actively growing shoots (not woody, hard stems). If your plant is already flowering, take cuttings from the newest side growth, since flowering stems tend to root more slowly and rot more easily.
How wet should the soil or medium be when rooting a marigold cutting?
Aim for consistently damp medium, not pooling or dripping. A simple check is to water until excess drains, then wait until the top feels just barely dry before re-watering (or mist only enough to prevent leaf wilt in water-rooting). Overly wet mix is the main reason cuttings fail.
What cleanliness steps make the biggest difference when propagating marigolds from stem cuttings?
Sanitize your tools and container each time, and avoid touching the cut end. Use fresh, pre-moistened propagation mix (or rinse and fully clean the jar for water). If you reuse containers or reuse old mix, you increase the chance of stem base rot before roots form.
Will marigold stem cuttings root in cooler weather or indoors?
You can, but expect slower rooting and a higher failure rate. Marigolds root best in warm conditions, so if nights are cool, keep cuttings in a warmer room or use gentle bottom heat. Protect them from chilling drafts, since cold slows root formation while rot can start once the stem stays wet.
What should I do if my water-rooted marigold cutting gets cloudy water or smells bad?
If water is cloudy or you see slime, discard the water, rinse the cutting gently, and restart with clean room-temperature water. Also remove any leaves that fall below the waterline, because submerged foliage decomposes quickly and feeds bacteria that stall rooting.
When is the right time to move a water-rooted marigold cutting into potting mix?
Don’t delay transplanting. Move water-rooted cuttings into soil once roots are about 0.5 inch long, because long, tangled water roots can break or shock during transfer. Handle gently, keep the medium lightly moist, and avoid deep burying beyond what the original node position required.
Do marigold cuttings need a humidity dome or plastic cover?
Yes, but keep the humidity moderate. Use a clear cover only if it prevents fast leaf wilt, not if it causes constant condensation dripping onto the cutting. If you do use a cover, ventilate briefly each day to reduce fungal risk.
Can I root multiple marigold stem cuttings in the same pot or jar?
Use one cutting per small cell or pot if possible, and space them so leaves don’t crowd. Crowding traps moisture on leaf surfaces and makes it harder to spot early rot. If you must group cuttings, keep containers larger and ensure good drainage and airflow around the leaves.
Can I overwinter marigold cuttings so I don’t have to start over next year?
Long-term, marigolds are annuals, but you can overwinter a rooted cutting indoors. Once it has a healthy root system, treat it like a small plant in bright light, reduce watering slightly, and avoid heavy fertilizer until active growth resumes. When outdoor temperatures warm again, acclimate it gradually.
Why aren’t my marigold cuttings blooming yet, even though they rooted?
Expect a window of about 3 to 5 weeks after transplant for flowers, but if the parent plant was small or the cutting rooted late, blooming can lag. The quickest path to earlier bloom is bright full sun once established, consistent watering, and planting out when the weather is reliably warm.
Next Article
How to Grow Marigold From Petals: What Works and What Fails
Learn why marigold petals rarely grow, plus seed and cutting steps, troubleshooting, and next-season tips for blooms.