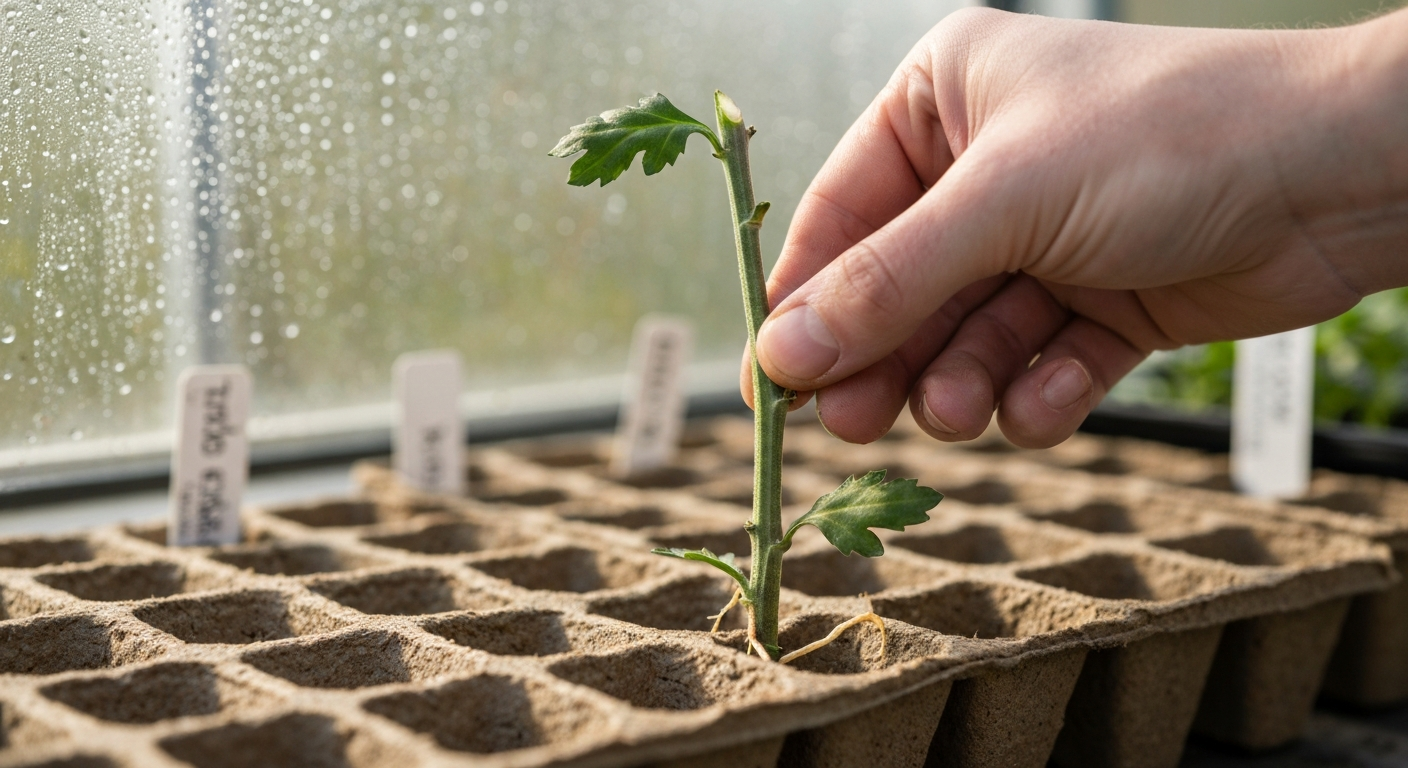
Yes, you can grow chrysanthemums from a bouquet, and the most reliable way is to root fresh stem cuttings in a sterile propagation mix under high humidity. For a step-by-step guide on how to grow chrysanthemum from stem, see the propagation walkthrough covering selection, rooting in media or water, and aftercare. Water rooting works too, but media rooting gives you stronger roots and less transplant shock. Collecting seed from dried flower heads is also possible, though florist hybrids rarely grow true from seed. Your biggest variable is the condition of the bouquet stems, the fresher and less chemically treated they are, the better your odds.
How to Grow Chrysanthemum from Bouquet: Rooting & Seeds

Marcus Holloway
4 Aug 2026
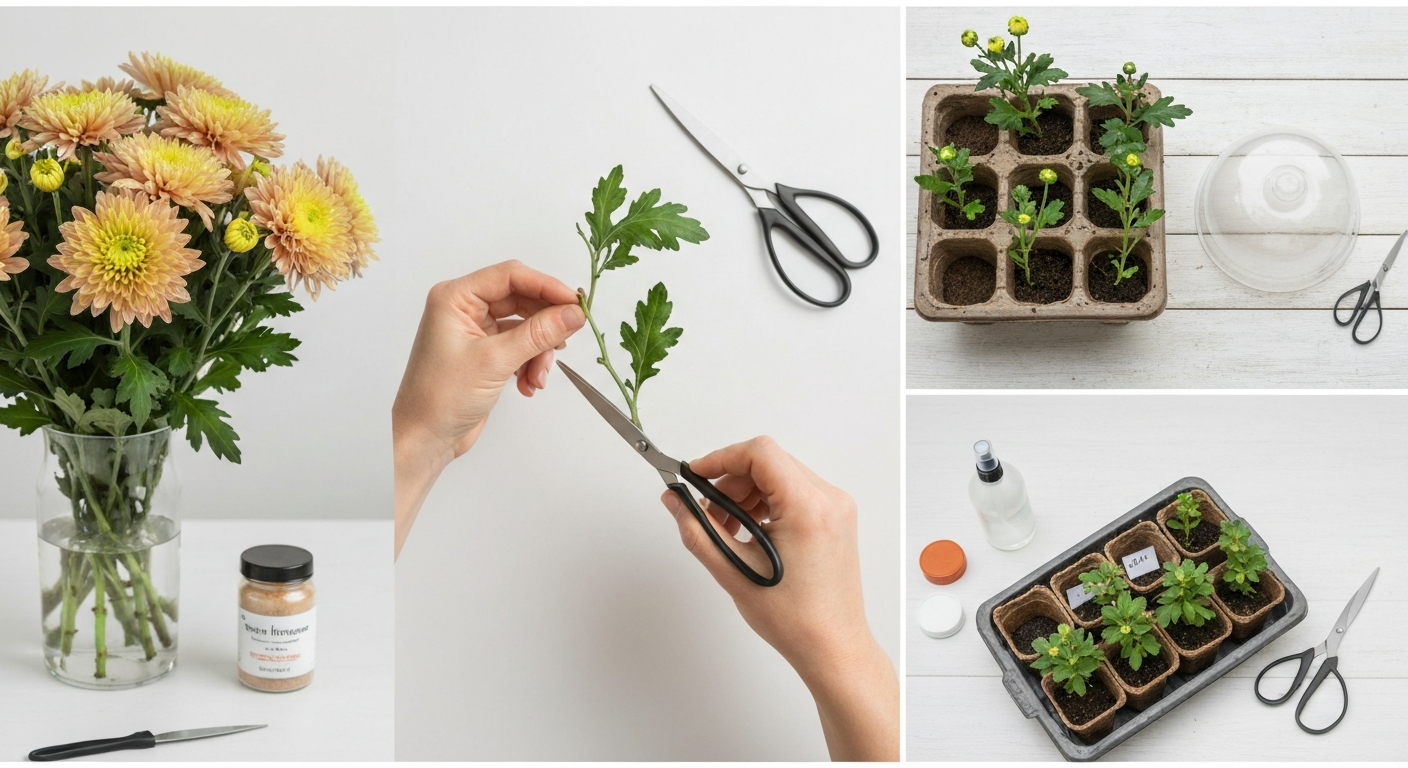
Can you actually grow chrysanthemums from a bouquet?
Practically speaking, yes, with a realistic caveat. Chrysanthemum stems are naturally inclined to produce adventitious roots, which is why commercial nurseries propagate millions of them from cuttings every year. The problem with bouquet stems specifically is that they've already been cut, conditioned, possibly treated with vase preservatives containing biocides like 8-hydroxyquinoline sulfate (8-HQS) or silver compounds, and they're usually carrying open or near-open flowers. See Journal of Applied Horticulture / postharvest literature summarizing vase preservatives and effects for reviews documenting common biocides (8‑HQS, silver compounds) and their persistence in vase solutions. All of those factors work against you. Fully opened flowers significantly reduce or even abolish rooting, even when you apply rooting hormone. Biocides in preservative solutions can devitalize tissue entirely. And older stems have depleted carbohydrate reserves that root formation depends on.
That said, plenty of home gardeners have turned a grocery store bunch into a patio full of mums. The trick is acting fast, choosing the right stems from the bunch, and giving those cuttings the right environment. If the bouquet is fresh, meaning it arrived recently and the flowers are still in bud rather than fully open, your success rate can be surprisingly good. If it's been sitting in a vase for a week with a sachet of preservative dissolved in the water, temper your expectations and treat it as a fun experiment rather than a guaranteed propagation project.
When to try: timing for temperate climates and for growers in India
Temperate climates (Europe, North America, similar)
In temperate zones, the ideal window for taking chrysanthemum cuttings from any source, bouquet or garden plant, is late spring through early summer, roughly April to June. At this time of year, ambient temperatures are climbing toward the 20–25°C range that root formation favors, days are long enough to keep cuttings in good growth without forcing flower buds, and you have a full growing season ahead to establish the plant before it needs to flower. Cuttings taken in July or August can still work but will produce smaller plants before the natural short-day trigger pushes them toward bloom. Avoid taking cuttings in autumn or winter unless you have a heated propagation setup and supplemental lighting, the combination of cold and short days is basically the opposite of what rooting chrysanthemum cuttings need.
Growers in India
India's chrysanthemum season runs differently. In most regions, including Maharashtra, West Bengal, Karnataka, and Tamil Nadu, the main commercial crop is planted from July to September (during or just after the monsoon) for flowering in October through December, which aligns with Diwali and winter wedding demand. For more detailed regional guidance, see our guide on how to grow chrysanthemum in India. For home propagation from a bouquet, the practical window is June through August, when temperatures in hill stations and higher elevations (16–22°C at night) are near ideal. In plains regions, mid-monsoon (July) sowings work well because the rain naturally maintains humidity around cuttings. Avoid trying to root cuttings during the hottest pre-monsoon months (March to May) when temperatures routinely exceed 35°C, heat stress kills tender cuttings quickly. Chrysanthemum morifolium, the florist mum dominant in Indian markets, responds to the same short-day flowering trigger as everywhere else, so plants propagated in July will typically flower October to November without any extra light manipulation.
Which propagation routes actually work
There are three routes open to you from a bouquet. Stem cuttings rooted in a soilless propagation mix are the most reliable and the method commercial growers use. Stem cuttings rooted in water first is an accessible beginner option, though the roots that form in water are structurally different and can struggle at transplant time. Collecting and sowing seed from dried flower heads is the third option, it is real and doable, but florist chrysanthemums are complex hybrids, and the seedlings will almost certainly not look like the parent plant. Each route has a place depending on your materials, your climate, and what you're trying to achieve.
| Method | Difficulty | True-to-parent? | Time to rooted cutting / seedling | Best for |
|---|---|---|---|---|
| Stem cutting in soilless mix | Moderate | Yes | 2–6 weeks | Reliable clones, experienced beginners |
| Stem cutting in water first | Easy | Yes | 2–4 weeks to water roots, + transplant step | Absolute beginners with no supplies |
| Seed from dried flower heads | Easy to collect, variable to germinate | No (hybrids) | 7–21 days to germination | Experimenting with new varieties |
Materials and supplies you'll need
Gather everything before you touch the bouquet, cuttings deteriorate fast once taken, and scrambling to find a pot while your stems are drying out is a common beginner mistake.
- Sharp, clean scissors or a craft knife (wipe with rubbing alcohol before use)
- Small clear glass or jar for water rooting (optional but useful as a backup)
- Propagation trays or 50–72-cell plug trays with drainage holes
- Sterile propagation mix: peat moss and perlite mixed 1:1 by volume, or vermiculite and perlite 1:1; in India, a cocopeat, vermiculite, and vermicompost mix at 2:1:1 works well
- Rooting hormone: IBA powder (250–2000 ppm) or IBA liquid concentrate; a garden-center rooting powder labelled for softwood cuttings is fine for beginners
- Small plastic bag or clear humidity dome to fit over the tray
- Pencil or dibber for making insertion holes (so rooting powder doesn't get scraped off)
- Spray bottle filled with clean water
- Small labels and a permanent marker
- 7–10 cm (3–4 in) pots and general-purpose potting mix for potting up after rooting
- A warm, bright spot out of direct sun, or a heat mat set to 20–25°C if your space is cool
Choosing and preparing stems from the bouquet
Not every stem in the bouquet is worth trying. You're looking for the stems most likely to root, which means younger, less mature growth with the smallest or most immature flower buds, not fully open blooms. Here's what to look for and what to skip.
What to choose
- Side shoots (laterals) branching off the main stem — these tend to be younger and less lignified than the main stem
- Stems where buds are still tightly closed or barely showing color
- Stems that feel firm and hydrated, not limp or slimy
- Stems 8–12 cm (3–5 in) long with at least 3–4 leaf nodes
- Growth that is green and slightly flexible — not woody and snapping
What to avoid
- Any stem with a fully open or spent flower — open blooms actively suppress root formation even when rooting hormone is applied
- Stems that have been sitting in floral foam, which often contains biocides
- The thickest main stems — they're usually the most mature and least likely to root
- Any stem showing slime, rot, or a foul smell from vase water
- Stems from bouquets that have been in preservative solution for more than 3–4 days
Once you've selected your stems, cut cleanly just below a leaf node at a 45-degree angle. Strip the lower leaves, leaving just 2–3 leaves at the top. If there's a bud on the cutting, pinch it off, this feels counterintuitive, but removing the bud redirects the cutting's energy toward making roots instead of trying to open a flower. Give the bare stem base about 30 minutes in a shallow dish of clean water to rehydrate before you proceed.
Rooting in water: step-by-step
Water rooting is the most accessible method and a good choice if you're testing whether your bouquet stems are viable at all. Just go in with realistic expectations: roots that form in water are structurally different from roots formed in propagation media, so the transplant step adds risk. That said, plenty of people get good results this way, especially with fresh, young cuttings.
- Prepare your cutting as described above — clean angled cut below a node, lower leaves removed, bud pinched off if present.
- Fill a clean glass or jar with room-temperature water. Rainwater or filtered water is slightly better than heavily chlorinated tap water; if using tap water, let it sit uncovered for an hour first.
- Place the cutting so the bottom 3–4 cm (about 1.5 in) of bare stem sits in the water. Leaves must not touch the water or they'll rot.
- Position the jar in a bright spot with indirect light — a north- or east-facing windowsill is ideal. Avoid direct sun, which heats the water and encourages bacterial growth.
- Keep the temperature in the 20–24°C range. Below 18°C, rooting slows significantly.
- Change the water every 2–3 days to prevent bacterial buildup, which can rot the stem base.
- Check for root development from day 7 onward. Fine white root nubs typically appear within 10–21 days under good conditions.
- Once roots are 2–3 cm long (roughly 1 in), pot the cutting into a 7–10 cm pot filled with moist propagation mix. Don't wait until the roots are long and tangled — early transplanting reduces shock.
- After potting, place a clear plastic bag loosely over the pot for 5–7 days to maintain humidity while the roots adjust to growing in soil. Gradually open the bag each day to acclimate the plant.
Rooting in a soilless mix: step-by-step
This is the method that commercial propagators use for good reason. Rooting directly in a sterile peat-perlite or cocopeat-vermiculite mix produces roots that are already adapted to growing in a solid medium, which means transplanting later is much less stressful for the plant. It's the approach I'd recommend to anyone who wants more than one or two successful plants. For best results maintain air and root‑zone temperatures around 20–25 °C, high relative humidity (75–95%) under a humidity dome or intermittent mist, and provide bottom heat (soil ~20–25 °C); see IPPS propagation reports / mist propagation greenhouse practice (industry/propagation proceedings).
- Mix your propagation medium (peat: perlite 1:1 or vermiculite:perlite 1:1) and moisten it until it just clumps when squeezed — it should not drip. Fill plug trays or small pots and firm gently.
- Use a pencil or dibber to make an insertion hole about 3–4 cm deep in each cell. Making the hole first is important — if you push the cutting straight in, you'll scrape off the rooting hormone.
- Take your prepared cutting and dip the bottom 2 cm of bare stem into rooting hormone powder. Tap off any excess — a light, even coating is what you want, not a clump.
- Insert the cutting into the pre-made hole and gently firm the mix around the stem so it stands upright with good contact between stem and medium.
- Water lightly with a spray bottle to settle the mix without washing away the hormone.
- Cover the tray with a clear humidity dome or a clean plastic bag propped up so it doesn't touch the leaves. You're aiming for 75–95% relative humidity around the cuttings — you should see a light condensation mist on the inside of the dome.
- Place the tray in a bright spot with no direct sun. A north-facing windowsill, a greenhouse bench away from the glass, or under T5 fluorescent or LED grow lights at about 30 cm distance all work well.
- Maintain an air temperature of 20–25°C. If your space is cool, a heat mat under the tray set to 22°C accelerates rooting noticeably — bottom heat is one of the most effective tools in propagation.
- Open the dome briefly once a day to allow fresh air exchange and prevent mold. If you see significant condensation dripping onto leaves, prop the dome slightly to allow some ventilation.
- Check for rooting by gently tugging a cutting after 10 days. Resistance means roots are forming. Visible root tips at the drainage holes are a reliable sign.
- Most cuttings will show strong root development within 2–6 weeks. Once roots are well established (2–3 cm), pot up into 7–10 cm pots with general-purpose potting mix and begin the hardening-off process.
A note on IBA concentrations: published trials for Chrysanthemum indicum show peak rooting with IBA treatments ranging from 250 ppm all the way to 2000 ppm depending on cultivar, with many commercial operations using as little as 250–300 ppm in low-concentration water soak protocols. For home use, a standard garden-center rooting powder labelled for softwood cuttings (typically 1000–3000 ppm IBA) used as directed is a reasonable starting point. You don't need to measure parts per million, follow the label, and if one batch doesn't root well, try a slightly heavier application next time.
Collecting and sowing seed from dried flower heads
This route is genuinely interesting but comes with an honest caveat: most florist chrysanthemums, including the widely grown Chrysanthemum morifolium complex, are complex hybrids with variable pollen viability and seed set. Seedlings from these plants will not grow true to the parent, you'll get unpredictable flower colors, forms, and sizes. That's not necessarily a bad thing if you're happy to be surprised, but if you want to replicate a specific variety from your bouquet, stick to cuttings. Seed collection works best from species-type or open-pollinated chrysanthemums. For step-by-step instructions on how to grow chrysanthemum from dried flowers, see our practical guide on how to grow chrysanthemum from dried flowers.
Drying and cleaning the seed
- After the flowers in your bouquet have fully faded, leave the heads on the stems and place them in a warm, dry spot with good airflow — a paper bag hanging in a shed or garage works perfectly. Avoid plastic bags, which trap moisture and cause mold.
- Allow the heads to dry completely for 3–4 weeks. The flower head should feel papery and crumbly, not soft or damp.
- Crumble the dried flower head between your fingers over a sheet of white paper. You're looking for small, pale, slightly elongated seeds about 2–3 mm long among the dry chaff.
- Blow gently across the paper to separate light chaff from heavier seeds, or use a fine sieve. Viability is variable in hybrid material, so collect as many seeds as you can.
- Store seeds in a labeled paper envelope in a cool, dry, dark location — a sealed jar in the fridge (not freezer) is ideal. Use within 12 months for best germination rates.
Sowing the seed
- In temperate climates, sow indoors in late winter to early spring (February to March) for summer-established plants. In India, sow at the start of the cool season (September to October) or during the pre-monsoon period (February to March) depending on your region.
- Fill a seed tray or small pots with fine, moistened seed-starting mix. Do not use heavy garden soil — it compacts around small seeds and promotes damping off.
- Scatter seeds thinly across the surface. Chrysanthemum seeds need light to germinate, so press them gently onto the surface with your fingertip rather than covering them with mix. A very light dusting of fine vermiculite (no more than 1–2 mm) is the maximum covering.
- Mist the surface with a spray bottle and cover the tray with a clear propagator lid or cling film.
- Place in a warm spot at 18–21°C. A heat mat helps here too — cool temperatures slow germination dramatically.
- Germination typically takes 7–21 days. Check daily and remove the cover as soon as seedlings appear to prevent damping off.
- Pot up seedlings individually into 7 cm pots once they have two true leaves, handling them by the leaves rather than the fragile stem.
- Be realistic: germination rates from hybrid bouquet seed are unpredictable. Sow more seeds than you think you need, and treat any that germinate as a bonus.
Aftercare: from rooted cutting to flowering plant
Pinching for bushy plants
Once your rooted cutting has settled into its first pot and is showing 5–6 new leaves, pinch out the growing tip between your finger and thumb. This single action, removing the top 2–3 cm of the main shoot, is probably the most impactful thing you can do for a chrysanthemum. It forces the plant to branch, turning one upright stem into a multi-branched bush that will carry far more flowers. Pinch again on each new side shoot when they reach 5–6 leaves. Stop all pinching by midsummer (in temperate zones) or 8–10 weeks before your target flowering date, since the plant needs time to set buds after the last pinch.
Feeding and repotting
Chrysanthemums are hungry plants. Start feeding with a balanced liquid fertilizer (something like a 10-10-10 or similar) every 2 weeks once the plant is actively growing in its first real pot. When flower buds begin to form, switch to a lower-nitrogen feed with more phosphorus and potassium to support blooming rather than leafy growth. Pot up from the 7–10 cm starter pot into a 12–15 cm (5–6 in) pot once the roots start circling the bottom, this usually happens 4–6 weeks after the initial potting up.
Hardening off for outdoor plants
If your plant has been growing indoors or under cover, it needs a gradual introduction to outdoor conditions before you leave it outside permanently. Start by placing it outside in a sheltered, shaded spot for 1–2 hours on the first day, then increase outdoor time by an hour or two each day over 10–14 days. Watch for leaf scorch in the first week, some drooping in afternoon sun is normal initially. By the end of two weeks, the plant should handle a full day outdoors comfortably.
Flowering and photoperiod
Chrysanthemum morifolium, the florist mum, is a short-day (technically long-night) plant, meaning it initiates flower buds when nights become longer than a critical threshold, typically around 13–14 hours of darkness. In most temperate climates this happens naturally in late summer and autumn, which is why mums are famously autumn-flowering plants. Plants you've propagated from bouquet cuttings will follow this same schedule unless you actively intervene with blackout cloth (to force earlier bloom) or supplemental lighting (to delay it). For most home gardeners, letting nature handle the timing is perfectly fine.
Overwintering
Garden mums are technically short-lived perennials in zones 5–9. After flowering, cut stems back to about 10–15 cm (4–6 in) and mulch the root zone heavily with straw or compost if leaving plants in the ground. In colder zones (below zone 5), it's safer to keep potted plants in an unheated but frost-free garage or shed over winter. In India, chrysanthemums can be cut back after flowering and left to regenerate from the base, the roots are quite hardy once established.
Troubleshooting: when things don't go to plan
| Problem | Likely cause | What to do |
|---|---|---|
| Cuttings wilt immediately after insertion | Low humidity or dried-out base | Mist more frequently; check dome seal; recut stem base and reinsert |
| Stem base turns brown/mushy | Rot from overwatering or dirty tools | Discard affected cuttings; reduce watering; sterilize tools and trays |
| No roots after 4+ weeks | Old or chemically treated stems; open flowers on cutting | Accept failure for this batch; try fresh stems with buds still closed |
| Roots form but plant collapses at transplant | Water-rooted stems not adapted to soil | Harden off more gradually; keep humidity high for 1 week after transplanting |
| Yellowing lower leaves during propagation | Normal senescence of stripped leaves; or overwatering | Remove yellowed leaves promptly; check moisture level |
| White mold on mix surface | Too little airflow under dome | Open dome daily; apply dilute hydrogen peroxide spray (3% solution, 1:10 dilution with water) |
| Seedlings damp off (collapse at soil line) | Fungal disease in seed tray | Use sterile mix; improve airflow; water from below rather than overhead |
| Aphids on young cuttings | Common once plants move outdoors | Blast off with water; use insecticidal soap spray; inspect regularly |
Honest success rates and when to buy cuttings instead
Under controlled nursery conditions with clean stock plants, correct IBA treatment, and sterile media, chrysanthemum cutting rooting percentages regularly hit 80–95% in published trials. Bouquet stems are not clean stock plants. They've been cut, shipped, conditioned, and possibly treated with preservatives. Realistically, you might root 30–60% of what you try from a reasonably fresh bouquet, and potentially zero from an older one that's been sitting in preservative water. That's not a reason not to try, it's just worth knowing so you're not disheartened if half the batch fails.
If you want a specific named variety reliably, or if you need a lot of plants quickly, buying rooted liners or propagation-ready cuttings from a reputable nursery is genuinely the better option. For Chrysanthemum morifolium specifically, many specialist nurseries sell rooted cuttings in spring that are named, virus-tested, and already hardened off. The bouquet propagation route is most rewarding as an experiment, as a way to save a plant you've fallen in love with, or simply as one of those satisfying gardening projects where the effort itself is part of the point.
A few notes on Chrysanthemum morifolium specifically
The vast majority of chrysanthemums sold in florist bouquets belong to the Chrysanthemum morifolium complex, the florist or garden mum. This group has been intensively hybridized for flower form, size, and cut-flower longevity, which means individual cultivars can differ significantly in their rooting response to IBA treatment. What works brilliantly for one cultivar (say, 2000 ppm IBA producing maximum root number) may be less effective for another where 400–500 ppm gives the best results. This is one reason to try a few different stems from the same bouquet with slightly varying hormone application if you want to maximize your hit rate. C. morifolium also tends to throw up basal shoots vigorously after being cut back, so even if your bouquet cutting only partially roots, the plant may compensate by generating new growing points from the base once established. Growing this species from seed almost never produces plants matching the parent, so for bouquet morifolium, cuttings are always the right propagation choice. For a step-by-step guide on how to grow Chrysanthemum morifolium from cuttings and through to flowering, see how to grow Chrysanthemum morifolium.
FAQ
Is it possible to turn a chrysanthemum bouquet into living plants at home?
Yes — but success depends on the bouquet's condition and treatments it received. Fresh, non‑treated stems (cut before flowering or with unopened buds) root much better than fully open, old stems that have been in vase solutions or floral foam. Bouquet‑sourced stems can root, but expect lower and more variable success than using healthy, non‑treated stock cuttings from garden plants or commercial liners.
When is the best time to try propagation in temperate climates and in India?
Temperate climates: propagate in late spring through summer when temperatures are warm (root zone 20–25 °C) and daylight supports root/shoot growth; avoid attempting during deep winter unless using heated indoor rooting. India/subtropical: many parts allow year‑round attempts, but best results occur in cooler, non‑monsoon windows (post‑monsoon to pre‑winter) with daytime temps ~20–28 °C and lower disease pressure. For both regions, avoid very hot, humid weather that favors rot and pests during rooting.
Which propagation methods work for chrysanthemum cuttings from bouquets?
Two practical methods: 1) Media (soil) cuttings — insert stem cuttings into a sterile, well‑drained rooting medium (peat/perlite 1:1, or coir:perlite/vermiculite blends) under high humidity; this is preferred. 2) Water rooting — possible for demonstration but yields weaker roots and higher transplant shock. Seed from dried flower heads is possible but rarely produces true‑to‑type plants for modern hybrids.
What exact materials will I need for media rooting?
Sharp sterile pruners or scissors, rooting hormone (IBA powder or liquid recommended), sterile rooting mix (peat:perlite 1:1 or vermiculite:perlite), plug tray or small pots with drainage, bottom heat pad (optional), humidity dome or clear plastic bag, mister or spray bottle, labels, and a clean workstation. Optional: fungicide dip or dilute bleach rinse for heavily soiled stems.
What IBA concentrations and application methods are recommended for chrysanthemum cuttings?
IBA works best. Common approaches: quick‑dip in liquid IBA (short dip 3–5 seconds) at higher concentrations (e.g., 1000–2000 ppm for quick‑dips used on woody/herbaceous cuttings) or talc/powder formulations of IBA. Commercial growers also use lower continuous concentrations (~250–300 ppm K‑IBA) in solutions. If using home supplies, follow the product label and test a small range (e.g., 250, 500, 1000 ppm) because cultivar response varies.
Step‑by‑step: how to take and prepare cuttings from a bouquet for rooting in media
1) Choose youngest firm, non‑woody stems near the base; avoid fully open flowers and very old stems. 2) Remove lower leaves leaving 2–3 leaf nodes; pinch or cut any flower buds. 3) Make a clean diagonal cut just below a node and optionally wound the base slightly (thin bark) to encourage rooting. 4) Dust base with IBA powder or quick‑dip per product instructions. 5) Insert cutting into pre‑moistened sterile mix to a depth of 2–3 cm; firm medium around stem. 6) Place under high humidity (dome or bag) with bright, indirect light and bottom heat if available (20–25 °C root zone). 7) Mist daily as needed, avoid saturated medium; check for roots after 7–14 days and transplant after a good root system forms.
Next Article
How to Grow Chrysanthemum from Stem: Step-by-Step Guide
Step-by-step guide to rooting chrysanthemum stem cuttings: timings, methods, materials, care, pests, plus India tips.