You can grow chrysanthemums from stem cuttings in as little as two to three weeks, and it is genuinely one of the most satisfying ways to multiply a plant you already love. Take a healthy, non-flowering shoot about 5–10 cm (2–4 inches) long, strip the lower leaves, dip the base in an IBA rooting hormone, and stick it into a peat-perlite mix. The PMC/NCBI study reports that commercial talc powders containing 0.4% IBA and high‑ppm aqueous IBA solutions prepared from 50 mg Rhizopon AA tablets (to about 4,000 ppm) have been used in chrysanthemum rooting trials blank" rel="noopener noreferrer">PMC/NCBI – Water dipping of auxin‑coated chrysanthemum cuttings (study mentioning 0.4% IBA talc and aqueous Rhizopon concentrates). Trials report effective IBA concentrations for chrysanthemum commonly between about 200–2,000 ppm; for example, the blank" rel="noopener noreferrer">Asian Journal of Research in Biochemistry – Effect of IBA on rooting of Chrysanthemum cv 'Flirt' (trial reporting 750 ppm optimum in that study) found 750 ppm to be optimal in that experiment. Keep it warm, humid, and out of direct sun, and roots will form at the nodes before you know it. This guide walks you through every step, from picking the right stem in the right season to getting that cutting all the way to a flowering garden plant.
How to Grow Chrysanthemum from Stem: Step-by-Step Guide

What you'll end up with
Starting a chrysanthemum from a stem cutting gives you a genetically identical copy of the parent plant. That matters a lot with mums because named cultivars do not come true from seed. If you have a plant with exactly the color, form, and bloom time you want, cuttings are the only reliable way to reproduce it exactly. By the end of this process you will have rooted cuttings, potted-on young plants, and, with a bit of pinching and feeding, a full flowering specimen by late summer or autumn.
When to take your cuttings
Timing is the single biggest factor that separates easy, fast-rooting cuttings from ones that just sit in the pot and rot. The good news is there are two perfectly workable windows in most climates.
The first window is late winter to early spring, when you can take basal cuttings from overwintered parent plants (called stools). These short, young shoots emerge directly from the crown and root quickly because they are packed with juvenile, actively dividing cells. The second window is late spring to early summer, before flower buds form. These are true softwood cuttings from the growing tips of established plants. Both types root in roughly two to three weeks under warm conditions. Avoid taking cuttings in high summer when the plant is stressed, or once buds have set, because the stems shift their energy away from root production.
Adjustments by climate
| Climate type | Best cutting window | Key adjustment |
|---|---|---|
| Temperate (UK, northern US, northern Europe) | Late winter–early spring (basal) or late spring–early summer (softwood) | Use a heated propagator; keep night temps above 15°C (59°F) |
| Mediterranean (southern US, southern Europe, parts of Australia) | Spring under protection; or midsummer semi-ripe cuttings | Shade from afternoon heat; bottom heat helps in cool springs |
| Subtropical / tropical (India, Southeast Asia) | Pre-monsoon (March–May) or post-monsoon (October–November) | Avoid peak monsoon humidity and hottest summer weeks; use shade net and good drainage |
| Continental (cold winters, hot summers) | Late spring after last frost risk | Harden off cuttings slowly before outdoor transplant |
If you are growing chrysanthemums in India or a similarly warm climate, year-round propagation under protected conditions is possible, but the October–November post-monsoon window tends to produce the most reliable results for outdoor beds. The cooler nights and lower humidity at that time suit chrysanthemum rooting well.
Choosing the right cultivar
Not all chrysanthemums propagate equally well from cuttings. Chrysanthemum morifolium (also sold as Chrysanthemum x morifolium or the 'florist's chrysanthemum') is the go-to species for home propagation. It is the most commercially propagated chrysanthemum in the world precisely because its basal and softwood cuttings root fast and reliably. Garden mums bred from C. morifolium stock, sold at nurseries and garden centers as hardy or cushion mums, behave the same way.
Spray types, pompom types, and single-flowered cutting mums all root well. Avoid species chrysanthemums with very woody, semi-shrubby stems for your first attempt, as they behave more like semi-ripe or hardwood subjects and take longer. If you are curious about C. morifolium in more depth, that cultivar group deserves its own deep dive, but for cutting propagation purposes, any healthy, actively growing garden mum is a fine candidate.
Softwood vs semi-ripe: picking the right stem
These terms describe the maturity of the stem tissue, and getting this right saves a lot of failed cuttings. Here is how to tell them apart and when to use each.
Softwood cuttings
Softwood is the current season's fresh, actively growing shoot. It is pliable, a little floppy, and if you try to bend it sharply it snaps rather than bends without breaking. The color is a bright, light green. This is the cutting type to reach for in late spring and early summer. It roots the fastest, often in two weeks, but it is also the most prone to wilting, so you need to work quickly and keep humidity high.
Semi-ripe cuttings
Semi-ripe describes growth from the same season that has started to firm and slightly harden at the base while remaining soft and green at the tip. You will notice the base of the shoot is less flexible and slightly darker in color. Take these from midsummer through early autumn. They are a bit slower to root, typically three to five weeks, but they are sturdier and handle propagation stress better. Use semi-ripe if you missed the spring window or if you are working in a hot climate where softwood wilts too quickly.
What makes a healthy cutting
- No flower buds or open flowers anywhere on the stem
- Firm, upright growth with compact internodes (nodes close together)
- Leaves are dark green, not yellowing, spotted, or distorted
- No visible aphids, whitefly, or powdery mildew on the donor plant
- Stem snaps cleanly rather than bending and fraying (softwood) or shows some resistance at the base (semi-ripe)
What to gather before you start
Having everything on the bench before you make a single cut means the cuttings spend less time wilting in the air, which directly improves your strike rate. Here is a complete list with the sizes and quantities you need for a small home batch of around ten cuttings.
| Item | Spec / quantity | Notes |
|---|---|---|
| Sharp, clean knife or scalpel | 1 | Sterilize with rubbing alcohol before use; blunt secateurs crush stem tissue |
| Rooting hormone (IBA powder or liquid) | IBA talc at 0.1–0.4%; or liquid concentrate (e.g., Dip 'N Grow, 1.0% IBA + 0.5% NAA) diluted per label | IBA is the most effective auxin for chrysanthemum; use per label instructions only |
| Sphagnum peat moss (or peat substitute: coir) | 1 part by volume (~1 litre) | Forms the moisture-retaining base of the mix |
| Perlite (coarse) | 1 part by volume (~1 litre) | Improves drainage and air porosity; a 50:50 or 60:40 peat:perlite mix is ideal |
| Small pots or plug trays (module trays) | 1 tray of 24–36 modules, or 7–9 cm (3 in) individual pots | Deep enough for the cutting to stand without touching the medium surface |
| Clear plastic bag or propagation dome | 1 per tray/pot | Maintains the high humidity softwood cuttings need to survive before rooting |
| Dibber or pencil | 1 | Makes a hole in the medium so you do not scrape off the rooting hormone when inserting the cutting |
| Spray bottle with clean water | 1 | For misting cuttings after insertion |
| Labels and waterproof marker | As needed | Date and cultivar name; cuttings can look identical at the start |
| Heating mat (optional but helpful) | Set to 18–22°C (65–72°F) base temperature | Bottom heat speeds rooting noticeably, especially in cooler rooms |
On pH: if you can, check that your peat-perlite mix sits in the 5.5–6.5 range. Most bagged peat-based potting mixes are already in this zone, so you usually do not need to adjust unless you are mixing from scratch with very acidic peat.
Preparing your cuttings
This is where precision pays off. Take your time here and the rest of the process is straightforward.
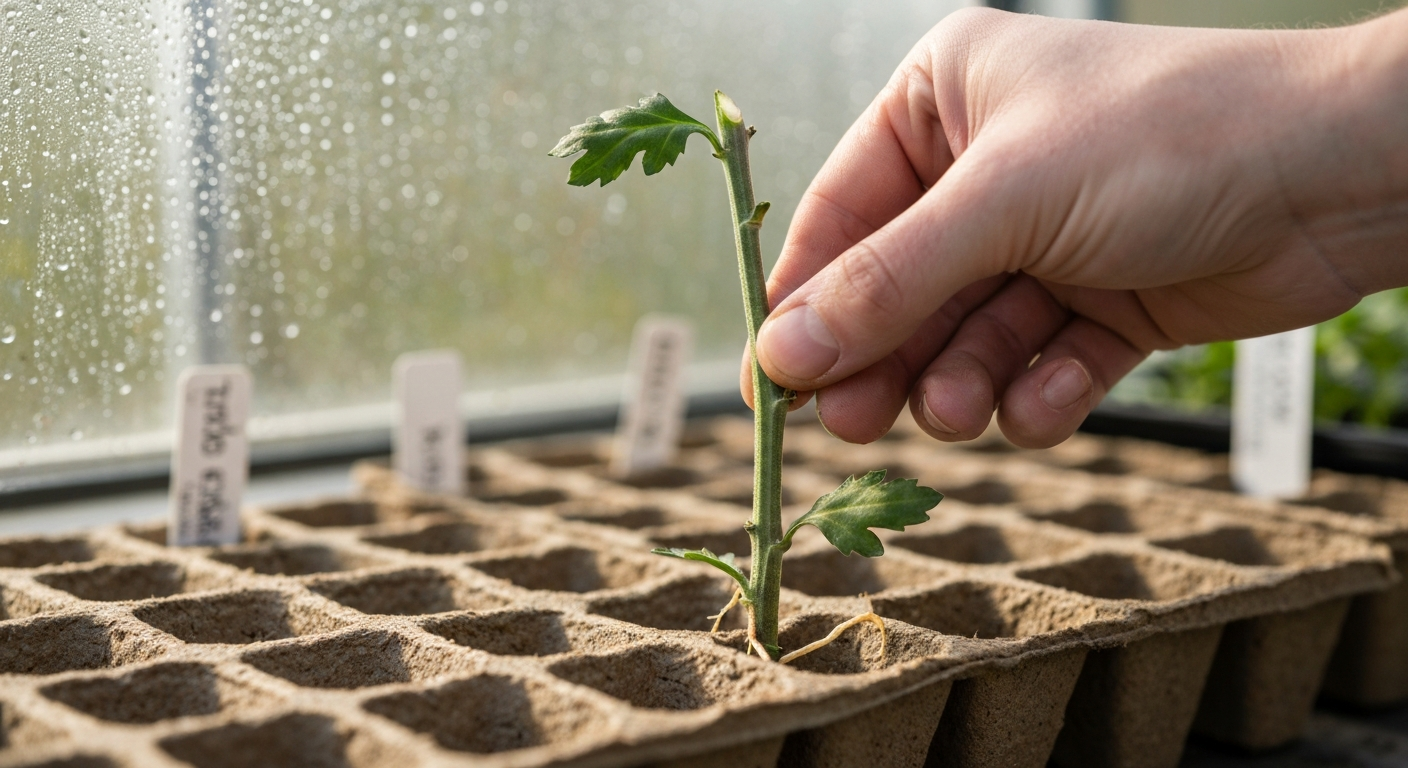
- Cut a non-flowering shoot 5–10 cm (2–4 inches) long from the donor plant. Morning is the best time, when stems are fully turgid with water. Use a clean, sharp knife and cut in one smooth motion.
- Identify the nodes on your cutting. Nodes are the small swollen points where leaves attach to the stem. You want at least one node, ideally two, on the portion that will go into the medium. Adventitious roots form from node tissue and from wounded basal cells, so every node in the medium is a potential rooting point.
- Strip all leaves from the lower half of the cutting, leaving just one or two small leaves at the tip. If those tip leaves are large (wider than about 3 cm), cut them in half crosswise with scissors. This is not cosmetic: it reduces the water the cutting loses through its leaves while it has no roots to replace that water.
- Make a fresh, slanted cut just below the lowest node you plan to bury. A slanted cut exposes more surface area than a flat cut and helps water uptake. Make this final cut on a clean surface with a fresh blade, not scissors.
- Optional wounding: for semi-ripe cuttings or any cutting that seems a little tough at the base, scrape one side of the bottom 1 cm of stem lightly with your knife blade. This shallow wound exposes more cambium tissue, which responds to rooting hormone more readily. Do not scrape all the way around or you may girdle and kill the stem.
- Dip the prepared base (the bottom 1 cm including any wounded area) immediately into IBA rooting powder or your diluted liquid hormone solution. Tap off any excess powder. Do not leave the base soaking in liquid hormone for more than the time specified on the label.
Rooting method A: soil or plug propagation
This is the standard method and the one I recommend for beginners. It is reliable, low-fuss, and gives you a cutting that transitions straight into a pot without a second move.
The medium recipe
Mix one part sphagnum peat moss (or coir as a peat-free alternative) with one part coarse perlite by volume. This 50:50 mix holds enough moisture to keep cuttings from drying out but drains freely enough to prevent the waterlogging that rots stems before roots can form. Moisten the mix so it clumps when squeezed but does not drip. Fill your plug tray or small pots and firm gently.
Step-by-step procedure
- Pre-moisten your peat-perlite mix and fill your module tray or 7–9 cm pots. Firm the mix to remove large air pockets.
- Use a dibber or pencil to make a hole about 3–4 cm deep in the center of each cell. The hole should be wide enough that the cutting slides in without rubbing off the hormone.
- Insert the prepared cutting so the lowest node sits at or just below the medium surface, and the base is at the bottom of the hole. The remaining leaves at the tip should sit above the medium.
- Firm the medium around the cutting gently with your fingers so it stands upright without rocking.
- Water in lightly with a fine-rose watering can or mister. You want the medium moist but not sodden.
- Cover the tray or pot with a clear propagation dome or loosely draped clear plastic bag. This keeps humidity high around the leaves. Do not let the plastic touch the leaves directly.
- Place in a warm spot: 18–22°C (65–72°F) is ideal. Indirect bright light is fine; avoid direct sun through the plastic, which will cook the cuttings. A north- or east-facing windowsill or a spot under fluorescent grow lights works well.
- Check daily. Mist the inside of the cover if it looks dry. If any cutting wilts severely and does not recover overnight, remove it.
- After 10 days, tug each cutting very gently. Resistance means roots are forming. Full rooting typically happens in 2–3 weeks for softwood and 3–5 weeks for semi-ripe.
Once you feel that resistance when you tug, remove the cover gradually over three to four days rather than all at once. A sudden drop in humidity stresses freshly rooted cuttings. After a week of uncovered life, your rooted cutting is ready to pot on.
Rooting method B: water propagation
Water propagation is appealing because you can actually watch roots develop, which makes it a satisfying teaching tool and a good option if you do not have perlite or potting mix on hand. It works for chrysanthemum cuttings, but it comes with a few specific pitfalls you should know about upfront.
Step-by-step procedure
- Prepare your cutting exactly as described above (correct length, leaf removal, slanted cut below a node). Skip the rooting hormone for water propagation, as most powder formulations are not designed for liquid use and concentrated liquid hormones can burn stems when applied before a water soak.
- Fill a small glass or jar with clean room-temperature water. Avoid tap water that has sat in metal pipes and is very cold; let it sit for 30 minutes if possible.
- Place the cutting so the bottom 2–3 cm of stem is submerged, with the stripped-node section in the water. The remaining leaves must sit above the waterline. If leaves sit in water they rot quickly and contaminate the jar.
- Set the jar in bright, indirect light, not direct sun. A warm kitchen windowsill works well as long as it does not get scorching afternoon sun.
- Change the water every two to three days. This is non-negotiable. Stagnant water becomes low in oxygen and high in bacteria, which rots stems. Fresh water keeps oxygen levels up around the developing root zone.
- You should see small white root nubs appearing within 10–21 days. Let roots grow to at least 2–3 cm before potting on.
- When roots reach 2–3 cm, transition the cutting to a peat-perlite or standard potting mix immediately. Do not wait for roots to become long and tangled; they become brittle and transition badly.
Advantages and pitfalls
The main advantage of water propagation is visibility: you can monitor root development without disturbing the cutting. It also needs no special equipment. The pitfalls are real though. Water-grown roots are structurally different from soil-grown roots and can suffer transplant shock when moved to soil, so the transition needs to be gentle. Rot is a faster risk than in a porous soil mix if you miss a water change. And you still need to pot on fairly quickly, so it is not a 'set and forget' shortcut. For most home gardeners, soil propagation in a peat-perlite mix is more forgiving overall, but water works as a perfectly valid method if you stay on top of the water changes.
Potting on and getting to the garden
Rooted cuttings need to move up in pot size before they go into the ground. Move each rooted cutting into a 9–11 cm (3.5–4 inch) pot filled with a good-quality potting mix. At this stage the cutting is fragile; hold it by a leaf, not the stem, while you settle it in. Water gently and place in bright indirect light for the first week.
After two to three weeks in the small pot, roots should be visible at the drainage holes. Move up to a 15 cm (6 inch) pot or prepare for outdoor transplanting. Chrysanthemums do best in a position with at least six hours of direct sun per day and well-drained soil. Space plants 45–60 cm (18–24 inches) apart to allow good airflow. If your last frost date is still a risk, keep pots indoors or under cover and harden them off over ten days to two weeks by gradually increasing their outdoor exposure before the final transplant.
Pinching and feeding for bushy, floriferous plants
If you skip pinching, your cutting will grow into a single tall stem with one flower at the top. Pinching redirects that energy into multiple stems and many more flowers. When your plant reaches about 15 cm (6 inches) tall, pinch out the very top growing tip between your finger and thumbnail, removing just the top 1–2 cm of stem. Repeat this process once or twice more as new side shoots reach 15 cm. Stop pinching by midsummer (around the beginning of July in temperate Northern Hemisphere gardens) so flower buds have time to develop before autumn.
For feeding, start a balanced liquid fertilizer (something close to a 10-10-10 NPK ratio) every two weeks once cuttings are established in their pots and showing new growth. Once flower buds appear, switch to a fertilizer with lower nitrogen and higher phosphorus and potassium, which encourages bloom development rather than leafy growth. Stop feeding when flowers are fully open.
Troubleshooting common problems
Cuttings wilt and do not recover
This is almost always a humidity or heat problem in the first week before roots form. Make sure your cover is sealing in moisture, and move the tray away from any direct sun or heat source. If the cutting is completely limp and discolored within two days, the stem has likely rotted at the base: remove it and check the medium is not waterlogged.
Stem base turns black or brown
Stem rot (usually caused by Botrytis or Pythium) is the most common failure in a propagation tray. It is almost always a waterlogging problem. Make sure your medium drains freely, that you are not over-watering, and that there is some air circulation inside the cover. Remove affected cuttings immediately to stop it spreading. Using a clean, sterile medium every time prevents most cases.
No roots after four weeks
Check temperature first: if your propagation spot is below 15°C (59°F) at night, root initiation slows dramatically. A heating mat set to 20°C (68°F) at the base of the tray often breaks the stall. Also check that the medium has not completely dried out between checks, which stops root development even when conditions otherwise look fine.
Aphids and whitefly
Both pests love the soft young tissue of propagated chrysanthemum cuttings. The best prevention is starting only from pest-free donor plants. If you spot an infestation early, a strong spray of water to dislodge insects, followed by insecticidal soap, handles light infestations without harsh chemicals that can stress unrooted cuttings.
Powdery mildew on leaves
Powdery mildew shows up as a white, powdery coating on leaves and is triggered by poor airflow combined with moderate humidity. Vent your propagation cover for an hour a day once cuttings are a week in. Remove any affected leaves promptly. Do not start cuttings from a donor plant that already has powdery mildew.
Can you root a stem from a store-bought bouquet?
This comes up a lot and the honest answer is: sometimes yes, but it is genuinely more difficult than using cuttings from a growing garden plant. See the guide on how to grow chrysanthemum from bouquet for detailed, step-by-step instructions and troubleshooting. Bouquet stems have usually been out of the ground for days, treated with preservatives, and stored in cold conditions. The lower nodes may be too mature to root easily, and the stems are often semi-ripe or fully ripe rather than softwood. That said, if the bouquet is fresh, the stems are still firm and green, and you can find a section with visible nodes and no flower bud, it is worth trying. Treat it exactly like a semi-ripe cutting: clean slanted cut below a node, IBA hormone, peat-perlite mix, and a humidity cover. Expect a lower strike rate than with fresh garden cuttings, but do not be discouraged if one or two succeed.
What about growing from dried flowers?
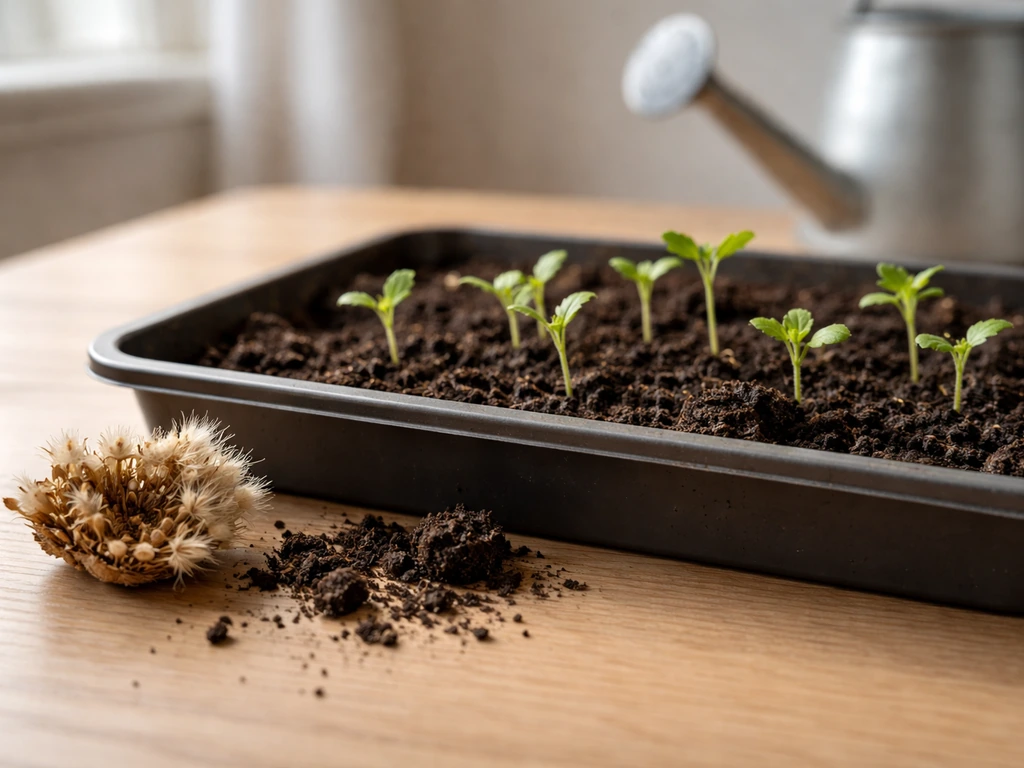
Dried chrysanthemum flower heads cannot be used for stem propagation, and the stems of dried flowers are too desiccated and dead to root. If you have seen advice suggesting you can root a dried chrysanthemum stem, that is not how stem cutting propagation works. Live, turgid, green tissue is the requirement. Dried flowers are an interesting area for other reasons (some chrysanthemum seeds can be collected from dried seed heads), but that is a different propagation route entirely, and one with different timing and technique considerations. If you want instructions specifically on how to grow chrysanthemum from dried flowers (collecting and sowing seed from dried heads), see our detailed guide on how to grow chrysanthemum from dried flowers.
Other ways to start chrysanthemums
Stem cuttings are the best route for reproducing a specific named cultivar, but they are not the only option. Growing from seed is possible with some species and open-pollinated cultivars, though seedlings will vary from the parent. Nursery liners (small rooted plugs sold by specialist nurseries) are an excellent shortcut if you want to skip the propagation stage altogether and still get the same varieties commercial growers use. Division of established clumps in spring is another straightforward option once you have an established plant to divide. Each method suits a different situation, but for getting more of a plant you already love, cuttings remain the most direct, satisfying, and economical route.
FAQ
What is the best time/season to take chrysanthemum stem cuttings?
Temperate climates: take basal/softwood cuttings in late winter–early spring (from overwintered crowns) or softwood cuttings in late spring–early summer; take semi‑ripe cuttings mid‑summer to early autumn when bases begin to firm. Subtropical/tropical (India and similar): propagation can be done year‑round under protection, but avoid the hottest monsoon peak—aim for cooler pre‑monsoon (March–May) or post‑monsoon (Oct–Nov) windows. Expect roots in ~2–3 weeks under good conditions.
Which type of stem should I select: softwood, semi‑ripe, or hardwood?
Choose softwood (young, pliable current season shoots) or basal cuttings when available—these root fastest and are easiest for beginners. Use semi‑ripe (partly firming) if softwood isn’t available; hardwood is rarely used for chrysanthemums and roots much slower.
Which cultivars root most reliably? Is Chrysanthemum morifolium suitable?
Many garden mum cultivars root well. Chrysanthemum × morifolium (often sold as garden mums) is a standard, reliable choice. Avoid heavily woody, very old cultivars if possible; look for vigorous, disease‑free stock and choose single or semi‑double forms for easier handling.
What materials do I need (detailed list)?
Materials: sharp clean pruners or scissors, plastic tray or small pots/plug cells, rooting medium (peat:perlite 60:40 or equal peat:perlite, pH ~5.5–6.5), optional seedling heat mat (bottom heat 20–25°C/68–77°F), clear plastic dome or plastic bag for humidity, rooting hormone (IBA talc or liquid; quick‑dip at 200–2000 ppm depending on product), water mister, labels, small dibber or pencil, fungicide/sterile powder if desired, gloves and disinfectant for tools.
What are the three rooting methods and when to use each?
1) Soil/plug (peat‑lite) method — standard for home gardeners: insert cuttings into damp peat:perlite mix, keep humid and warm. Best for consistent success. 2) Water rooting — place stems in clean water until roots form (useful for demonstration or if no medium available). Transplant quickly to soil once roots are 1–2 cm. 3) Rooting hormone/leaf‑node techniques — use quick‑dip or talc IBA at 200–2000 ppm and insert nodal or heel cuttings into medium; best for faster, more reliable rooting and commercial success.
Step‑by‑step: how do I prepare and stick a chrysanthemum cutting?
1. Select a healthy non‑flowering shoot 5–10 cm (2–4 in) long with 1–2 nodes. 2. Cut just below a node on a slant; recut the base before sticking. 3. Remove lower leaves, leaving 1–2 small top leaves (large leaves may be halved). 4. Optional: wound the base lightly (a thin scrape) or include a small ‘heel’ of older tissue. 5. Dip base in rooting hormone (quick dip in liquid or dust lightly with talc). 6. Insert so the lowest node is at or just below the medium surface in pre‑moistened peat:perlite. 7. Place under humidity (dome or bag) in bright, indirect light; bottom heat 20–25°C speeds rooting. 8. Mist as needed; avoid direct sun and waterlogging.
How to Grow Chrysanthemum From Dried Flowers: Step-by-Step
Learn how to grow chrysanthemum from dried heads or seed, check viability, sow, care for seedlings, and transplant.