You don't need seeds to grow marigolds. There are three practical seedless paths: buying nursery transplants and putting them straight in the ground or a container, propagating new plants from stem cuttings, or dividing an existing clump if you already have an established marigold plant. Each method works, but they suit different situations. Nursery transplants are the fastest and most beginner-friendly. Cuttings take a few extra weeks but let you clone a plant you love. Division is less common with marigolds than with perennials, but it is possible on larger, bushy specimens. This guide walks you through all three so you can pick the one that fits your situation today.
How to Grow Marigolds Without Seeds: Transplants, Division, Cuttings

Your three seedless options at a glance

Before getting into the steps, here is a quick comparison of the three methods so you know what you're committing to.
| Method | Time to first bloom | Difficulty | Best for |
|---|---|---|---|
| Nursery transplant | 2–4 weeks after planting | Beginner | Anyone who wants fast, reliable results |
| Stem cuttings | 5–8 weeks from cutting to bloom | Intermediate | Cloning a favorite plant's exact color/habit |
| Division | 3–5 weeks to re-establish | Intermediate | Splitting a large, established marigold clump you already own |
One important note on cuttings: propagating from a cutting preserves the exact characteristics of the parent plant, including flower color and growth habit. Seed-grown plants can vary, so if you have a variety you love, cuttings are actually the better long-term strategy. Division works similarly, but marigolds are annuals in most climates, so division only makes sense mid-season on an unusually large, healthy plant that hasn't set seed yet.
Choose the right marigold type before you start
Not every marigold responds the same way to seedless propagation, and variety choice affects how easy the whole process is. French marigolds (Tagetes patula) are the best pick for beginners going the cutting or transplant route. They are compact (usually 6 to 12 inches tall), bushy, and produce lots of non-flowering side shoots, which are exactly what you want for cuttings. African marigolds (Tagetes erecta) grow much larger and are typically grown from seed for a reason, but you can still buy them as transplants from a nursery and skip the seed stage entirely. Signet marigolds (Tagetes tenuifolia) are a compact option too, but they are less commonly stocked at garden centers.
If you're going the cutting route, French marigolds win every time. Their side shoots are plentiful, easy to trim, and root well under the right conditions. If you just want blooms fast and don't want to fuss with propagation, any type works as a nursery transplant.
Where to get your seedless starts
Nursery transplants
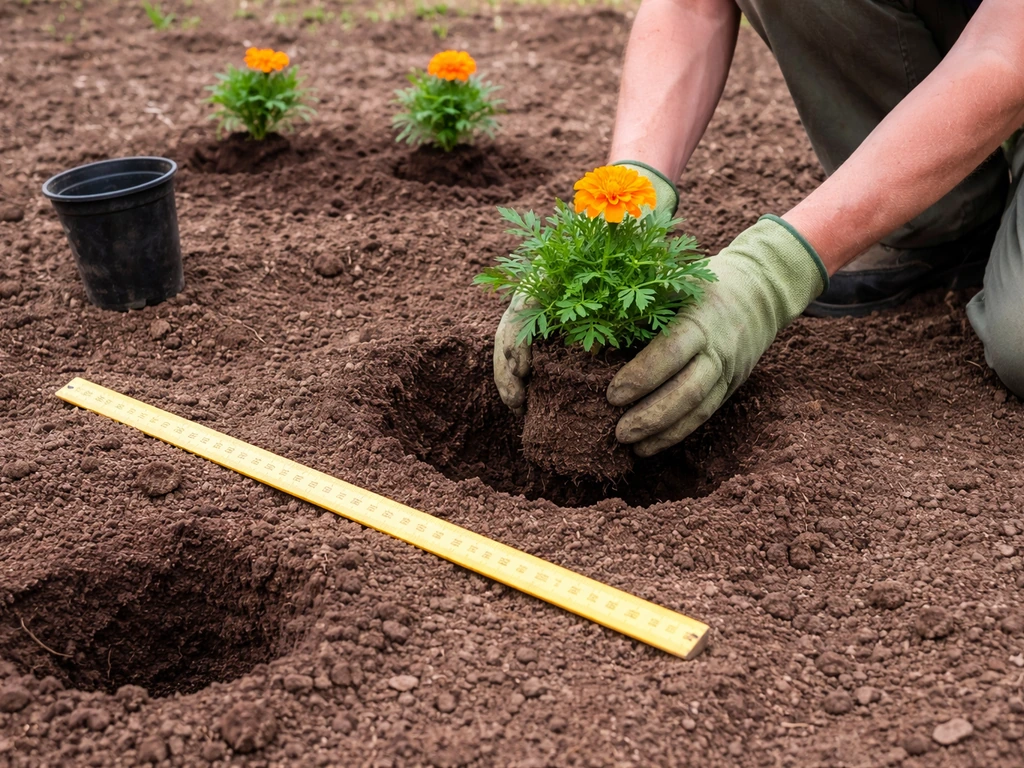
Your local garden center or home improvement store will carry marigold six-packs and 4-inch pots from early spring through summer. Look for plants that are stocky and compact with dark green leaves. Avoid anything leggy, yellow, or already fully flowering, as those plants have been sitting in a small container too long and will take longer to establish. A plant with a few buds just beginning to open is ideal. If you want a specific variety (say, a deep orange African type for cutting bouquets), specialty nurseries or online plant retailers ship rooted transplants and are worth the extra effort.
Taking cuttings from an existing plant
If you already have a marigold growing, or a neighbor has one they're willing to share, cuttings are free and effective. Take cuttings in the morning when the plant is well-hydrated. Look for healthy, non-flowering side shoots that are 4 to 6 inches long. The stem should be firm but not woody. Use clean, sharp scissors or pruners and cut just below a leaf node. Remove all leaves from the bottom two inches of the stem, leaving only two or three pairs of leaves at the top. Do not leave flower buds on the cutting. A budded tip puts energy into flowering instead of rooting, which is the opposite of what you need right now. Keep cuttings cool and slightly moist in a plastic bag if you can't plant them within the hour.
Division
Division is an option mid-season on a large, bushy marigold clump that has become crowded. Water the plant thoroughly the day before. Lift the whole root ball with a trowel, gently tease the clump into two or three sections by hand or with a clean fork, and replant each section immediately. Each division needs at least a few healthy stems and a decent root mass. Keep divisions shaded and well-watered for the first week while they settle in. This method is less commonly used because marigolds are annuals, but it is a valid way to fill more space in your garden from one original plant.
Soil setup and planting
Marigolds are not demanding about soil, but they do have two non-negotiable needs: good drainage and the right pH. Target a soil pH between 6.0 and 7.0. Anything outside that range starts to interfere with nutrient uptake and will slow your plants down right when they should be establishing. A basic soil test from your local extension office or garden center will confirm where you stand. If you're planting in the ground, work the soil to a depth of about 12 inches, breaking up any hard clumps and mixing in a couple of inches of compost to improve structure. Avoid heavy clay or any spot where water pools after rain. Standing water is one of the fastest ways to kill a marigold through root rot.
For containers, use a quality potting mix with good drainage. Don't use straight garden soil in a pot because it compacts and holds too much moisture. A container with drainage holes is not optional. If you're potting up a nursery transplant, choose a container that's at least 8 to 10 inches in diameter for French marigolds, and 12 to 14 inches for African types.
Rooting medium for cuttings

Cuttings need a rooting medium that holds some moisture but doesn't stay soggy. A mix of perlite and peat (roughly 50/50) works well, as does a dedicated propagation mix. Avoid using regular potting soil by itself because it tends to hold too much water and increases the risk of rot before roots have formed. A light dusting of rooting hormone powder or gel on the cut end of each stem helps speed up root development, though marigolds are cooperative enough to root without it. Insert each cutting about 2 inches deep into the medium and firm it gently so the stem stays upright.
Planting depth and spacing
For nursery transplants, plant at the same depth the plant was sitting in its nursery pot. Planting too deep can cause stem rot. Space French marigolds about 8 to 10 inches apart. African marigolds, which get much larger, need 12 to 18 inches between plants. For divisions, replant at the same soil depth the original clump was growing at. After planting, press the soil gently around the base and water in well.
Timing, spacing, and watering after planting or sticking cuttings
When to plant outside
Marigolds are warm-season plants. Do not transplant into the garden until nighttime temperatures are reliably above 50°F. Below that, growth stalls and young transplants can set back significantly. In most of the US, that means planting outdoors from late April through June depending on your zone. If you're taking cuttings indoors, you can start them at any point and then move the rooted plants outside once conditions are right.
Watering transplants
Water transplants in immediately after planting, making sure the root zone is thoroughly wet. For the first week, check soil moisture daily. You want the soil to feel consistently moist but not waterlogged. Stick your finger an inch into the soil. If it comes out dry, water. If it comes out muddy, hold off. After the first two weeks, once the plant has had a chance to extend roots into the surrounding soil, you can back off to watering every two to three days in warm weather, or less if you've had rain.
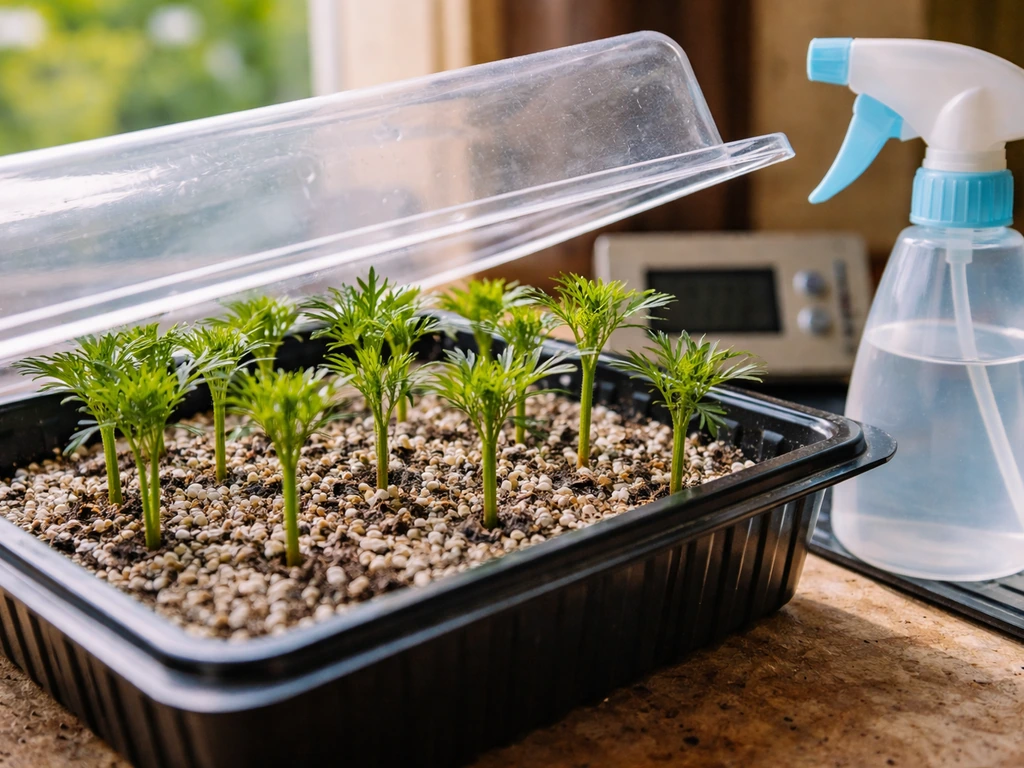
Watering cuttings during rooting
This is where most people go wrong. The biggest failure point with cutting propagation is overwatering, which leads to rot and a fungal problem called botrytis before the cutting ever gets a chance to root. The goal is humidity around the leaves, not constant wetness at the roots. Cover your cuttings with a clear plastic bag or humidity dome to trap moisture in the air. Mist the inside of the bag lightly if it dries out, but water the medium itself only when it feels almost dry. Lift the cover daily for 10 to 15 minutes to allow fresh air exchange and reduce fungal pressure. Cuttings typically develop roots in about 2 to 3 weeks under these conditions.
If you have a heat mat, use it. Root zone temperature matters more than air temperature when it comes to rooting speed. A bottom temperature of around 70 to 75°F in the growing medium will accelerate rooting noticeably compared to a cold windowsill.
When to fertilize
Hold off on fertilizer until you see clear signs of new growth, which is usually 5 to 10 days after transplanting or once cuttings have visibly rooted. Fertilizing too early stresses the plant when its roots aren't ready to process nutrients. Once growth is underway, use a balanced fertilizer at half strength. Be careful not to overdo it. Too much fertilizer pushes lush leafy growth at the expense of flowers, which is the opposite of what you want from a marigold.
Light, temperature, and fixing common problems
Sun and temperature requirements
Marigolds need full sun all day to bloom properly and stay healthy. A spot that gets six or more hours of direct sun daily is the baseline, but marigolds genuinely thrive with eight or more hours. Part shade reduces flowering significantly and weakens stems, making plants more vulnerable to disease. During the rooting phase for cuttings, keep them in bright indirect light, not direct sun. Once cuttings have rooted and are ready to transplant, gradually acclimate them to full sun over several days by starting them in a sheltered, bright spot before moving to their final location.
Wilting after transplanting
Some wilting in the first 24 to 48 hours after transplanting is normal, especially on hot days. The plant's root system is adjusting. Water thoroughly, move container plants out of full afternoon sun temporarily, and wait. If wilting persists past 48 to 72 hours, check the roots: soggy, brown roots signal overwatering and rot, while dry, pale roots mean the plant isn't getting enough water. Adjust accordingly. For cuttings, wilting before roots form is expected because the stem has no roots yet to absorb water. That's exactly why the humidity dome matters: it reduces the moisture the cutting loses through its leaves while it waits to root.
Slow growth or no new leaves
If a transplant or cutting-turned-plant sits there doing nothing for more than two weeks, the likely culprits are insufficient light, too-cold temperatures (below 60°F), or a pH problem in the soil. Check your location first. If it's not getting at least 6 hours of direct sun, that's almost certainly the issue. If light is fine and the weather has been cool, be patient. Once temperatures settle above 65°F consistently, most marigolds will kick into gear.
Root rot and damping-off
Damping-off is a real risk for marigolds, caused by soil fungi and water molds including Rhizoctonia, Fusarium, Pythium, and Phytophthora. It shows up as a stem that collapses at soil level, often with a dark, mushy base. Prevention is straightforward: use fresh, well-draining medium, avoid overwatering, and make sure there's good air circulation around your plants. Don't crowd them. If you're rooting cuttings in a humidity dome, take the cover off for part of each day so moisture doesn't build up excessively.
Pests to watch for early on
Spider mites and aphids are the two most common marigold pests. Spider mites show up as fine webbing on the undersides of leaves, usually when conditions are hot and dry. Aphids cluster on new growth and stem tips. Both are manageable with a strong spray of water to knock them off, or with insecticidal soap if numbers get out of hand. Check the undersides of leaves when you're watering so problems don't get ahead of you.
Keeping your marigolds blooming once they're established
Once your transplants or rooted cuttings are settled in and growing, the main job is deadheading. Removing spent flowers as soon as they fade keeps the plant producing new blooms instead of putting energy into seed development. You can pinch them off by hand or use scissors. Do this every few days during peak bloom. If a plant starts to look tired and leggy mid-summer, cut it back by about one-third, see how to grow marigold seeds for more timing tips. It will bounce back with fresh growth and a new flush of flowers within a couple of weeks. For anyone growing marigolds for cut bouquets or arrangements, cutting stems regularly counts as deadheading and serves the same purpose. If you’re wondering how to grow marigold in water, the timing can help you plan your next bloom cycle. If you want to dig deeper into the full lifecycle from planting through the season, the guides on how to grow a marigold and how to grow marigolds at home cover ongoing care in more detail. how to grow marigold at home. how to grow marigold in winter
The first two weeks after planting are the period that matters most. Get the watering right (moist but not soggy), give the plants full sun as soon as they're established, hold off on fertilizer until new growth appears, and watch for early signs of rot or pests. Do those four things and your seedless marigolds will be well on their way to a full season of color.
FAQ
Can I grow marigolds without seeds from store-bought flowers or bouquets?
Yes sometimes, but success is inconsistent. If the bouquet stems are fresh and you can take healthy side shoots, treat them like cuttings (remove lower leaves, use a fast-draining rooting medium, keep humidity high). If the stems are old, water-stressed, or were treated with preservatives, rooting usually fails.
What’s the best time of day to take marigold cuttings?
Morning is ideal because the plant is most hydrated then. If you must take cuttings later, water the parent plant thoroughly first and take shoots after the leaves look turgid, then keep cuttings cool and covered to reduce moisture loss.
How long should I keep a humidity dome or plastic bag on cuttings?
Keep it during the rooting window, but vent daily (10 to 15 minutes) once you notice condensation and active leaf growth. If the medium stays soggy or the stems look dark at the base, remove the dome more often and let the medium approach nearly dry before misting again.
My marigold cuttings look wilted, is that always bad?
Not necessarily. Wilting is common before roots form because the cutting cannot replace water loss yet. The problem signs are blackening at the lower stem (rot) or a mushy base. If the leaves wilt but the cut end stays firm and the medium is only slightly moist, give it time.
Can I root marigold cuttings in plain water?
You can try, but for most gardeners it’s slower and riskier because water-rooted cuttings often struggle when moved to soil. If you do it, change the water every 1 to 2 days, keep light bright but indirect, and transplant as soon as roots are a few inches long into a well-draining mix.
Why are my rooted cuttings not making new growth after 2 to 3 weeks?
Most often it’s low light, cold rooting temperatures, or an overly wet medium. Confirm the rooting medium is draining well, aim for a warm root zone, and check sun exposure after transplanting. If temperatures are below about 60°F, growth may pause even if roots exist.
Is fertilizer needed for seedless marigolds right away?
Usually no. Wait for visible new growth (or established rooting) before fertilizing. When you do start, use half strength and avoid high-nitrogen blends, since that can increase leafiness and reduce flowering.
How do I know if my marigolds were planted too deep?
If the stems stay wet-looking, decline after initial wilting, or show a dark base, planting too deep may be the issue. For transplants, set the plant at the same depth as it sat in the nursery pot, then water in and avoid piling mulch against the stem.
Can I divide marigolds multiple times during the season?
Usually not. Because marigolds are typically annuals, division is best treated as a mid-season rescue or space-filling option on a very large clump. Frequent dividing stresses the plant and can delay flowering or reduce bloom density.
What should I do if my nursery transplant is already flowering when I plant it?
Expect less immediate flowering. Keep it in full sun, water the root zone consistently for the first week, and be patient for a flush after establishment. You can also remove a few fading blooms to reduce energy spent on maintaining flowers that will drop anyway.
How often should I water container-grown marigolds compared with in-ground?
Containers dry out faster, especially in heat and wind. Check daily at least during the first two weeks, water when the top inch feels dry, and make sure excess water drains out. Never let pots sit in a saucer of water, since that speeds up root rot.
Are marigolds still seedless if I don’t deadhead?
They can still reproduce by seed, even if you started seedless. If you want to reduce or prevent seed set, deadhead frequently (every few days during peak bloom). Leaving spent flowers on will encourage seed development and may change your future plant patterns.
Will marigolds grown from cuttings or transplants be true to color and form?
Yes, that’s a key advantage. Cuttings generally keep the parent’s flower color and growth habit, while seed-grown plants can vary. If you’re trying to match a specific cultivar, avoid mixing unknown volunteer plants near your cuttings.
How do I prevent damping-off when rooting or starting plants?
Use fresh, well-draining medium, avoid constant moisture, and ensure airflow. Don’t crowd, lift the humidity cover daily for ventilation, and remove any cuttings that show a collapsing, mushy stem base early so the problem does not spread.