Phlox is one of those flowers that rewards you generously once you understand what type you're growing and what it actually needs. Get that right, and you'll have strong plants, good blooms, and very few headaches. Get it wrong, and you'll spend a season wondering why nothing is happening. This guide covers everything: the main types of phlox, how to grow them from seed or from roots, what soil and light they need, and how to fix the most common problems before they wreck your season.
How to Grow Phlox: Seeds, Root Propagation, and Care
Marcus Holloway
20 Apr 2026
Know your phlox before you do anything else
The biggest mistake gardeners make with phlox is treating it like one plant. It isn't. The name 'phlox' covers a whole family of species that look and behave very differently. Before you buy seeds or dig a hole, figure out which type you're actually working with, because the growing conditions are not interchangeable.
| Type | Species | Height | Light | Best Use |
|---|---|---|---|---|
| Garden phlox (tall phlox) | Phlox paniculata | 2–5 feet | Full sun to part sun | Back of border, cutting garden |
| Creeping phlox (moss phlox) | Phlox subulata | ~6 inches | Full sun (tolerates light shade) | Ground cover, slopes, rock gardens |
| Woodland phlox (wild blue phlox) | Phlox divaricata | 12–18 inches | Part shade to full shade | Shade gardens, woodland edges |
| Annual phlox | Phlox drummondii | 6–20 inches depending on variety | Full sun | Borders, containers, cutting gardens |
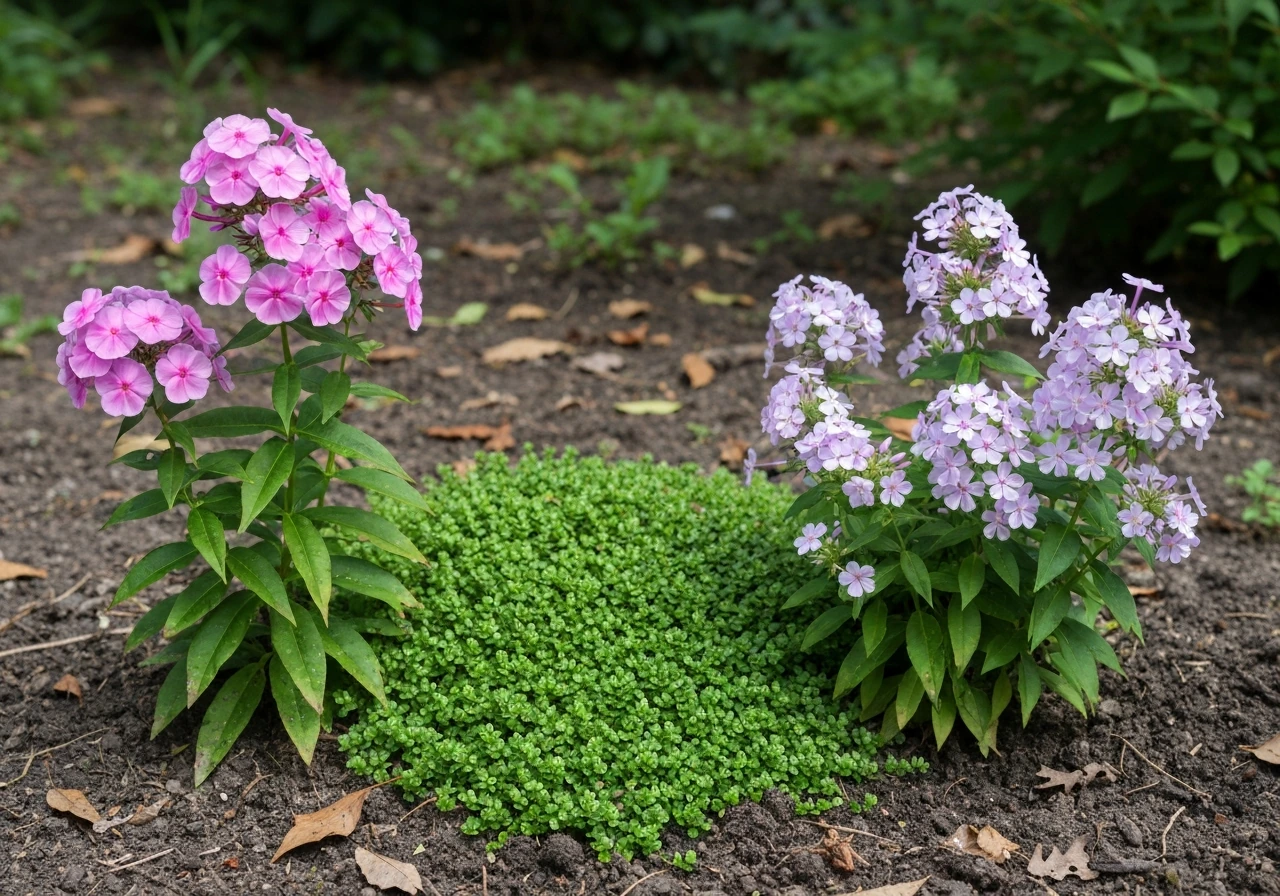
Garden phlox (Phlox paniculata) is the tall, fragrant, summer-blooming perennial most people picture when they hear 'phlox.' It can reach 5 feet under good conditions. Creeping phlox (Phlox subulata) is the low carpet that explodes into color in spring and stays only about 6 inches tall. Woodland phlox (Phlox divaricata), sometimes called wild blue phlox, sits in the middle at 12–18 inches and actually prefers shade. Annual phlox (Phlox drummondii) is the easiest type to start from seed and finishes its whole life cycle in one season. Keep these differences in mind throughout this guide, because the advice changes depending on which one you have.
Seeds or roots: which propagation method makes sense for you
Both seeds and vegetative propagation (division or cuttings) work for phlox, but they're not equally convenient for every type. Here's how to decide.
Growing from seed
Annual phlox (P. drummondii) is the easiest from seed and is genuinely beginner-friendly. Garden phlox (P. paniculata) can be grown from seed, but it needs some preparation (more on that below) and takes longer to establish. Woodland phlox (P. divaricata) from seed requires a 60-day cold stratification period, so it demands some planning. If you want blooms this season and don't have months to wait, division or cuttings from an existing plant will get you there faster.
Growing from root division or cuttings
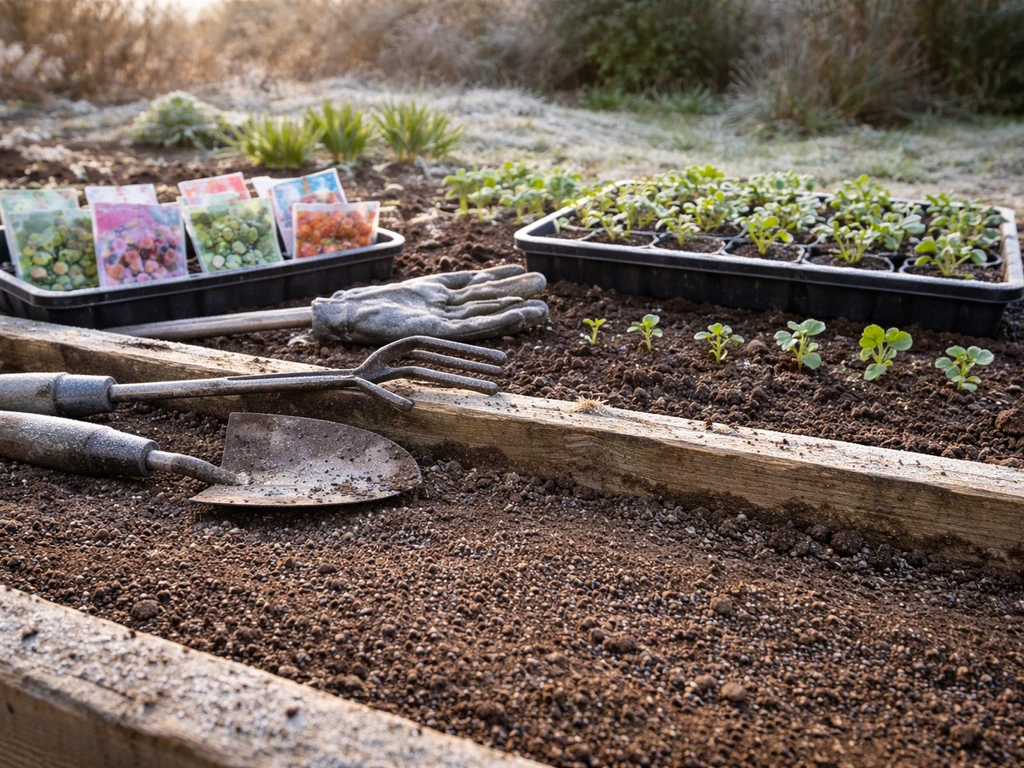
Division is the most reliable way to multiply established perennial phlox, especially garden phlox. It also rejuvenates older plants that have started blooming less vigorously. Divide garden phlox every 2–4 years, either in early spring just as new growth appears or in late summer to early fall (mid-August through September works well). Dig up the clump, split it into sections with a spade or two forks, and replant the divisions promptly with the crowns at soil level. Water them in well and keep the soil consistently moist for the first few weeks.
Stem cuttings are another solid option for garden phlox. Take basal stem cuttings in spring, stick them into a moist rooting medium, and expect roots in about 1–2 weeks. Root cuttings are a less common but viable method and are best taken in mid-autumn to early winter when the plant is dormant. If you have a friend or neighbor with a mature garden phlox, asking for a division in spring is genuinely the fastest path to a thriving plant.
How to grow phlox from seed, step by step
Annual phlox (Phlox drummondii)
This is the one to start with if you're new to growing phlox from seed. It's straightforward, germinates reliably, and blooms the same season you sow it.
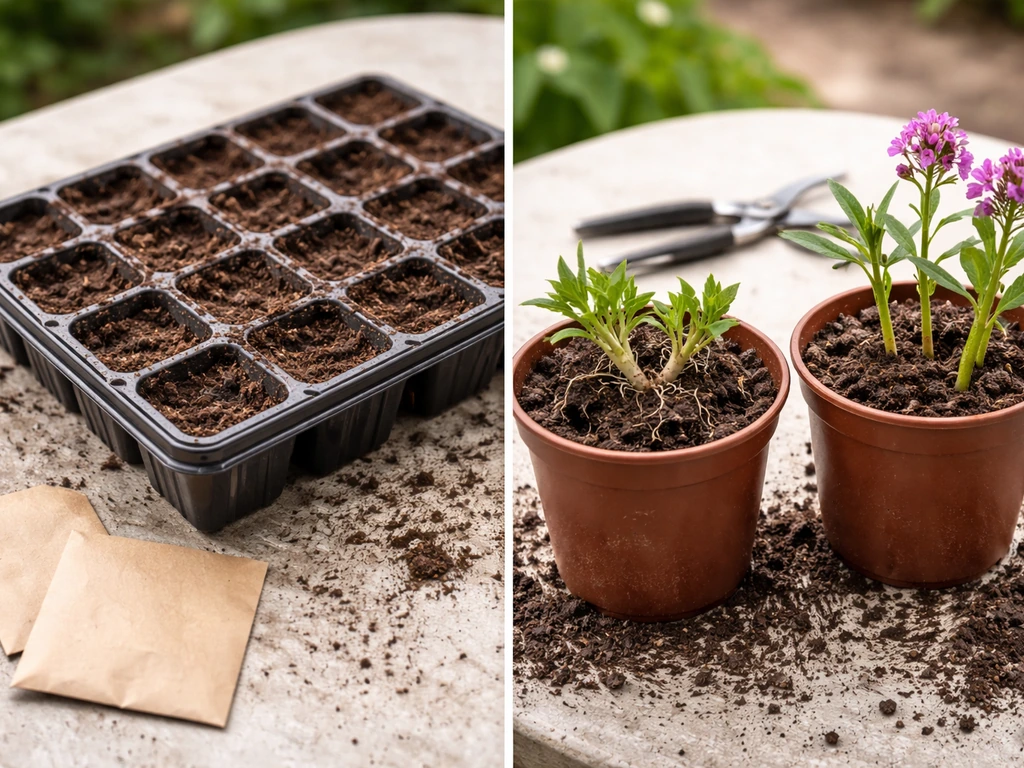
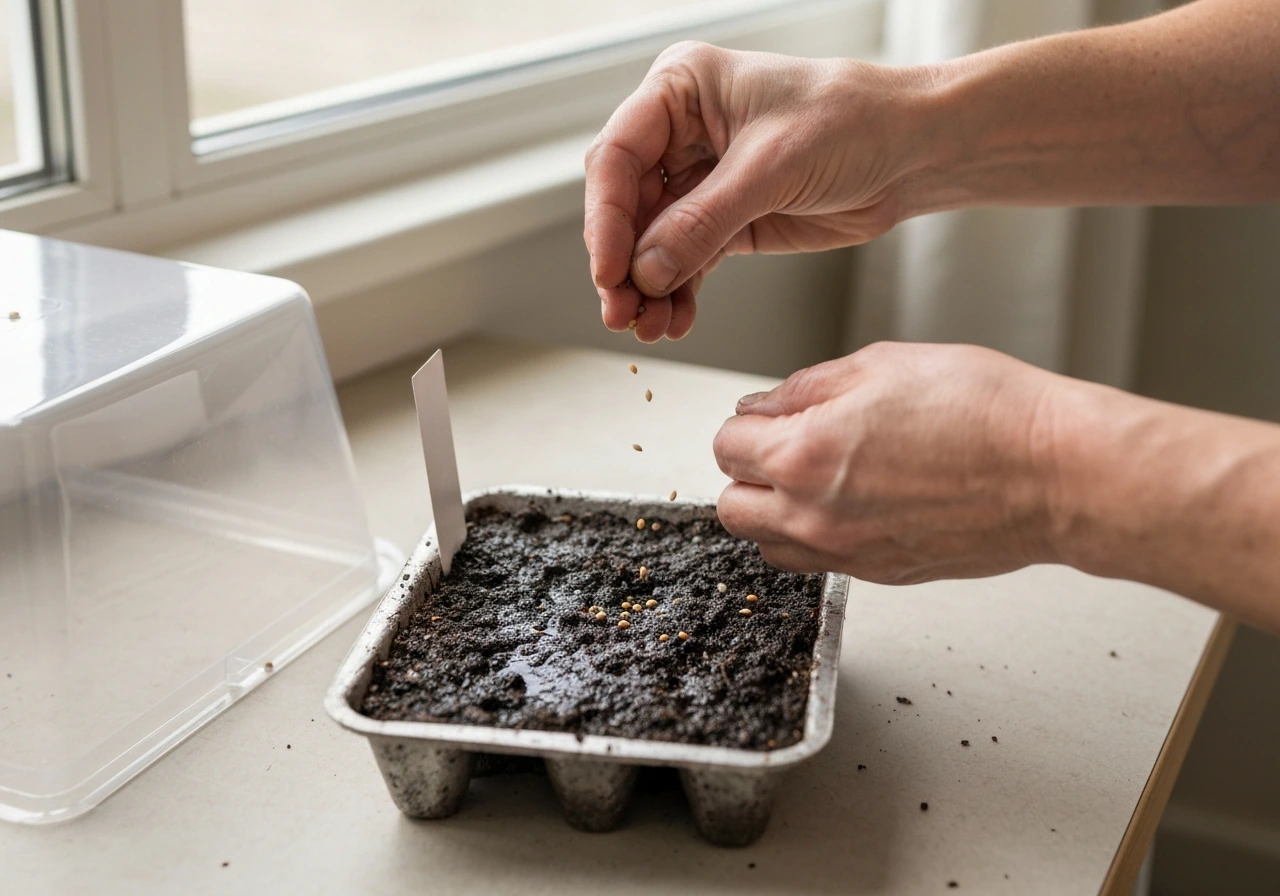
- Start seeds indoors 6–8 weeks before your last expected frost date.
- Fill a seed tray or small pots with a fresh, fine seed-starting mix.
- Sow seeds at a depth of about 1/8 inch. Phlox seeds need darkness to germinate, so make sure they're covered.
- Keep the medium consistently moist but not waterlogged. A humidity dome helps.
- Place the tray somewhere with a temperature around 65–70°F. Germination typically takes 10–21 days.
- Once seedlings have two sets of true leaves, thin or transplant to individual cells.
- Harden off for 7–10 days before moving outdoors. Transplant after your last frost date.
Garden phlox (Phlox paniculata) from seed
Garden phlox seeds need a cold period to germinate well. Skip this step and you'll get patchy, frustrating results. Here's the process:
- Start the stratification process 10–12 weeks before your last frost date to give yourself enough lead time.
- Place seeds on a damp paper towel, fold it over, seal it in a zip-lock bag, and put it in the refrigerator (around 35–40°F) for 4–6 weeks. This mimics winter and breaks dormancy.
- After stratification, sow seeds indoors 6–8 weeks before your last frost date at a depth of about 1/8 inch, covered to block light.
- At around 55–65°F (15–18°C), germination takes roughly 7–14 days. At cooler temperatures (around 40°F/4°C), it can take 14–28 days.
- Grow seedlings under bright light or a grow light to prevent legginess.
- Transplant outdoors after the last frost, spacing plants 18–24 inches apart for good airflow.
Woodland and wild phlox (Phlox divaricata) from seed
Wild blue phlox needs a full 60 days of cold, moist stratification before it will germinate. The approach is the same damp-paper-towel-in-the-fridge method described above, just held for the full two months. Once stratification is done, plant the seeds immediately, don't let them sit around and dry out. Time your sowing so the seedlings can go out before the heat of summer hits, because seedlings that emerge into hot, dry conditions really struggle. A good rule of thumb: count back 60 days from when you expect to transplant outdoors in spring, and that's when you start stratification.
Growing each type of phlox: variety-specific guidance
Garden phlox / Phlox paniculata
Garden phlox wants full sun to part sun and fertile, moist, well-drained soil with a pH in the range of 6.0–8.0 (it leans toward slightly alkaline). Work in plenty of compost before planting. Space plants 18–24 inches apart; this isn't just about room to grow, it's about keeping air moving between them to reduce mildew pressure. Water at the base, not overhead. Mulch around the root zone to keep moisture consistent and roots cool. This is a perennial that can get 2–5 feet tall, so plan for it at the back of a border where it won't shade shorter neighbors.
Creeping phlox / Phlox subulata
Moss phlox is one of the lowest-maintenance plants you can grow. It tops out at about 6 inches in flower and spreads to form a dense, weed-suppressing mat. Give it full sun and well-drained soil; it handles dry, rocky, or sandy conditions far better than garden phlox. It doesn't like wet roots, so avoid planting it anywhere that stays soggy. After the spring bloom finishes, shear the plant back by about a third to keep it tidy and encourage dense regrowth. Division every few years keeps it vigorous.
Woodland phlox / Phlox divaricata
Woodland phlox is the one you want for a shady spot where most flowers won't perform. It grows 12–18 inches tall and genuinely thrives in part shade to full shade under trees, where it spreads happily once established. It needs moist, well-drained, humus-rich soil with a pH around 5.5–7.0. Work in leaf mold or compost to build that organic content. Don't plant it in a hot, dry spot thinking it will adapt because it won't. This plant has a specific ecological niche and it performs best when you match it. It's worth comparing to other shade-tolerant bloomers if you're building out a woodland garden.
Soil, light, water, and feeding for strong plants and big blooms
Getting these four fundamentals right will do more for your phlox than any other intervention. Here's the honest breakdown:
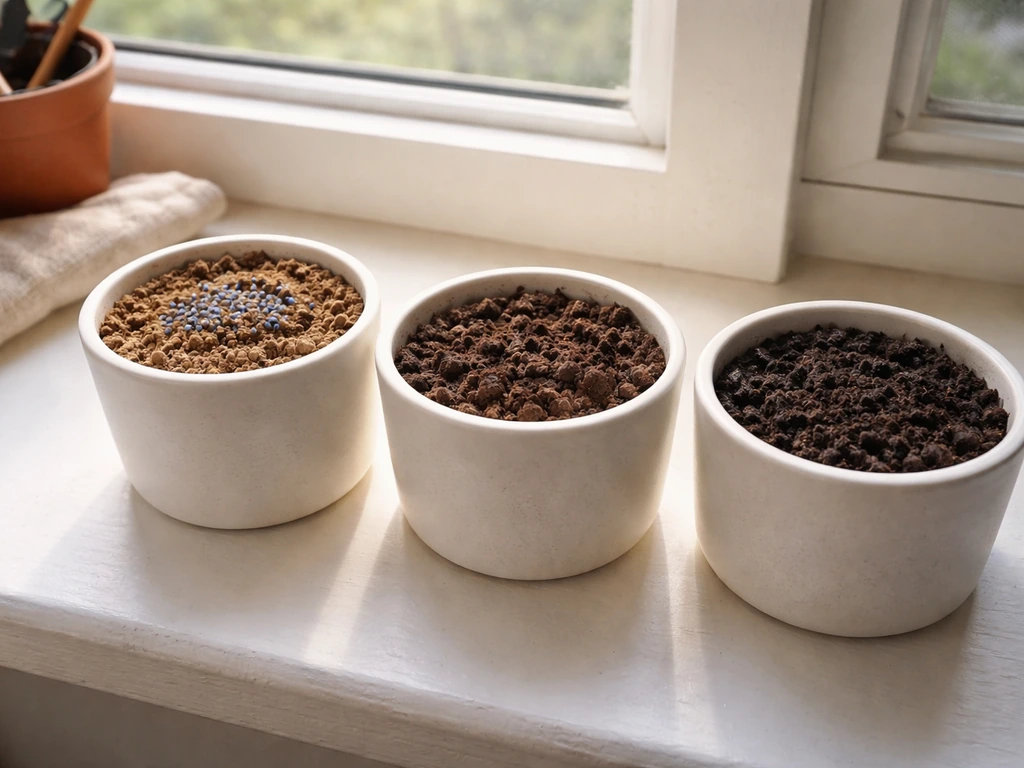
Soil
Garden phlox and annual phlox want fertile, organic, well-drained soil. Before planting, dig in 2–3 inches of compost. A soil pH between 6.0 and 8.0 suits garden phlox well. Woodland phlox wants humus-rich, moist soil on the slightly acidic side (pH 5.5–7.0). Creeping phlox is the outlier: it's fine in lean, gritty, or sandy soil as long as drainage is excellent. Heavy clay is the enemy of all phlox types because waterlogged roots lead to rot.
Light
Garden phlox and annual phlox do best in full sun (at least 6 hours a day), though garden phlox tolerates part shade. Creeping phlox strongly prefers full sun and blooms most densely there, though it handles a little light shade. Woodland phlox is the opposite: it wants part shade to full shade and will scorch or fail in direct afternoon sun.
Watering
Consistent moisture matters for garden phlox and woodland phlox. Water deeply and regularly during dry spells, aiming for about an inch per week. Critically, water at the base of the plant and keep the foliage dry. Wet leaves on garden phlox are an open invitation to powdery mildew. Drip irrigation or a soaker hose works beautifully here. Creeping phlox is more drought-tolerant once established but still appreciates a good drink during extended dry stretches.
Feeding
Garden phlox benefits from a balanced fertilizer in early spring as growth resumes and again just before the blooming period. Don't overdo it with high-nitrogen fertilizers because lush, sappy growth is more susceptible to mildew and pest pressure. A compost top-dressing each spring is often enough. Woodland phlox really doesn't need heavy feeding: in its preferred humus-rich soil, regular compost addition is sufficient. Annual phlox can handle a light balanced feed every 3–4 weeks if the soil is lean. Avoid very high-salt fertilizers, keeping EC low, particularly for seedlings, which are sensitive to salt stress.
Getting tall phlox to flower well: pinching, spacing, and deadheading
Tall garden phlox can hit 5 feet, and a few simple habits make the difference between a floppy, disease-prone mess and a beautiful display that lasts for weeks.
Spacing and airflow
Plant garden phlox 18–24 inches apart. I know it looks sparse in the first season, but crowding is one of the main reasons gardeners end up with powdery mildew problems. Good spacing lets air move freely between stems and keeps the foliage drier. If you already have established plants that are too close together, thin them or divide and replant at the right spacing.
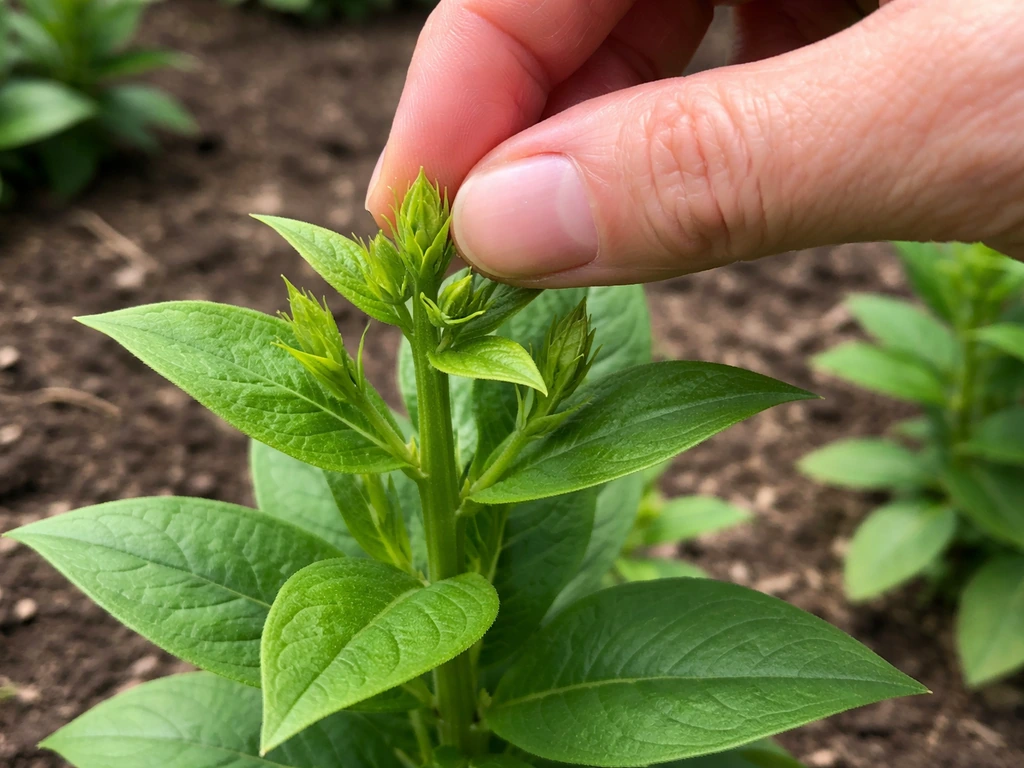
Pinching for bushier plants
Pinching the tips of young garden phlox plants in late spring (when stems are 6–8 inches tall) encourages branching and produces a fuller plant with more flower heads. It delays blooming slightly, but the result is worth it. You can also thin crowded stems at the base in early summer, removing the weakest ones to improve airflow and redirect energy into the remaining stems.
Support for tall stems
Garden phlox at 4–5 feet tall will flop in wind or heavy rain without some support. Install a grow-through support ring or stake individual stems loosely with bamboo canes when plants are about 18 inches tall. Getting the stakes in early means the plant grows up through them naturally rather than being tied awkwardly after the fact.
Deadheading to extend blooms
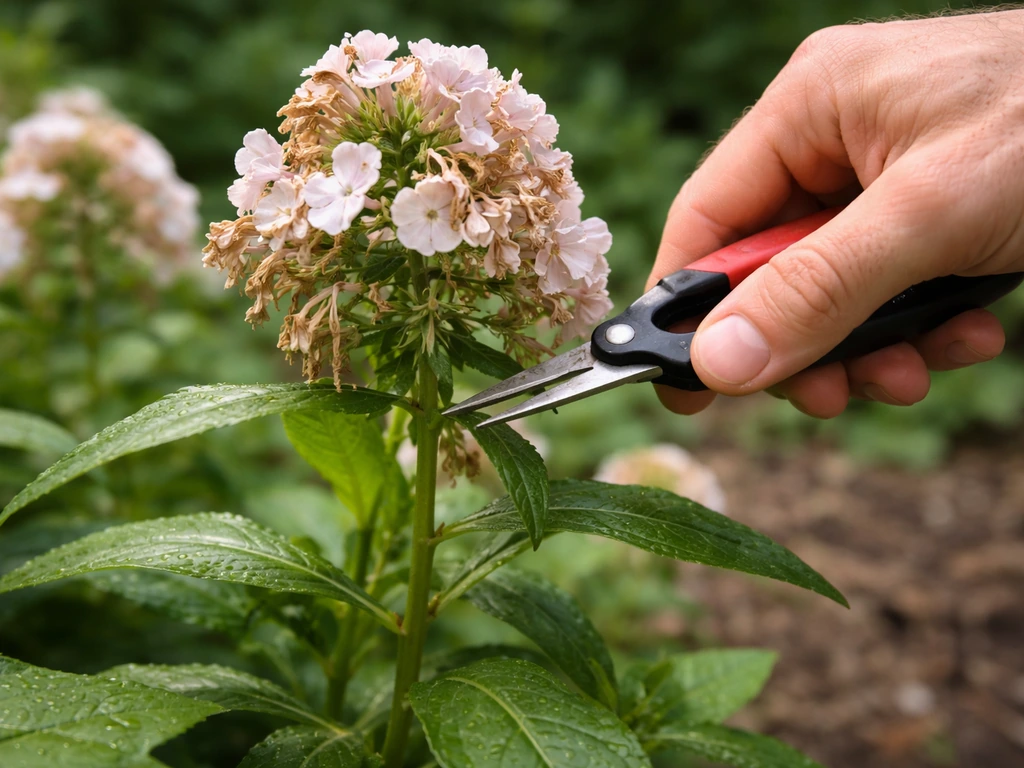
Once the flower clusters on garden phlox start to fade, cut them off. Deadheading prevents seed set (which saps plant energy) and can encourage a second flush of smaller blooms later in the season. It also keeps the plant looking tidy. Beyond deadheading, you don't need to do much pruning until fall, when you can cut stems back to the ground after frost dieback. Annual phlox also responds well to deadheading to keep it blooming vigorously through summer.
Troubleshooting the most common phlox problems
Poor germination
If your phlox seeds aren't sprouting, the most likely culprits are skipped stratification (for paniculata and divaricata), seeds sown too shallow so light reaches them, or soil that's too warm or too cold. Phlox seeds need darkness, so always cover them. For perennial types, don't skip the cold treatment; it's not optional. Also check your seed age: phlox seeds don't stay viable for many years, so use fresh seed when possible.
Leggy seedlings
Leggy, stretched seedlings almost always mean insufficient light. If you're starting indoors, place the tray as close as possible to a grow light (2–4 inches from the bulb for fluorescent or LED grow lights) and run it for 14–16 hours a day. A sunny south-facing windowsill rarely delivers enough light intensity in late winter and early spring for compact seedlings. Leggy starts are weaker at transplant and more prone to flopping, so getting the light right from the beginning saves a lot of trouble.
Heat and drought stress
Garden phlox and woodland phlox both struggle in hot, dry conditions. Stressed plants drop leaves, stop blooming, and become more vulnerable to mildew. Mulching around the root zone (2–3 inches of organic mulch, kept away from the crown) dramatically helps by moderating soil temperature and holding moisture. If you're in a hot-summer climate, site garden phlox where it gets afternoon shade, and make sure woodland phlox is fully in the shade. Don't let plants wilt repeatedly; consistent watering is far better than occasional deep soaks with long dry gaps between them.
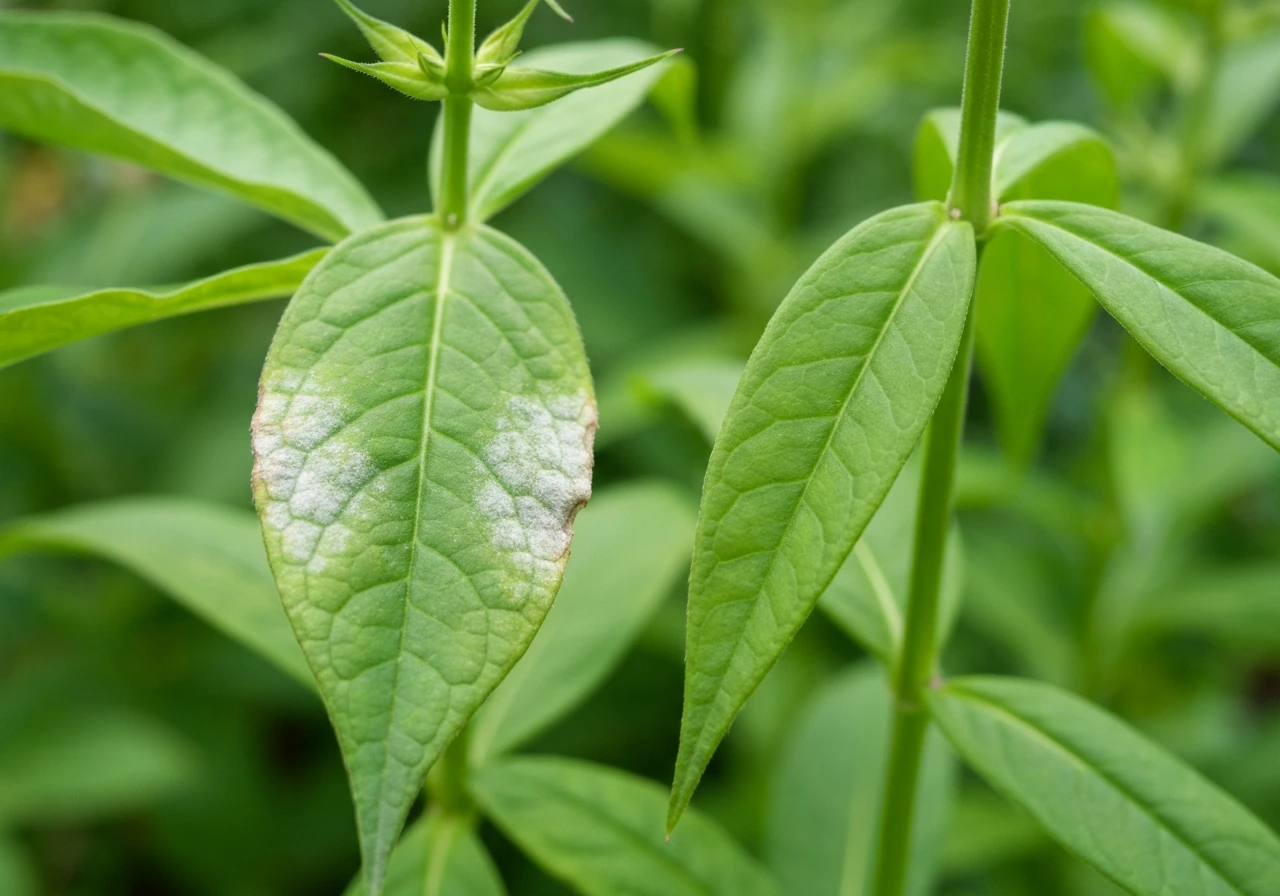
Powdery mildew
Powdery mildew is the number-one disease problem with garden phlox, and non-resistant cultivars are especially vulnerable. The white, powdery coating on leaves is caused by a fungal pathogen and is worst in conditions with warm days, cool nights, and poor airflow. The good news is that cultural controls are highly effective when applied consistently. Water at the base of the plant, never overhead. Space plants 18–24 inches apart. Remove and dispose of any affected stems promptly, don't compost them. If mildew is already spreading despite these measures, a spray of horticultural oil or sulfur-based fungicide applied every 7–10 days can help slow it down. Choosing mildew-resistant cultivars when you buy plants or seeds is the single best long-term fix. Some straight wild species show strong natural resistance, so if mildew is a recurring battle in your garden, that's worth factoring into your variety choices.
Other pests and diseases
Phlox can also be bothered by phlox plant bugs, which cause stippled, distorted foliage, and leaf spot diseases like Septoria. Good garden hygiene goes a long way: clean up dead stems and debris in fall, rotate where you plant annuals, and keep the area around established phlox clear. Inspect plants regularly so you catch problems early while they're still easy to manage.
Your next steps right now
If it's spring (and in late April, it is for most gardeners), your best immediate actions depend on what you're working with. If you want annual phlox blooming this summer, get seeds started indoors now or direct-sow outdoors once the soil has warmed. If you want to establish garden phlox this season, the fastest path is buying transplants or getting a division from an established plant, since seed-started paniculata will take time to reach flowering size. If you're looking for a more specific guide like FloraFlex on how to grow, match the same basics for light, soil, and moisture to your cultivar and setup flora flex how to grow. If you are wondering how to grow posies, start by matching the basics of light, soil, and consistent moisture to the specific variety you have. For woodland phlox from seed, plan for a fall outdoor sowing or start your stratification now for a late-spring transplant. And if you already have garden phlox in the ground, now is the time to check spacing, get supports in place before stems get taller, and commit to base watering from the start to head off mildew before it starts. Blue moon phlox is a specific garden phlox type, so use the same full-sun, well-drained soil and base watering approach, then follow the spacing and mildew tips for best results how to grow blue moon phlox. If you’re specifically growing blue mist flower, the same attention to sun, soil drainage, and watering schedule will set you up for strong blooms how to grow blue mist flower. If you’re also trying to grow blue delphinium, the biggest wins usually come from matching light, soil drainage, and consistent watering to the needs of that specific cultivar how to grow diamonds blue delphinium.
FAQ
Can I grow phlox in containers, or is it only for garden beds?
Yes, but choose the type carefully. Garden phlox (tall, 18–24 inches spacing in beds) needs a large pot and consistent base watering to avoid mildew, and it will still need airflow. Use a well-draining potting mix, keep pH in the right range, and monitor soil moisture closely because containers dry out faster than beds.
How do I know which phlox type I have (so I give it the right care)?
Look at height, bloom season, and site preference. Creeping phlox stays low and carpets in spring, woodland phlox is typically shorter and prefers shade with humus-rich soil, and garden phlox is taller with summer flowers. If you’re unsure, don’t guess on light or soil, send photos to a local nursery or extension service, and treat it as “woodland vs sun-loving” until verified.
What’s the best way to improve drainage for phlox if I have heavy clay?
If your soil stays soggy after rain, phlox will struggle. Work in compost and consider building raised beds, then test by soaking the area and checking how quickly water disappears over 24 hours. You can also mound soil slightly where phlox will sit to keep crowns from sitting in wet pockets.
How deep should I plant phlox divisions or rooted cuttings?
Plant crowns at soil level, not buried. For divisions, keep the same crown height as the original plant, then water in thoroughly. Planting too deep increases rot risk, especially for garden phlox and woodland phlox in humid conditions.
Should I mulch phlox, and how thick should I apply it?
Mulch is helpful for moisture and root temperature, especially in hot climates, but keep it away from the crown. Use about 2–3 inches of organic mulch and leave a small gap around the stems so you don’t create a damp “collar” that favors mildew and rot.
Why is my garden phlox getting powdery mildew even though I water at the base?
Mildew can still be triggered by crowding and plant structure. Recheck spacing (18–24 inches for garden phlox), remove the most affected stems early, and consider thinning stems at the base to increase airflow. Also watch for late-day humidity, if your plants receive warm air with cool nights and little breeze, mildew often appears faster.
Can I save seed from my phlox, and will seedlings come true to type?
You can collect seed, but garden phlox hybrids and many named cultivars may not come true, so expect variation in flower color and habit. If you want the exact cultivar, division or cuttings are the more reliable route. For best results, collect only from healthy plants, then follow the correct stratification timing for the type.
What if my phlox seedlings are emerging but not growing well?
Legginess and slow growth often point to light or temperature issues. Provide strong light (indoors, keep seedlings very close to a grow light and run long days), and transplant before hot, dry weather sets in. Also avoid letting seedlings sit in saltier fertilizer mixes, they can stall if the soil solution is too concentrated.
When is the right time to transplant phlox started from seed?
For garden phlox, time transplanting so seedlings face moderate conditions, not the first heat wave. A practical approach is to start stratification about 60 days ahead of your expected spring transplant date, then move plants outdoors when they are sturdy and weather is reliably mild.
How often should I fertilize phlox, and what should I avoid?
For garden phlox, a balanced fertilizer in early spring and again near the start of blooming is usually enough, but skip high-nitrogen feedings that push lush growth and worsen mildew risk. Woodland phlox often needs only compost or light feeding in its humus-rich soil. Avoid very high-salt products, especially for seedlings.
Do different phlox types need different watering schedules?
Yes. Garden phlox and woodland phlox benefit from consistent moisture, but both perform best with dry foliage (base watering, avoid overhead). Creeping phlox tolerates drought better once established, still water during long dry spells, but do not let it sit in consistently wet soil.
What should I do if my phlox flops over?
Support early, when plants are around 18 inches tall, or use a grow-through ring so stems grow through it naturally. Also check spacing and pinching, pinching young garden phlox can build a sturdier, branching plant. If overcrowding is the issue, thin or divide rather than relying only on stakes.
Is deadheading necessary for all phlox types?
It’s most beneficial for garden and annual phlox because it prevents seed set and can encourage a second flush of blooms. Creeping and woodland types may not respond as dramatically, and for some people the spring carpet look is the priority. If you prefer, you can deadhead garden phlox while leaving some stems for seed only if you don’t mind reduced bloom later.
Why are my woodland phlox plants failing in a sunny spot, even if I water them?
Woodland phlox is adapted to part shade to full shade and cool, humus-rich conditions. In direct afternoon sun, it can scorch or decline even with watering, and dry shade gardens are a common failure point. Move it to deeper shade, enrich with leaf mold or compost, and avoid planting in hot, dry pockets.
How do I handle phlox plant bugs and leaf spot before they spread?
Start with prevention and early detection. Inspect regularly, remove debris and spent stems in fall, and keep the area around plants clean. If you catch stippling or leaf spots early, removing affected leaves or stems reduces spread, then focus on airflow and sanitation rather than spraying everything as a routine first step.
Next Article
When to Grow Poppies: Planting Windows by Type
Plant poppies at the right time by type, using frost dates for direct sow or indoor starts plus key soil and aftercare.